This section is a diary of the things that I found about and did to each loco.
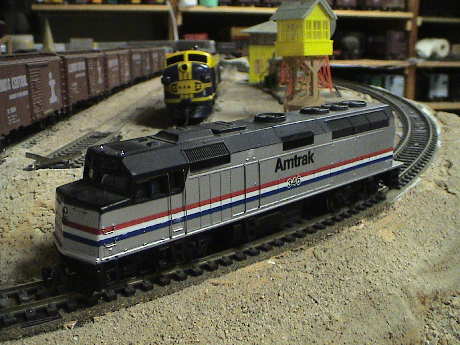
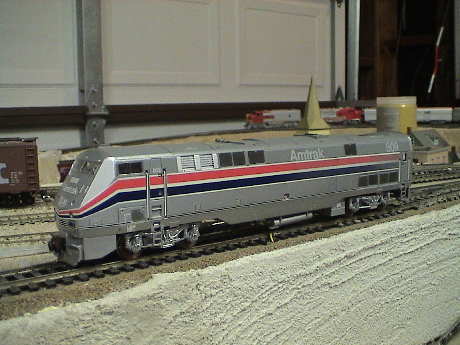
The first one I tried was a Bachmann Spectrum FP40PH as Amtrak 396. The prototype was last known to be in Los Angeles MetroLink service. The loco buzzed with DCC on the track so it was clear that it had not been converted to DCC, but it ran. The couplers were Kadee's but they were nearly non-functional due to kludged coupler boxes, somebody had done an inadequate coupler conversion. After I opened it up and lubed it, it ran pretty well although it was fairly noisy.
This loco was deemed worth fixing but I needed a decoder. The N scale decoder from UP x1614 (which was already on the dead line) went into the Amtrak FP40PH. This Bachmann loco was not designed to accept DCC. It was built from two large weights halves that mostly filled the shell. These halves form the structure and electrical distribution system for the loco. The loco also had an analog lighting board attached inside the top of the shell that drove the strobe lights on the top of the cab.
I first tested the motor for commutator shorts and found it free of problems so that I deemed it safe to install the decoder in it.
The loco came apart (easily) and I cut the spring tabs that connected each motor contact to a weight. I then soldered and insulated wires to stubs of the motor contacts and then reassembled the loco. After a check that the power pickups still worked and that the motor worked and it was now isolated from everything else, I installed the DN142 decoder. The loco ran under DCC.
The lighting board was mostly scrapped. I retained the ends of the board because they held the front and rear incandescent headlight bulbs in their proper position but the rest was cut out. I wired the headlights (no series resistor needed) back to the decoder. I then rewired the two incandescent "strobe" lights in series with a 120 ohm resistor to the green (F1) function wire of the decoder and fired it up. All the lights worked. The strobes, however, had a MARS light attribute assigned to them. A quick reprogram with DecoderPro turned them back into strobes. Then the loco was reassembled and tested.
The couplers themselves were ok, but the centering springs were ruined. I replaced those with new Kadee springs using Kadee #5 boxes.
Based on my experience with Amtrak 227, I pulled Amtrak 346 back and lubed two spots that I had missed. The residual noise went away. Steve had also certified the loco in the meantime so it is back in service.
Since Amtrak 227 was being scrapped, I pulled the handrails off the rear of 227 and put them on 346.
I tried to use this one at the club last night and it didn't run well. It's power pickup was flakey. I put it in a box to take home. As it turns out there was nothing wrong with it but dirty wheels.
Amtrak 346 made it back to the bad order box with a note of intermittent operation. It looked like dirty wheels and that was the problem. I cleaned them and it ran fine.
This one finally came back with a bad order report of intermittent running. The wheels were just incredibly dirty. I cleaned them with alcohol. A visual inspection indicated that the wheels were suffering from wear, but they are not worn out. In any event, the loco runs smoothly now.
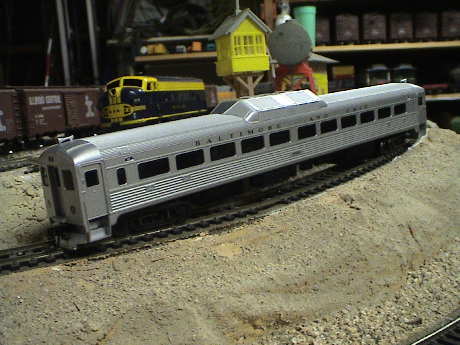
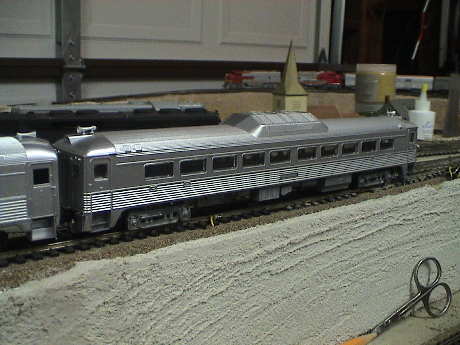
The Life-Like RDC (Baltimore and Ohio 6516) was also clearly not converted to DCC. It ran on DC pretty well, but it made a terrible buzzing racket in the higher speed ranges. It needed lubrication. It's couplers were not Kadee's and were clearly non-functional.
After opening the RDC, I found that would be fairly easy to convert to DCC but it would take a wired decoder, there is no socket or connector. After a lube job, I worked on the buzz. This resulted from an imbalance in the flywheel that was transmitted to the motor and from there through the motor's electrical connection tabs to a plastic box that enclosed the motor. The box acted like a sounding board and made the buzz really loud. After adding some padding (folded piece of paper towel) and securing the box better, the buzz went away. So far, so good. It ran smoothly, but not real fast but it would be ok.
Then I ran a test on the motor by monitoring the motor current on a scope. What I found was disturbing. This motor behaved identically to the one in my USRA 0-6-0 in that it would draw indicated intermittent current spikes of more than 20 amps on my bench power supply. This behavior tends to be hard on decoders, I blew one up in the 0-6-0. Good motors don't do this. After running the motor for awhile, the spikes did not go away. Further, the hack of adding resistance in series with the motor to isolate it would just slow the thing down. I deemed it unsuitable for conversion to DCC and set it aside. I may get back to it later to see if a resistor would actually work in this unit but it draws about twice as much current as the 0-6-0 (about 200 mA) so that it may not work well enough with a resistor in place.
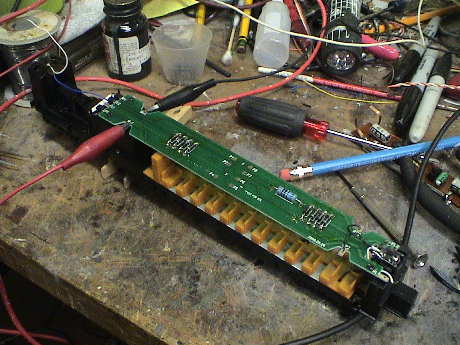
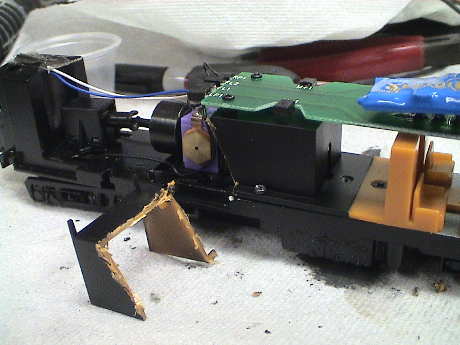
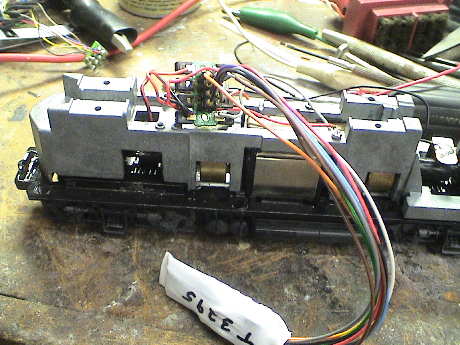
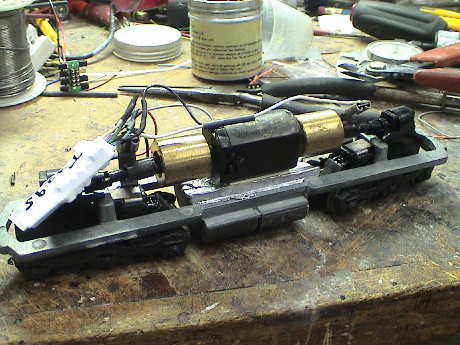
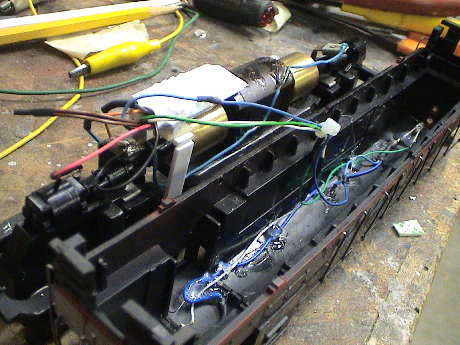
I wasn't ready to give up on the RDC so I took it apart again and ran more tests. This photo shows it connected to a bench supply with the motor being run in to see if I can get most of the spikes to go away.
I think that the very large current spikes I was seeing before were due to an interaction between the autoranging on my scopemeter and inductive kick backs from the motor. When I added a 5.6Ω resistor in series with the motor and ran it from 6 volts, the worst spike I should be able to get would be about 1 amp. The huge ones went away but I would still occasionally see spikes exceeding 2 amps. Good motors will not do this with the same test rig so that this motor still has some difficulties. However, it runs ok with 5.6Ω resistor in series so if I convert it, it will get a current limiting resistor just provide a maximum possible current limit to the decoder of about 3 amps. The motor running by itself averages about 150 mA. The stall resistance of this motor is about 15Ω which would result in a normal stall current of less than an amp at the club's track voltage (14 volts).
The PWB is wired rather oddly. The headlights are 2.5 volt 50 mA bulbs with the voltage controlled by diode stacks. The two stacks have 3 diodes wired one way to provide a little less than 2 volts for the bulb and one diode wired the other way to provide directionality and to allow bidirectional current flow for the motor. The two stacks are wired in series with the motor to give the headlights a head start. This takes about 3 volts away from the motor which one reason that it ran so slowly.
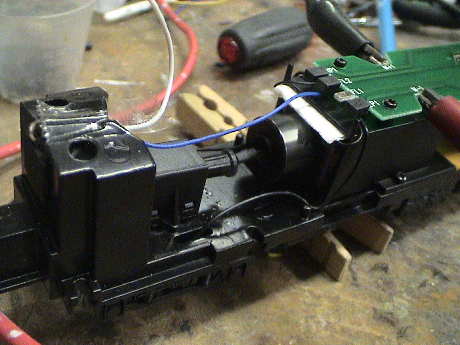 This is the motor mount. The white thing is a double layer of paper towel that mechanically damps the connection between the motor tabs (on top of the motor) and the plastic housing. The RDC is driven only by the front truck which is fine because it only has to haul itself, and maybe one trailer car, around and it doesn't need a lot of traction.
It also appears that I can salvage the couplers from the UP FA to put Kadee couplers on the RDC.
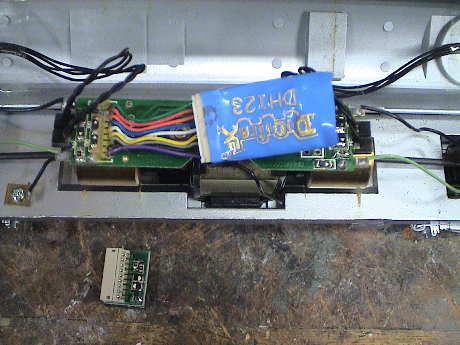
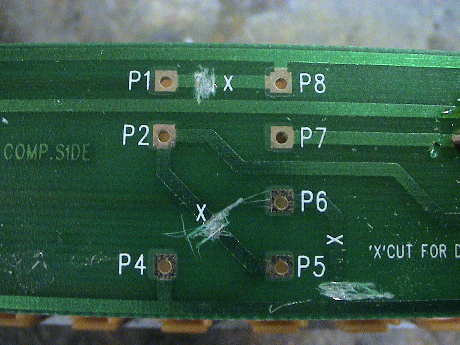 The PWB is marked in 3 places to cut for DCC. These didn't make sense to me until I had traced out the board and determined the wiring. I took this photo because it was easier for me to visually verify that the traces were cut in the photo instead of by eyeball at 1x. Growing old is a bitch. The 7 terminals are the ones that would be used on a standard 8 pin DCC socket. There is a 300Ω resistor on the board that isn't used for DC operation. It ends up in series with the decoder blue wire to provide current limiting for the headlights. The diode stacks still limit the bulb voltage such that the headlights run fairly dim.
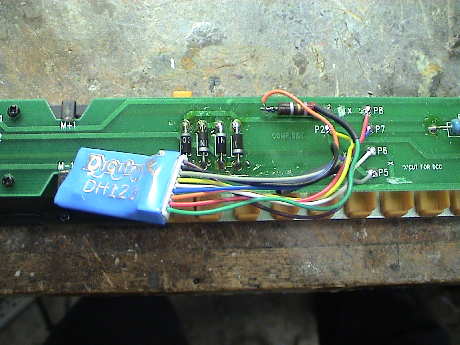 I wired a 9 PIN JST socket to the terminals on the board, plugged in a used DH123 and it worked.
| Terminal Number | Decoder Wire |
|---|---|
| 1 | Orange |
| 2 | Yellow |
| 3 | n/a |
| 4 | Black |
| 5 | Gray |
| 6 | White |
| 7 | Blue |
| 8 | Red |
I used a resistor in series with the orange wire to the motor. The bands indicate that it is 2.7Ω, but it is an old 20% part and actually measures 3.5Ω.
The RDC runs, still slowly, and the lights were fairly dim. I lifted lift one of the stack diodes and decreased the resistor in the blue wire to 220Ω to brighten them. It turns out that headlight is wired across only two of the stack of 3 diodes so it's voltage was limited to 1.3 volts. Now they get 2.2 volts or so at the club voltage and at least they burn white in color but they are still not overly bright.
I also removed the 3.5Ω resistor in the orange motor lead to try to speed it up a little at the risk of maybe toasting a cheap decoder. It ran a little faster, but it is still slow and my track voltage is a little higher than the club voltage.
Then it occurred to me what was going on. This wasn't a new decoder. The decoder probably came out of a rubber drive Athearn F7B and CV2 had probably been set to keep it from running at warp 6. CV2 was indeed set at 150. Resetting it allowed the loco to run fast enough at the club track voltage even with the 3.5Ω resistor reinstalled. This is the way that it will stay. The decoder itself is placed to fit in the radiator blister on the top of the shell.
I took the couplers and pockets off the Life-Like FA and put them on the Life-Like RDC, adjusted the trip pin height and it's done.
I had installed one of my own decoders in the RDC. I got a DH140 from the club to substitute in for a my DH123. This is an older style decoder that uses a low PWM frequency, but it worked fine in the RDC with audible but not objectionable motor growl. The RDC started to make more high frequency motor buzz again so I need to get back in there AGAIN to work on that some more.
I worked over the acoustic buzz again and suppressed some of it but the rest may be there until the whole side of the motor box is cut out. The buzz is not a mechanical problem but it is annoying.
 Every time I thought that I had the buzzing under control, it came back. This is probably why the thing had never been converted to DCC. I hacked off the motor cover box everywhere the motor touched it and then the chassis itself ran with only gear whine left. When I put the shell back on, the buzzing came back. There were still two sources, a loose window segment on the left side near the motor was buzzing against the shell. Some CA took care of that as it was not attached well. Then the shell itself was buzzing against the frame. The folded paper towel, no longer needed at the motor, help damp that. It still makes some noise do the vibration of the motor, but it's not nearly as bad as it was.
The RDC and the dummy were run at the LAMRS Christmas Open House and did just fine. The couplers on the dummy still need work to be fully in spec but the pair ran. I'll submit 6516 for certification at the next meeting and hopefully pick up some couplers.
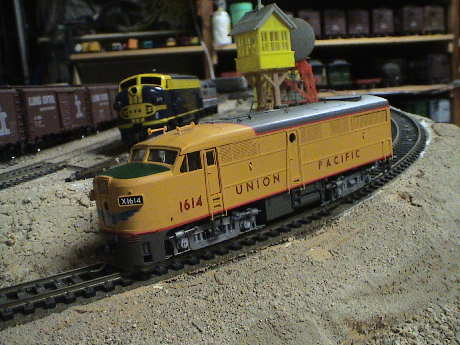
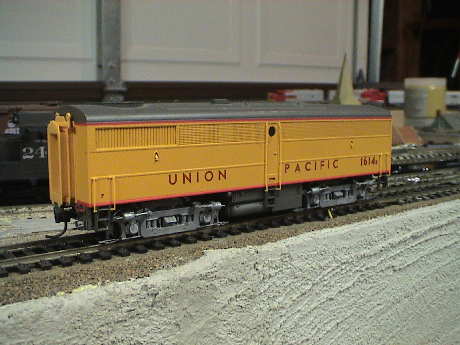
The Life-Like UP FA (x1614) didn't buzz on the track. It had a DCC address on a label on the bottom, but it did not respond to that address. It sort of responded on the DCC programming track, but the command station indicated that all the CVs I tried contained 255. This indicates a problem because many CVs, like the 2 digit address, don't allow values exceeding 127. There was a 4 digit address reported, but it wasn't the one on the loco label.
After opening the loco I found that it had a DN142 decoder in it. I first substituted a DH123 for the DN142 and it's response on the programming track did not change. Clearly there was something wrong in the loco. I connected an 8 pin DCC jumper plug to the socket in the loco to convert it back to DC and put it on the track. It was a dead short.
Then I attached some test wires to the DCC jumper plug so that it would be easy to inject DC into the loco on the bench and it drew 10 amps with only a few volts on it. This was not good. I manually turned the motor with very low voltage on it and the motor turned a little more by itself but it stalled again in less than half a turn. The current draw bounced all over, but it was always very high and I couldn't get more than a few turns from the motor before it would stall again at very high current. Then I noticed that a wire had broken out of the motor windings and was flopping around. The motor was clearly toast. I was not going to get much further with this loco. I did plug the decoder into an HO SD45 (which was already open) and the decoder worked.
After consulting with some club members, I elected to declare the FA1 as scrap and sent it to the dead line but not before recovering the decoder and couplers. The club wanted me to try to fix it so I'll swap the guts from UP 1642 with this dead one.
I've done a guts swap with UP 1642, an FB1. I needed to move the headlight assy, engineer, fireman and panel from the old FA1 chassis to the chassis from the FB1. Otherwise, the chassis are identical. Now x1614 needs a decoder and couplers as the FB1 didn't have couplers either.
It also needs a new front truck which I can get from the remains of UP 1642. I have an MRC AD350 decoder for it. I'll use this one instead of a Wangrow decoder because the MRC has a Mars light simulation. The matching B unit (1614b) also has an MRC AD350. The AD350 is not the greatest decoder, but it is current production. A PDF file of the manual is at the link.
I installed the MRC AD350 decoder and set up the special functions. F0 operates normally following Rule 17. The number boards are actually wired to the ditch light function but both are wired in parallel so that there is no flashing. A double click on F1 turns them on or off or if they are off F5 toggles them. There are actually two bulbs in the upper headlight position, the other bulb has been configured as a MARS light. F4 turns it on or off.
The loco needs a Kadee #6 long shank coupler for the front. The rear coupler is a Kadee #5.
Steve and I tried to certify this loco at the club a few days ago and it didn't run so I brought it home again. For some reason, CV29 was set for 2 digit addressing, I reset it to 4 digit and it ran. However, during test I smelled some plastic burning. Then I noticed that the headlight was showing through the top of the hood. It was running too bright on my higher track voltage and melting the shell.
The shell damage was not severe. I increased the resistance in series with the headlights from 39 to 51 ohms and things looked better. I then painted the side of the bulb engine black and painted the inside of the shell next to the headlight engine black as well to prevent the light from shining through the damaged plastic.
This one failed certification tonight. It has one undergauge wheelset. I will get a part from the basket case UP 1642. It also would not speed match so we elected to pull the MRC decoder and replace it with a better one for further evaluation.
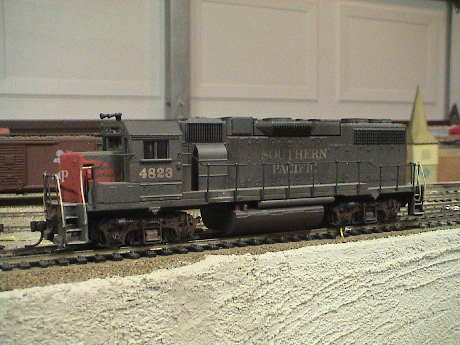
I pulled a DH121 from SP 4823 (going to the scrapper) and installed it in x1614. This is a two function decoder so I could not test the numberboard or MARS lights but the headlight works and I wired those missing functions to the 9 pin JST socket so that a 4 function decoder could drive them.
The front coupler was easier to deal with than I thought it was going to be. The frames for these locos are set up as a B unit. The old A unit frame (which I recovered last night) had a plastic extension piece screwed to the frame. This extension was just right to install a Kadee #5 at the front, done.
One wheelset was under gauge last night. By the time I got to it, it was over gauge. Something was amiss. The plastic gear on that axle was cracked so it wasn't holding the half axle firmly. I rummaged through the remains of UP 1642 and also recovered a single wheelset that wasn't cracked and installed it. That fixed that problem. Then the thing started to derail. On this loco, the square axle bushings tend to fall out of the slot in the metal frame of the truck. Unless they are carefully held in place with the bottom cover of the truck is snapped on, they will fall out of the frame and the axle will not be positioned in the right spot. The cover spaces them properly IF they are in the right place to begin with.
Eventually, this one will need a better decoder. I don't know why this one would not speed match while it's matching B unit did but we should probably pull the MRC decoder out of UP 1614 (the B unit) and replace it with a better decoder.
Before the OPS session today I had a chance to test UP x1614 on the club layout. It failed with flakey power pickup. This is odd because it was stable on my own layout just before I boxed it up.
I put it back on my track and the headlight doesn't even flicker. The wheels are clean and they all work individually. It'll have to go back to the club for more testing there.
Yesterday, it went back on the club layout and ran fine. The problem must have been a dirty stretch of track.
It got the DH121 pulled and a TCS T4X installed so that the extra lights will work. It also got power jumpers, using SIP connectors, to cross-connect power to it's B unit, UP 1614b.
UP x1614 actually got certified along with UP 1614b. However in later running, it developed a problem. From the sound, it appears that an axle gear has cracked. This is not a big deal as Athearn gears will fit this loco BUT I don't have any. It'll wait until I purchase some replacement gears.
I stopped by Milepost 38 and picked up two bags of Athearn #60024 axle gears ($4.98 per package of 6). The 2nd axle of UP x1614 had a split gear and made a clunking sound. This fixed it.
Last week I noticed that x1614 was clunking again. Last night, Steve and I tested it and it was indeed clunking. This time, the lead axle on the front truck was cracked. It got fixed again.
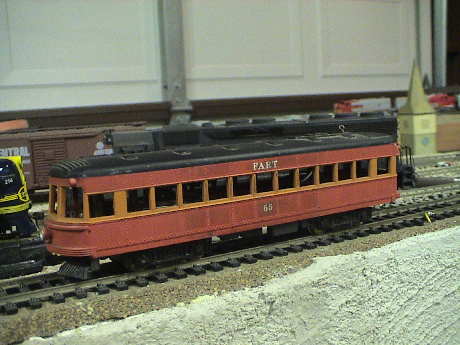
This is the Ford Area Rapid Transit (FART) car. I believe that this is the car that ran on the trolly line in the town of Ford over a decade ago. It is a die cast model with a very odd power truck. The motor is vertically mounted and drives a worm, pointed down, that then drives skew cut gears to drive the axles.
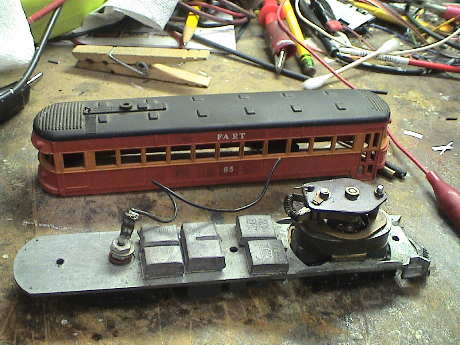 Initially, this car didn't run, but looking through the windows revealed a wire hanging loose. I took it apart and indeed the power pickup wire from the rear truck was broken. I soldered it back on the very old motor and the car tried to run. The wheels are brass and were totally packed with crud, I took that off with a brass wire wheel in a Dremel tool. Then after some lubrication it ran fairly well but it makes some noise. I need to spend more time with this car to see if will be worth investing a decoder in. The motor draws about half an amp while running but an inexpensive decoder should work in it. I am suspicious that the brass wheels will be an operational problem and the car may require more wheel cleaning than it is worth. Also, due to a small clearance between the wheels and the metal frame, it tends to short out when derailed.
The car is missing it's trolly pole.
I messed with FART 65 more today and finally gave up on it. The biggest problem is that it tends to spit fire from beneath the power truck at times and it has only 4 wheel power pickup. This car will not be a reliable runner.
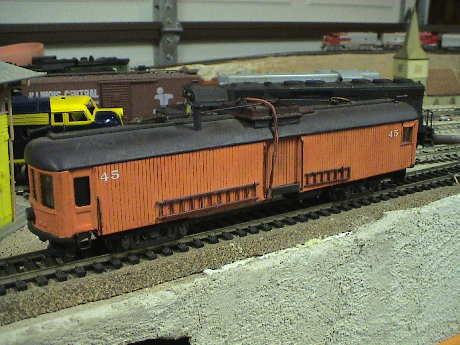
This traction work car was also in the pile. Number 45 ran poorly drawing about 300 mA, but it sputtered a lot. The motor is up in the body and drives the truck via two spring belts. Worms in the truck then drive the axles. It also has brass wheels and they needed cleaning badly. It picks up power from two wheels on one side of the rear truck and the other side of the power truck. I suspect that the power pickup will be too poor for reliable operation.
The car appears to be a scratch built model. The body is wood and cardboard totally unlike the description on the box it came in. This car may not be worth recovering but some traction guy may want it. I think that this one is evilBay fodder.
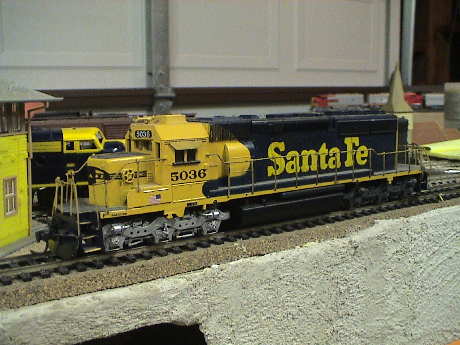
ATSF SD40 5036 sort of ran but it made awful gear noise and drew a lot of current, about an amp on DC. It needs some mechanical work before I can determine if it is worth salvaging.
I worked on this one some and it is pretty clear that this loco has been used up. The whole gear train was completely dry but lubrication didn't help it. The motor was virtually stalled when taken out of the unit. The commutator is worn but I faced it a little and it ran better but the other motor bearing is bad and vibrates badly.
The loco derails constantly on tight radius track
It's a pity because the loco looks pretty good but sadly, I must recommend to sell on this one.
This undecorated RDC dummy was a little easier to deal with. It needs coupler work but otherwise seems fit for service. I tested it with the powered RDC and it handled my 18" radius curves fine so I suspect that it will run on the LAMRS layout without difficulty.
I replaced the centering springs on both couplers, adjusted their height and glued the loose trip pin on one of them. This one should be ready for service. While I was there working on the couplers, it was obvious that a powered version of this RDC would be a rubber drive unit.
The dummy RDC had plastic wheels. It ran fine with them, but I found a club rule that required metal wheels on club owned equipment so I changed them with some older metal wheels. This required drilling out the swedging that held the cast metal trucks together and separating the truck halves, then drilling and tapping the trucks to accept #2-56 screws and reassembling them with screws. The insulated wheel tends to touch the truck frame so I added a thin styrene insulator to keep the wheel from rubbing on the frame and causing a track short. The rolling resistance is higher than I would like but that won't matter much in it's service attached to a powered RDC.
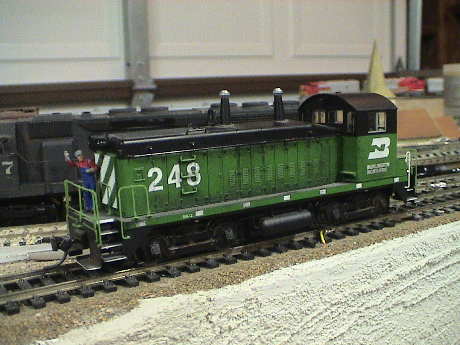
BN 248 is an SW12 made by Life-Like. This one has not been converted to DCC, but it should be. It runs really sweetly.
This MAY be a privately owned loco. There is a label on the bottom that says "Totten."
There is precious little room inside the SW12 and it's not set up to take DCC. If the low voltage lighting board is removed, there is probably room for a very thin, N or Z scale decoder. The lights themselves are attached to the shell and connect with spring contacts to the board. The front headlight does not work anyway. It should be possible to mount a new front headlight on the front of the weight. The rear headlight would be more of a problem, it would probably have to be wired to the decoder with an appropriate current limiting resistor for a 1.5 volt 120 mA bulb. The cab area could be difficult to get into.
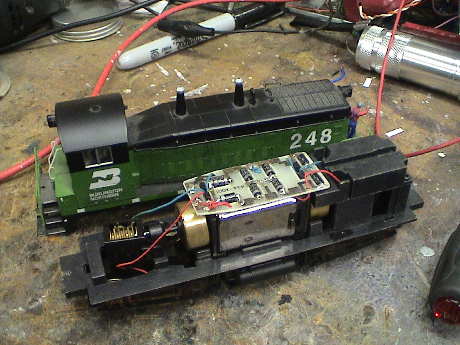
I was told that John Totten has donated this loco to the club and Lloyd gave me an N scale MRC AD332 decoder to install in it. The headlights were 1.5 volt bulbs and the front one had failed anyway so I pulled both of them out and replaced them with warm white LEDs. The GOW bulbs drew nearly 150 mA which was just too much anyway. As of today, the headlights are replaced (no easy task to get the cab apart) and the decoder will go in shortly.
This one is finished and it runs really well. The shell is a little loose, but it won't come off because the coupler pockets hold it in place.
This one did not want to speed match the standard loco, the MRC decoder just doesn't have the programmability. It will get the DZ143 from Amtrak 227.
I took the decoder from Amtrak 227 and installed directly into BN248. There were no problems, it ran fine.
I left this one at the club this morning for certification.
The wheels on this one just wore out and started collecting dirt like crazy. It got a new set of Kato wheels.
This one had suffered some drop damage, the cab was busted off and the loco was in a pile in the bad order box. I glued the cracked cab wall back together so that it would actually latch in place. The cab grabs were also broken but I elected NOT to glue them because then the cab couldn't easily be taken off again. They will stay in place by themselves if they are not molested.
After the cab had set up, I reassembled the loco and it made a lot of noise. There were wires dragging on a flywheel or universal joint. I took it apart and rerouted the wires and taped them over the top of the motor and then tried to reassemble it. Whatever features had been there to hold the shell on (4 clips on the shell that go through the frame) were all broken off. I fabricated some new features with 0.040 x 0.125 styrene strip mounted behind the pilots to use the coupler pockets to hold the shell on.
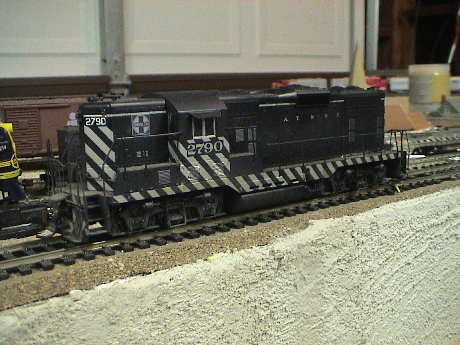
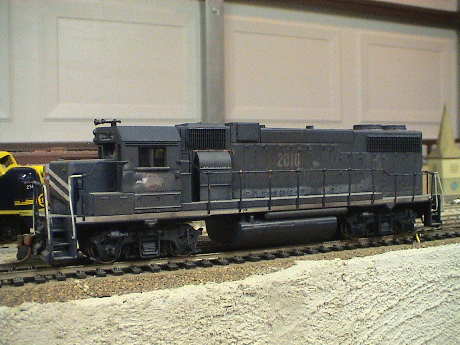
ATSF 2790 is a GP7 or GP9. The model does not run on DC nor does it respond to the DCC programming track.
The problem was there there was nothing in the jumper plug. Apparently, somebody had taken decoders OUT of some locos that didn't run all that well and didn't reinstall the jumper plugs.
Once I put a plug in, it ran, but made a lot of noise. I lubed as much as I could get to and after a minute or so to get the grease spread around inside, it quieted right down. I plugged in a test decoder and it ran fine. A small HO decoder will barely fit over the motor, an N scale one would be an easier install.
This loco is worth saving.
This loco was tested at LAMRS tonight and passed. It will get the test decoder pulled and a TCS T4X decoder installed as soon as the new decoders arrive.
ATSF 2790 was bad ordered for a clunking sound. Sure enough, the wheels on the rear axle would rotate with respect to each other indicating that the axle gear had split and was not holding fast to the half axles. I replaced that gear with a new one and tested it again, it still clunked, but from the other end. The 2nd axle gear was partially split. Only one wheel would turn. I replaced that one too and all the clunking is gone for now anyway. These gears die of old age and need occasional replacement.
I had some troubles with ATSF 2790. When I connected one of club's Wangrow decoders, the decoder would become non-responsive. After some careful examination of the wiring, I found two problems. Somebody had jumped around the plug to connect the lighting outputs back to the track. This confused the decoder. Further, the PWB itself jumps pins 3 and 7 which does not conform to the NMRA RP 9.1.1. Pin 3 is supposed to be left NC or used for a function, commonly the green wire. With the jumper on the socket, a function output is directly connected to the blue wire. If you put the loco on the track that way and turn on the function... poof. The club's decoders wire the violet wire to pin 3.
Further, the plugs on the club's decoders are so tall that if the plug is used, the shell won't fit back on. There are two ways around this, 1) use a decoder with a flush plug (which most of the newer ones are) or, 2) throw the little PWB overboard and hard wire the decoder. I am taking the 2nd route.
The decoder went in without difficulty and doesn't make a lot of PWM hum either. The loco didn't have any lights so I installed a couple of 5 mm warm white LEDs with 560Ω current limiting resistors. The LEDs fit nicely in the slots in the weights that were intended for them. The number boards are lettered and illuminate nicely. The front headlight is on F0 and is not directional. The rear headlight is on F1.
2790 got tested at LAMRS last night and didn't do so well. The bad order card says "no go." I ran it this morning on my layout and it ran like crap, nothing like what it was when I worked on it last month. It had two problems, one was obviously poor power pickup, but the other problem was similar to other locos that were tested with the Wangrow decoders. The lights would continue to burn and the motor would cut out or not run at all. My track current was all over the place while it was misbehaving and the motor buzz tracked the motor movement. Either this motor is intermittent (possible) or the decoder is behaving oddly (likely). After a few minutes of running on the bench, the loco smoothed out and then it ran fine. I did a minor handrail repair and put it back in the box for more test. Maybe the source of the problem will become apparent as I test other locos that had similar difficulties.
The club supplied a DH121 decoder for this loco. It was an easy 7 wire cut and splice job to install it. The loco runs fine and doesn't make a lot of noise.
The loco got retested at the club and it ran fine and passed muster. It is now waiting for the delivery of it's final decoder, a TCS T4X.
The TCS T4X went in without difficulty. I did reglue the shell to the walkways but that was all it needed.
I ran 2790 at the club last night and it simply didn't work. The wheels were so dirty that it would go only a few inches and stall again. I brought it home and found that the wheels were packed with hard crud. I cleaned it off abrasively and then used a grit block to polish the wheel surface. Then it ran fine. We'll see how it holds together. If it doesn't it will need new wheels.
ATSF 2790 had reliability problems. The wheels were just worn out with bare brass showing and a hazed surface. These wheels just collected crud from the track and it needed wheel cleaning every half hour or so, not acceptable. Since this was an Athearn loco, the club has used wheels that are in much better condition so I changed them out. There is was a complication however. There are 40" and 42" wheels that are otherwise identical. I had only 7 usable wheels in 40" without going through the sell box to recover just one wheel. I did have enough 42" wheels though so the loco got "regeared" to a higher speed service. There was a cracked gear too, it got replaced with another used gear that wasn't cracked. This raised the couplers about 15 mils so I replaced the Kadee #5 couplers with low offset Kadee #42 couplers, which I had in club stock. The loco will require recertification due to the coupler change and it will need speed matching again, but it runs without fouling the wheels.
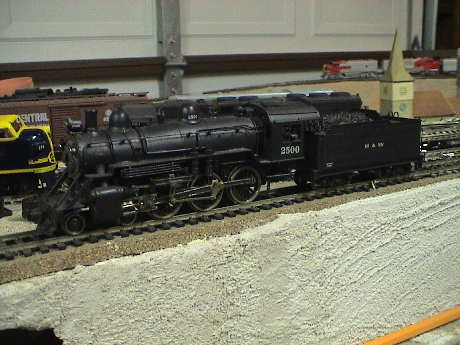
Harbor & Western 2500 is a brass ten wheeler (4-6-0) that runs pretty well drawing about 700 mA. However, it requires the tender for power pickup and may or may not be reliable enough for the club layout. It is a nice looking loco that is in good physical condition.
After a tuneup, this loco is not making the grade. It's power pickup is marginal at best on track that other locos run on without hesitation. The current draw of the motor is without a load which implies that the motor will get quite hot. This is a shame because this is a well proportioned and detailed model of an attractive prototype. It is sturdy and heavy. This loco would be better suited to somebody's DC layout for light duty service.
UP FB1 1614b is a Life-Like model that is part of the set with the UP FA1 that has the shorted motor. It has been converted to DCC but it runs slowly at the club track voltage. It does run smoothly, just not real fast.
I pulled the DH163 that was in UP 1614b and replaced it with a Wangrow 8 pin decoder. Then I could use the JST connected DH163 in Amtrak 809.
I got a couple of MRC AD350 decoders from the club. This is a basic decoder, but it does have some lighting functions that were suitable for the matching FA so I put the other one in the FB so at least the locos would be using the same decoder.
The MRC decoder got ripped out for being too different and messing with Steve's process. It got a TCS T4X.
UP x1614 and 1614b ran as a consist all day today at the OP session. At the very end of the session, it started to howl indicating a dry bearing. I brought it home opened up and ran it slowly on it's side on the bench. It was howling. I hit the 4 of the 6 potential bearings starting with the motor. When I got to the forward gear tower bearing, the noise immediately stopped. The other two gear tower bearings are under a weight and are hard to get to so I skipped those.
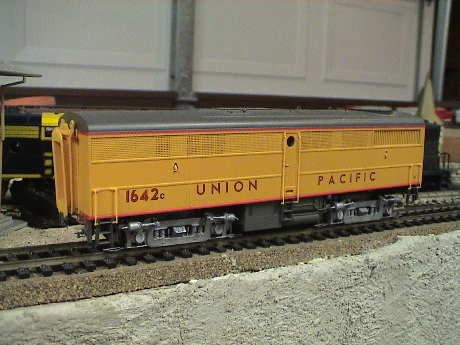
UP FB1 1642 is the third loco in the set. It was marked "bad motor." It did not run. I took off the shell and found that it was missing the jumper plug. I put a jumper in and then it ran on DC, but not very fast. I plugged in a DH123 and it ran about the same as 1614.
If the speed of 1614 is acceptable to the club, then I think that I should swap shells and make the one that is now 1642 into FA1 x1614. That one will need some couplers and a decoder as I salvaged those parts to get the RDC and Amtrak 346 going. Then I should convert the frame that was in the FA1 to a dummy and put the FB1 1642 shell on it.
I've done the shell swap with UP x1614 so now UP 1642 has the bad motor. I looked at converting it to a dummy, but the trucks will have to be completely disassembled to remove some gears. This is not worth the effort. This loco should be retained for parts to fix the other two when needed.
The hulk that was 1642 has surrendered a truck to WM 81, but the truck was not much good either. This loco now resides in a bag, it is truly a basket case.
I've also pulled the front truck to use on UP x1614 as the one that was on 1642 and got transplanted into x1614 had a bad gear.
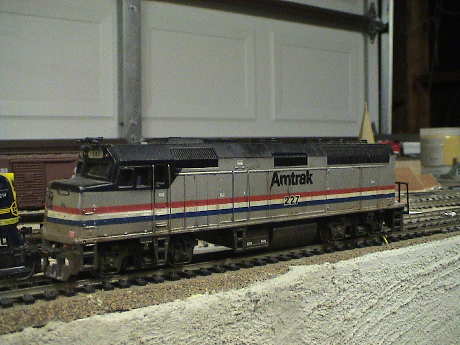
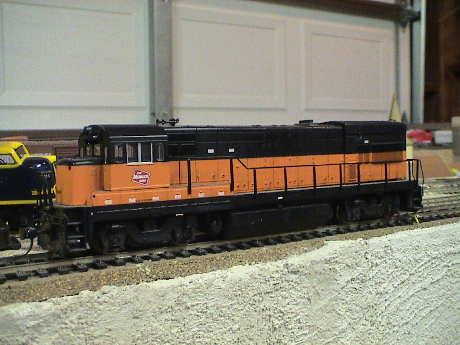
Amtrak 227 is another FP40PH that is pretty much identical to Amtrak 346. It does not run and also does not respond to the programming track. It also needs coupler work.
The loco has been fixed, it had a corroded motor contact and it needed lubrication. It still makes some bearing noise once in a while. While I was in there fixing the motor contacts to the frame halves I cut them off and wired them with orange and gray wires (polarity is right, I think) and then soldered the wires back to the frame halves where a decoder's red and black wires will eventually go. I need an N-scale 2 function decoder to put in it. The lighting is identical to Amtrak 346 and can be modified the same way.
The loco had Kadee couplers but they did not work. Both would not center and one needed a knuckle spring. I installed new parts from my stock and hacked up some new covers to fit so that now the couplers work properly.
I test ran this one this morning to measure the slipping current and it started to howl again. I took it apart and found the problem, it needed more oil at both shafts of the worms on both trucks. Now, no howl but the current is a little high, 600 mA running light (with lights) and 1 amp slipping. The clubs MRC332 N scale decoders are rated at 750 mA, they won't do.
The club came up with a Digitrax DZ143 decoder for this loco. It will fit and has the current capacity so I installed it in the same fashion as Amtrak 346. It ran fine.
I did notice one odd thing that may come back to bite us. The right front wheel is 7 mils smaller than the rest of them so that the front truck doesn't sit exactly flat on the track. We'll need to watch this one for derailments. This hasn't been a problem on my layout.
Amtrak 227 got a road test at LAMRS tonight, but it tended to derail the front truck which is the one with the small wheel. We don't have another similar loco to recover parts and getting parts from Bachmann is currently nearly impossible. The club elected to scrap it so I'll pull the decoder and put it in BN 248 in place of the MRC decoder.
I pulled the Z scale decoder for use in BN 248 and rewired the engine to run on DC but I did not reconnect the headlights. The DCC color coded wiring is there, the next owner can figure it out.
After I made an initial pass at the first batch of locos, the club loaded me up with another box full. At that point, I had only triaged most of the first batch.
This one has serious motor problems. It draws 1.5 amps at only 6 volts and increases in current rapidly at increasing voltages. This indicates weak motor magnets. To recover this one, it will require a new motor.
Sometime in the following weeks, the club elected to scrap this one.
This one runs poorly on DC out of the bad order box. It needs more investigation.
Upon opening the loco revealed that it was a straight up Athearn "Classic" loco. I ran it on the bench and the commutator was having difficulties, it was spitting fire. Further, it would go dead short at times. After picking some conductive crud from between the commutator segments, lubricating it with conductive oil and then cleaning off the black crud, it settled down to run well enough. It draws about 300 ma running light with some current spiking. The wheels are pretty throughly pitted but after cleaning, the loco had good power pickup and ran smoothly.
It had been awhile since I last ran this loco and I was looking for something I could make progress on so I rechecked this one. Initially, it seemed to run fine. After a minute or so of running, the current meter on my power pack pegged and the loco intermittently stalled, then picked up again. This shorting continued a few times before I pulled it off the track for inspection. I found that the commutator segments were packed with crud and there COULD be shorting across the segments from one brush to the other. I used a knife blade to break up the bridging between segments and cleaned the commutator. It seemed to be better as I saw no more shorts on the bench. However, a track test indicated that it was NOT fixed. It still shorts out. There appears to be nothing else in the loco that could be shorting, I wiggled whatever was left and there were no shorts.
I looked at the commutator again and the gaps between the segments were packed up again, not as badly, but there was more stuff in there. I cleaned it out again and I apparently turned up some edges on the commutator as the motor drag and noise increased, but it didn't short again.
I don't trust this one so I recommend that it goes to scrap.
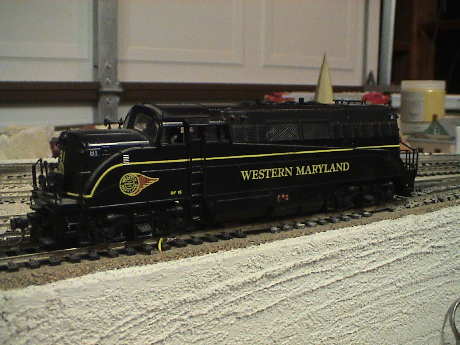
WM 81 runs pretty well on DC as received. It needs wheel cleaning and lubrication for further evaluation.
When I got the Life-Like model apart, it looked pretty much the same inside as an Athearn "Classic" loco. However, all was not well. There is a gearing problem in the upper part of the rear gear tower and when it will hang up and stall the whole loco. This one is going to need some mechanical parts, perhaps from another Life-Like loco.
I went ahead and robbed the rear truck from the now dead UP FB1 1642 and put it on the BL2. It was close enough to fit. The stalling in the rear truck is gone now but there may be other minor gearing issues. It does run but not well. The replaced truck has problems too. Further after some run in, the front truck is having difficulties AND the motor tended to short at times. I think that this one is scrap.
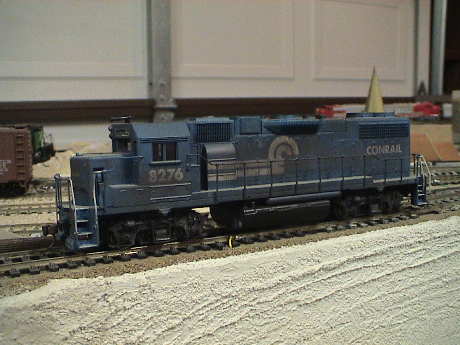
This one runs ok on DC out of the bad order box. It is an Athearn "Classic" loco with a mechanism virtually identical to Conrail 8276. The current is a bit high, but not a lot higher than 8276. This one may be privately owned by Danny McKeever. It obviously has seen lots of miles as the wheels are heavily pitted, but it runs ok and appears to have stable power pickup.
I put a System One decoder into this straight up Athearn loco. The first decoder ran for awhile and then failed with melted shrinkwrap. A replacement decoder worked fine although it was hard to get the shell back on without wires dragging on the flywheels. This loco has no lights and I didn't install any. It would be well suited to helper or secondary unit service where lights are not needed.
I cleaned the wheels as best I could. I also found that some of the square bushings that the wheels ride in don't always ride in the metal collars so that sometimes a wheel or two doesn't pick up power. This is a high milage loco but it looks good and runs well enough for Period 3 or Modern service.
I put a club supplied Digitrax DH121 into 4823 but I did not install lights yet. I want to see if the noise level is acceptable to the club.
SP 4823 didn't perform up to expectation at the club tonight so the club elected to scrap it. I'll pull the DH121 and transplant it into another loco that needs road testing.
This is yet another Athearn "Classic" GP-38. The couplers need work. It runs at marginally high current on DC but it is nearly identical to the other two Athearn GP38's. It doesn't make quite as much gear noise as SP 4823.
I test ran this one on DC and while it didn't short like Conrail 8276 it is obviously having commutation issues as there is a lot of sparking at the brushes and the motor is making lots of current transients. It also tends to derail when running in reverse.
This one is going to the scrapper too.
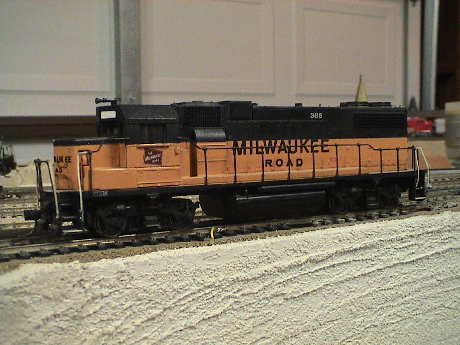
Milwaukee 365 draws about 800 mA on DC even after lubrication. Besides that, it is virtually identical to the other three Athearn GP38's.
Based on the current draw, the club elected to scrap this one.
This one was sold to a member of the public at the swap meet today.

SP 7415 does not run at all and the couplers are mounted about 1/8" too high.
After opening it, I find that a decoder has been hard wired to the 8 pin socket, effectively ruining the socket. There is also a JST 9 pin socket in there. The decoder appears to be a Tsunami. This is probably why it doesn't respond to my programming track.
This is one of three Life-Like locos in this batch (including GN 3022 and a Milwaukee loco without a number) that had DCC installed, probably by the same person because the installations look pretty much the same. None of the locos work in any fashion.
I'll did find my SPROG and reinstalled the software to drive it on my iMac. The SPROG is a decoder programmer that I bought so that I could talk to a Tsunami decoder that is installed in a large scale USAT Speeder. I did get it to work. The Speeder responds. It was also able to see Digitrax decoders installed a couple of HO locos so that I know that my HO programming track works. However, the SPROG does not detect any of the three LAMRS locos with Tsunami-looking decoders in them. Without being able to read back the decoders, I cannot get an idea of what they might be, or what their addresses are. Without knowing what the decoder is, I can't actually reset it either because I don't know what to stuff into CV8.
If worse comes to worse, I can desolder the decoders from the 8 pin socket. I can then find replacement sockets and install those. THEN I can plug in an 8 pin jumper plug to see if the locos will actually run on DC. I can also test the decoders outside the locos, provided that I can find a way to program them, to see if the decoders are actually any good.

The decoders that I thought might have been early Tsunami's were really something much more generic. They were ones supplied by Wangrow as part of their System One. I don't know who manufactured them. The only documentation that I have access to is in this PDF data sheet.
SP 7415 had one of these in it. I thought that the wires had been soldered directly to an 8 pin socket in the loco. It turns out that the 8 pin plug that came with the decoder had been soldered to holes for socket contacts on the loco's PWB. Since the loco acted like a DC loco on the DCC programming track (buzz while trying to read anything) I assume that the decoder is toast, probably shorted motor drivers, and the motor was seeing the programming track more or less directly. I desolderd the plug (it came apart in the process) and used the 9 pin JST jumper plug from Amtrak P42 to plug into the 9 pin JST DCC decoder connector that was installed in the loco. Then the loco ran on DC and it ran quite well, drawing less than 200 mA and making only light noise. I'll test this decoder later. However, for now, it looks like what we want is some cheap 9 pin JST decoder like a DH123 or DH163 and this loco would be good to go after the couplers get mounted properly.
I put a DH121 in this loco and things got a little weird until I figured out that the shell was on backwards. 3 of the 4 GOW headlight bulbs had fallen out too so I reattached the wires to the shell with CA. They will stay in place now.
The loco reacts badly to the low PRF of the DH121 making some serious buzz at low speeds, but it smooths out at higher speeds. This one clearly needs a newer "silent" decoder such as a T4X or a DH163.
This loco was tested at LAMRS tonight and passed. It will get the test decoder pulled and a TCS T4X decoder installed as soon as the new decoders arrive.
This was the easiest upgrade of the bunch. All I had to do was pull off the dynamic break pod, unplug the JST socket from the Digitrax test decoder and plug in the TCS T4X.
Apparently, I never fixed the coupler mounting height and nobody else did either. This loco caused some problems with inadvertent uncoupling during a recent open house and was bad ordered. Dave got some low set couplers for it and I have the couplers, but not the loco. Next time I get to the club I'll recover the loco from where ever it is stashed and replace the couplers to get the mounting height correct.
I think that when I delivered this loco back to LAMRS, I hadn't fixed the coupler height because I didn't have any couplers for it. The ones that were on it were plastic. Somebody had changed them out to Kadee couplers with whiskers but they were still a full half knuckle height too high and this was causing serious unintended uncoupling problems.
Last night, I recovered the loco and installed the Kadee #42 low set couplers on the loco in place of the center set ones that were there. This brought the height right down to where it was supposed to be.
This GE 70 ton switcher sort of runs on DC but it has obvious mechanical problems as some of the wheels are not being driven. The couplers are mounted too high and some of the external detail is not in the best shape.
 I was a little surprised when I opened this loco. It has a small motor on each truck. Each motor is connected to the pickups within it's own truck. One motor does not run. Further, some wheels on BOTH trucks freewheel. Since this is such an odd puppy and one motor probably has bad brushes, I think that this one is a candidate for the scrap heap.
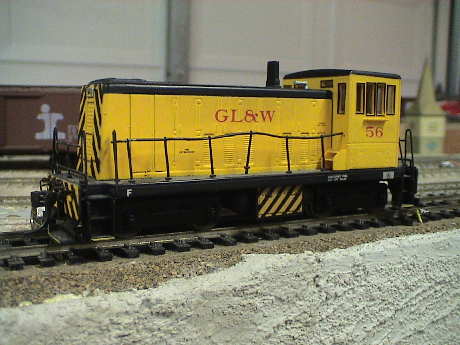
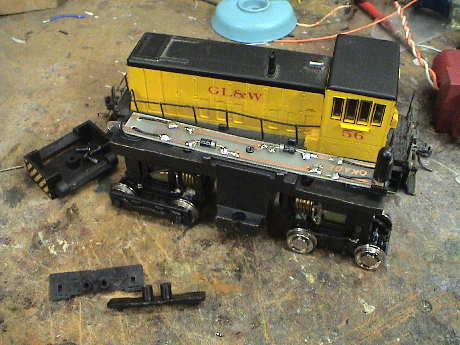
The club wanted me to take another crack at fixing this one because it is only one of two lettered and painted for the Great Lakes and Western, the namesake road for the club's railroad. I got some truck parts from another similarly built dead loco to try to use for parts.
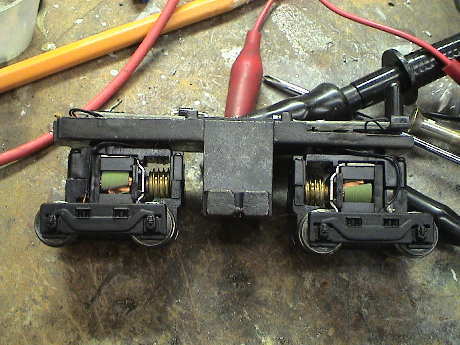
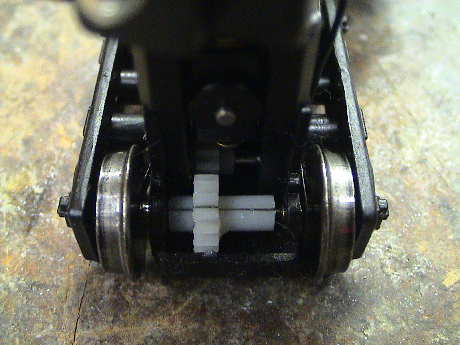
GL&W 56 has several problems. One motor does not run, but this is probably due to a bad spring contact between the power pickup contact and the motor. It also has two wheels, one on each truck, that free spin. This photo shows why. The drive gear that separates the half axles is split on both trucks. Bachmann axles gears often fail this way in large scale locos. Over a period of time, the plastic that the gear is molded from shrinks as it outgasses and eventually the hard axle inside splits it. In large scale, this is usually the end of the gear because even if it is glued back together, the teeth won't mesh properly. In this loco, there is quite a bit of slop in the gears so that a slightly wider space between a couple of teeth simply isn't noticed. I dropped some CA into the crack in the hopes that it would find it's way to the axle and bind the axle back to the gear. Once the CA has set, I'll disassemble the truck with the bad motor and try to determine if the motor is bad or it's just the contact. If it's a bad motor, I have two working spares.
 The CA patch worked on both the axles BUT the rear truck had other problems. The motor itself was bad, it got replaced. Then the rear truck would stall. After disassembling it again, I found that the other axle gear was cracked and split in such a way as to make the CA patch not practical.
It was then time to resurrect one of the other spare trucks. One of them was complete except for sideframes and it ran. However, when I went to install it into the loco, it didn't fit. Bachmann had made a change in the mounting configuration and the truck would not rotate. Both the weights and the truck top frames were indeed different between this loco and the one that surrendered the parts. Both trucks would fit the other weight but the other weight wouldn't fit into the shell, the mounting points had moved. I could not just swap the upper truck frames because Bachmann had also moved the fasteners that hold the trucks together so 56's upper truck frame would not fit on the replacement truck. Out came the Dremel tool and I shaved some plastic off the replacement truck's mounting ring until it fit over the pedestal on the 56's weight.
In the process, I had removed both trucks from the loco so I ran each on the HO layout. The replacement truck ran faster but not so much faster that it would be a problem. Both needed lubrication and run in, which they got. However, one of them was running the wrong direction. I guessed that it was the replacement truck because I had had it apart. I disassembled it again and flipped over the motor and then it ran in correct direction with respect to the other one.
Then I had to deal with the sideframes. The replacement truck didn't have any and the ones on the original truck were very firmly fixed to the truck. I just pried it off hoping that the studs that stuck out from the original truck would just break off, which they did. I then drilled out the remainder of the studs by hand to 0.060", the diameter of the mounting studs on the new trucks. They fit but are loose, I'll eventually glue them back on.
I reassembled the loco so that it would run on DC and FINALLY it works. It draws about 200 mA with the headlight on and runs smoothly and quietly enough to actually use. I reattached some handrails and adjusted the couplers. The front one is a tad high, but it is close enough.
DCC conversion will be somewhat involved. The trucks will have to come back off the loco and disassembled again so that the spring contacts to the motors can be cut off. Orange and gray wires will be wired back to the motors and brought up top to reach a decoder. The only space for a decoder is in the cab. An HO sized one won't fit well, this loco should use a Z scale decoder.
The headlights are incandescent and run directly from track voltage so that they can be wired directly to the decoder after the PWB is cut up a little. The are really bright at 10 VDC drawing about 30 mA. A 100Ω resistor would about right to dim them so that they will last.
I got a DZ123 from the club and it was about a big a decoder as would easily fit. I took the trucks apart again and isolated the motors. As much as I tried to keep everything straight, I reversed the orange/gray wires to the rear truck. I also had to improvise a little on the wire routing as the smallest wire I had was too stiff to route along with the power pickup wires without interfering with the truck rotation. In any event, the installation went without major hassle and now the little loco runs on DCC.
Sometime later, the club certified this loco. It is now in service on the Sierra Pacific logging line.
GL&W 56 had been used a lot at the club on the logging line but it had become flakey with power pickup issues. I figured that the contact wipers were not reaching all the way to one or more wheels when they were pushed all the way to the side. This is what I found on FOUR wheels, all on the same side. Further two more are loose in the axle gear and actually spin. This one will require complete disassembly to repin the half axles with CA and to form the contact wipers enough so that they will touch the wheels all the time.
I've been messing with GL&W 56 for a couple of weeks and it isn't responding to treatment. The original problem with poor contact is easy to solve, pull out the wheelsets, bend the wiper a little and reinsert the wheelsets. However, all of the axle gears are cracked and the gears don't hold the wheels tightly. They were sort of glued in place, but getting them to stick again has been a problem. This loco is going to need new axle gears and I doubt that Bachmann has them. I have an email into them to ask, but I don't expect results soon.
This loco may be down for the count. Bachmann does not appear to have parts. I've moved it back to the "in work" status until something changes. In the meantime, I removed the decoder to use it in Shay #11.
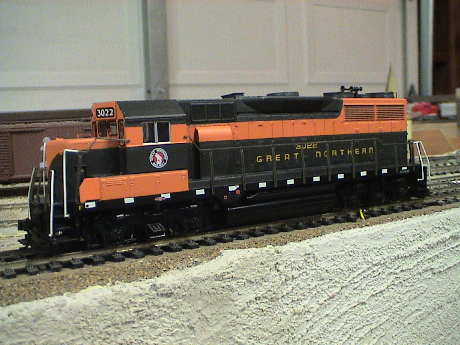
GN 3022 may have a decoder installed but it does not run. It also needs coupler work.
After opening it, I found that it was in the same condition as SP 7415. It appears to have a Tsunami installed (speaker leads cut) with the wires directly soldered to the 8 pin socket.
The decoder is a Wangrow Basic decoder and it the 8 pin plug is hard soldered to the PWB. The decoder is marked T3295. The decoder does respond to DecoderPro and I have set up an address of 8922 and enabled analog conversion. After finding and fixing the motor wire that was not connected, the loco started to run. It was well lubricated already and it runs as smoothly and quietly as the 28 speed step, low PWM frequency decoder will allow. The headlights are non-directional. The front headlight is on F0, the rear one on F1. I adjusted the couplers so that this loco is ready to certify.
GN 3022 was tested last week at the club and it ran like the others with a Wangrow decoder, it was not acceptable. The club supplied a Digitrax DH121 and I installed it. This loco had a 9 pin JST plug so I desolderd the plug that was on the Wangrow from the PWB to make some room and plugged the DH121 in. It ran fine right off.
This loco passed muster during testing tonight. It is waiting for an upgraded decoder.
GN 3022 got it's decoder changed out. This was a very easy swap. I pulled off the dynamic brake assembly and the old decoder was accessible. I pulled the DH121 and plugged in a DH163D. A quick check on the programming track and an adjustment to the address was all it needed. It runs fine.
This U23 has a decoder in it of unknown make. It presents a 4 digit address but it does not run. The decoder is the same as the ones in SP 7415 and GN 3022.
I am slowly prying open the Wangrow decoders in these locos. I got this one to respond on the programming track and used DecoderPro to download it's contents assuming that it was a Wangrow Basic decoder. It reports 0 in CV7 and CV8 so DecoderPro cannot determine what the decoder is until I tell it what it is. The loco was set to respond on analog so I put on DC powered truck and slid it on the track and it started to do something. The mechanism was bound up but eventually freed itself and it started to run fairly smoothly drawing about 400 mA. DecoderPro indicated that it had a 4 digit address of 8900 enabled so I dialed that up in 28 speed step mode and it actually ran. The headlight is not directional and there is no rear headlight. I adjusted the couplers but the rear one doesn't center every time, it needs a new spring and I haven't got a loose one.
The Wangrow got tossed, a Digitrax DH121 went in. The loco is good to go.
This loco was tested at LAMRS tonight and passed. It will get the test decoder pulled and a TCS T4X decoder installed as soon as the new decoders arrive.
This one had a DH121 in it so I just plugged in a T4X. There was no rear headlight. The club gave me a couple of bags of 14V GOW bulbs so i added one. I also removed the long shank couplers and substituted regular whisker ones. The long ones can go somewhere else where they are needed.

I got this one back, this time with a road number of 5502. All that I could find wrong was that a cut lever had come off. I reattached it with CA.
The wheels on this one just wore out and started collecting dirt like crazy. It got a new set of Kato wheels.
Amtrak 809 is a P42 that is in pretty good shape. It isn't marked but it appears to be a Life-Like product. It runs on DC and is a little noisy before lubrication, however it doesn't draw a lot of current, about 200 mA. The couplers will need some work. It has a JST socket with a jumper plug installed so that DCC conversion MIGHT be easy. I've not done one with a JST socket so I'm going to do a little wire tracing before I just plug one in.
I lubed the loco and the noise faded some to about the level of the wheels noise. I pulled the JST jumper plug and plugged in a test DH123 and it ran quite well. The plug is out right now as I am using it to test some other locos but it could go back in there easily. I adjusted the couplers. With the addition of a DH123 or DH163 or some sound equipped 9 pin JST decoder, this loco would be good to go.
Eventually, I pulled the DH163 from UP 1614b and replaced it with a Wangrow decoder because the FA, UP x1614, is going to get one of those also. The DH163 is a 9 pin JST decoder and plugged right into Amtrak 809. The Wangrow decoders have 8 pin plugs and plug into the UP units.
Amtrak 809 is done and ready to certify.
Amtrak 809 did get certified. I pulled it down from the cabinet because one of the other club members said it didn't run well. It didn't. It had obvious power pickup issues and when it ran, it ran sluggishly, not making speed.
The speed problem was due to commutator issues. It was sparking at the brushes pretty badly. I put a very small amount of AeroCar conductive oil on the commutator and it started to run better, but there black crud all over the commutator. Extended light abrasion with the end of a wooden toothpick rubbed most the black stuff off and the motor started to run smoothly with no visible sparking.
Then a track test indicated that the power pickup was bad too. An alcohol clean helped that a lot but there was still obvious crud on the wheels. I faced them lightly with a Bright Boy while running the engine with a Kadee brush and shined up the wheel treads. This helped more and the headlight flicker went away.
It'll go back to the club, but I'm going to keep a close eye on this one.
I tried to run 809 at the club last night and it had a problem. It would uncouple from the following car and when running in reverse, the rear coupler was so loose that the trip pin would hang up on the ties. I don't think that I left the couplers in that state, very badly mounted with an entirely wrong coupler box. In any event, I replaced the partial box in the rear with a Kadee #5 box, cleaned the wheels and the loco is good to go.
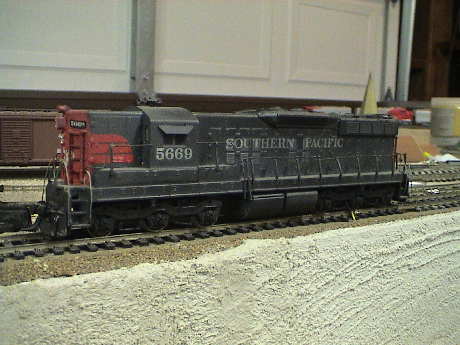
SP 5669 is an SD9 which appears to be manufactured by Athearn. The engine runs with a moderate amount of noise before lubrication. The couplers are very high and will need some significant remounting work. It does not like 18" radius track very much.
I took SP 5669 apart for inspection and I found that it had been remotored with a good can motor. Most of the noise was coming from a contact tower on one truck rubbing against a U-joint, an easy fix. After lubrication and a little run in to spread the stuff around, it ran pretty well. It now runs on 18" curves, but it picks the points on some Atlas Snap switches.
I installed a Wangrow decoder. I now believe that these are probably a DH-155. This particular decoder is one I cut out of another loco as it just did not seem to operate. However, after learning more about these things, I was able to coerce it into working.
This loco has NO lights, nor any provision for them. There isn't even a hole in the shell for any light to shine out. If somebody wants to light this loco, they'll have to remove the lenses from the outside, drill some light passages and reinstall the lenses.
In any event, the decoder worked. It will read back on a SPROG programming track but not a DCS100 programming track. The loco is ready to return to LAMRS.
I tested the "Cadillac" at LAMRS last night. I apparently installed the shell backwards as it ran in reverse, but it ran well except that it picked the points of a turnout at Edison a couple of times. It is also intolerant of some of the tighter curves on my own layout.
It has no lights so I could not see if it had the same problem as 2790, but I could hear the motor cutting out on my own layout. A commutation problem would not cut out for so long so I suspect that the decoder is doing something odd. This one could use a better decoder and some lights. The shell was never drilled for lighting so the headlight lenses would have to be removed or drilled out.
I elected to upgrade the headlights on this one in preparation for a new decoder. Lloyd has some DH121's that will do ok for testing, much better than the Wangrow ones. When I get some of those, I'll cut out the Wangrow and install the DH121. If we elect to upgrade past that, a DH163 or T4X will plug right in.
The headlights were very small blobs of plastic with a metalized back that were glued into the headlight housings. There were 4 on each end. I popped the two on the upper housing out and drilled a 5/64" hole behind each one. Then I mounted a 5 mm white LED inside the shell so that it would shine out the resulting holes. This actually makes an acceptable headlight. The LED current is set with a 1KΩ resistor at each end so that the LEDs should run at 9 or 10 mA.
The club provided a Digitrax DH121 decoder to install in this loco for further testing as the Wangrow decoder was just not cutting it. The DH121 is a 28 step decoder with a low motor switching speed and no BEMF. However, it appears to work quite well and it works with 128 step commands.
The loco ran quite well with this decoder in it. It is ready to test again on the layout. If it runs well enough, it could possibly keep the decoder.
The headlight installation worked quite well. I also repaired some broken handrails and rebuilt a section that was missing from 25 mil music wire for the uprights and 15 mil phosphor bronze wire for the handrail proper.
This loco was tested at LAMRS tonight and passed. It will get the test decoder pulled and a TCS T4X decoder installed as soon as the new decoders arrive.
The decoder swap to a TCS T4X was uneventful, the loco runs fine.
SP 5015 is a PB1 dummy unit. It is missing one coupler and the other one is poorly mounted. It doesn't roll all that freely and it doesn't like 18" curves at all.
5015 got a new coupler, centering spring and cover. The other coupler got adjusted.
At the meeting tonight, the club determined that they didn't need this dummy, it goes to scrap.
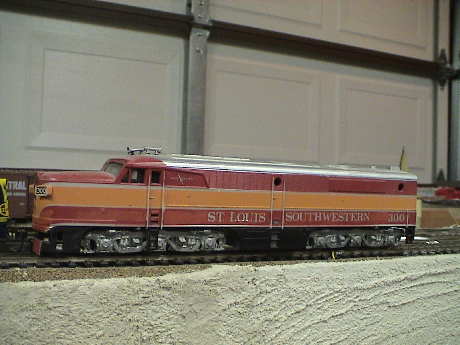
SLSW 300 is an Athearn PA1 that has probably been remotored. It is fairly noisy on DC but it draws only about 200 mA. It also does not like 18" radius curves.
This one had been remotored and after some lubrication, run in and adjustment of the contact stands, it runs well. It got a Wangrow decoder, there is plenty of room for it. The unit had a 1.5 volt 80 mA GOW bulb. I retained that and used a 240Ω current limiting resistor wired to F0. It got a new coupler spring in the front.
I tested this one at the club last night and I had to pull it off the track. It was too intermittent, it would intermittently sit there with the lights burning and no movement. When I retested it this morning, I could not reproduce that behavior. It had flakey power pickup until I cleaned the wheels, but the motor would still cut out while it was running, I could hear the buzz drop out and my track current meter was bouncing. This time, however, the headlights were flickering so the dropouts could be just power pickup issues.
This loco has talgo mounted couplers with the metal clip on covers, both are not acceptable to LARMS. This one may meet a grim fate. It's semi-matching B unit (SP 6146) and a dummy B unit (SP 5915) may meet a similar fate.
The club elected to dispose of this loco primarily because of the coupler situation and that it really isn't needed.
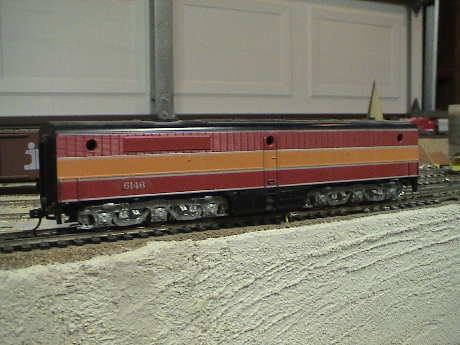
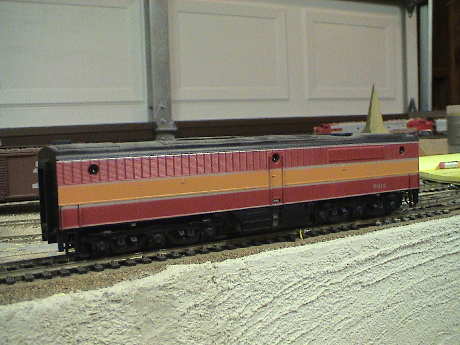
SP 6146 is an Athearn PB1. It has been remotored and draws about 200 mA. It is fairly noisy before lubrication. Like the other C-C locos, it does not like 18" radius track.
This one needed the motor glued back down as it was flopping around loose. It also got a Wangrow decoder. It needed a new coupler, centering spring and cover on one end and a new centering spring on the other end.
The club elected to abandon this loco as it was not needed.

SP 3343 is a Fairbanks-Morris HW-24-66 Trainmaster. It is probably a Life-Like unit. It has been remotored, draws about 200 mA and makes a lot of noise before lubrication. This loco has the plastic coupler retainer clips that tend to fall off. It also doesn't like 18" radius curves.
SP 3343 had been remotored with a can motor and it actually ran pretty well after I reattached the motor which was just flopping around loose. It had what appeared to be 1.5 volt GOW bulbs in it, but none of them worked. There was some sort of regulator installed to control the bulb voltage, but it was clearly damaged too. All that stuff got hacked out.
The unit ran pretty well on the bench but every time I put it on the track it shorted out. Eventually, I let the short circuit current rise high enough, above 2 amps, so that I hoped to see some arcing at the location of the problem. There was some arcing and smoking on the top of one of the trucks. The steel contact that rises above the drive shafts was very close to a metal plate on the top of the truck connected to the other side. The pieces were a little loose and when the weight of the loco was on the wheels, they tended to move together and short. A small piece of styrene was glued into each truck to keep those pieces apart and the shorting went away.
The headlights were replaced with 3 mm warm white LEDs fed through 560Ω resistors. The LEDs were glued to the roof of the shell and generally pointed at the main headlight lens with some spill over to the 2nd headlight.
The couplers were mounted in the plastic clip covers that never stay on, one was missing a knuckle spring and both centering springs were bad. I drilled out the coupler pad for a #2-56 screw on both ends and installed Kadee #5 boxes, then replaced the bad springs.
 I essentially got the whole thing together, THEN I realized why the shell never fit quite right. The damn thing was on backwards when I got it. I had to turn the shell around, which was straightforward, but the decoder would not recognize the NDOT (normal direction of travel) bit in CV29 and I had to reverse the motor wires too. Further, I had difficulty getting it together and keeping the decoder from rubbing on a flywheel so I had to build a little stand made of styrene to prop the end of the decoder up. The decoder is fastened to that frame with a piece of double backed foam mounting tape. It just barely fits. This puppy is done.
I also tested the Trainmaster at the club last night and it behaved similarly to the other locos, it had very intermittent operation. However, I was able to see what is happening in this case. The decoder has poor restart response when power drops for a very short time and is restored. This loco has 12 working wheels which had been cleaned. The track is clean, it should have good pickup. It seems the decoder's firmware is just not up to the task.
I did substitute the Wangrow decoder with a DH123 from my stock. I didn't have a normal JST harness for it so I used a function harness from a DG583S. It is the same connector with the same function wire colors, but the motor and track wires are different from the standard. It went in fine and all the weirdness simply vanished. This loco is waiting a retest at LAMRS.
I tested this one at the club and it ran fine, MUCH better than it did with the Wangrow decoder. It will wait for a good club decoder, preferably with BEMF.
This loco was tested at LAMRS tonight and passed. It will get the test decoder pulled and a TCS T4X decoder installed as soon as the new decoders arrive.
I didn't put a T4X decoder in this one as I used them elsewhere. I did change out my DH123 that was in it to a DH121 club decoder. The loco buzzes some now but it makes less noise than some other locos with the low frequency decoders in them. It could use a better decoder but this one may be good enough.
While I had done some more testing at the club while the track had not been recently cleaned and I noticed that this loco tended to sputter and stall at spots where other locos had only minor difficulties. It needed some more work.
I brought it home again with the intent of changing out the wheelsets for some that were in better condition. I didn't do that because this loco has different wheelsets that most others. This guy doesn't use the axle bushings for power pickup, but instead it has metal sideframes and uses brass bushings in the sideframes. I also discovered that the forward right wheel on the rear truck wasn't providing power pickup at all. After some poking around with an ohmmeter, I found that the actual bushing wasn't making contact to the frame that it was pressed in to. I managed to actually rotate the bushing just a little with a screwdriver and scrub it in a little and it started to work.
The wheels themselves were covered with a gray haze that did not come off in an alcohol clean. I assume that this was either a micropit haze or some adherent oxide coating. I gently abraded it off each wheel with a Bright Boy. As each wheel turned, I could feel the wheel tugging on the Bright Boy for a few turns until the surface smoothed out and the tugging stopped. Then the loco ran without the headlight flickering. We'll see how it does in regular service.
SP 3343 got a new decoder. It was an easy matter to pop off the shell, unplug the test DH121 and plug in a DH163. The loco ran fine right off the bat.
I ran 3343 at the club last night for a long time. At the end of the evening, it was showing evidence of dirty wheels. I brought it home and found the wheels packed with hard non-conductive crud. I abrasively cleaned and polished the wheels. We'll see how it holds up.
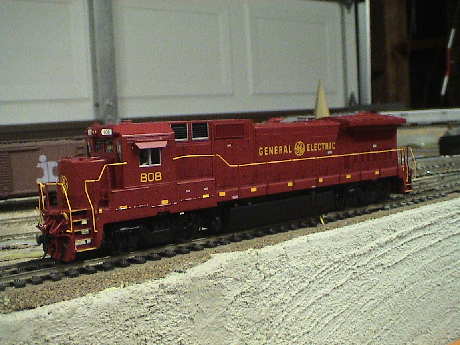
GE demonstrator 808 was one of three locos I picked up at the club that had been converted by somebody else with a club supplied Wangrow decoder. These locos could not be read on the club's programming track so I brought them home for test.
This one ran well enough and it would respond to the SPROG for programming. I programmed a club standard address of 8908 for this loco and it appears good to go.
Since the club is scrapping the Wangrow decoders, this one never got road tested. I pulled it back to wait for a new TCS decoder.
The club had 3 TCS drop in decoders in stock. One fit this loco so I installed it. It ran fine.
GE 808 was certified and ran well for quite a while, then it started to run slowly. A quick bench test at the club indicated a mechanical issue with something dragging inside. I took it home and track tested it, it still made dragging noises. I removed the shell and did a visual inspection for dragging wires, none found. Then I rotated a flywheel a little and one of the push on clips on the drop in decoder for the rear headlight wire fell out. It did not fit back on properly. I soldered the wire in place and track tested it again, problem gone. The wire clip had fallen off and jammed under the rear flywheel. Those little plastic caps often don't fit properly on a replacement drop in decoder, on a couple of installs I had to solder every wire. Anyway, this one goes back to the club next week.
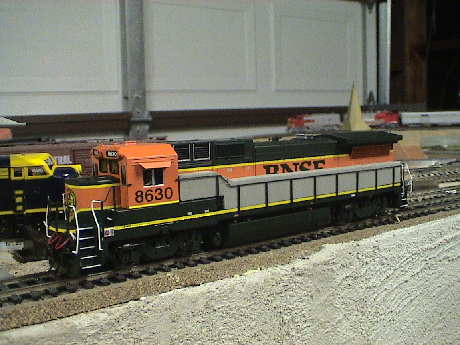
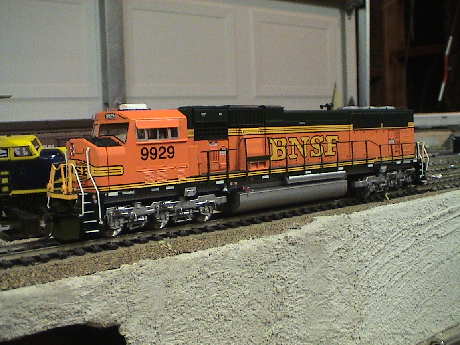
BNSF 8630 is a little puzzling. It responds to the SPROG programming track in the expected fashion but it does not run. Occasionally, it would just run away on the programming track which means that it is trying to analog convert even though analog conversion shows to be off. I suspect a bad decoder in this one.
I put another Wangrow decoder in this loco and it still would not run although it acted like it was working on the SPROG programming track. I put in a jumper plug and the loco ran on DC. I plugged in a Bachmann EZ-Command decoder and it worked. I plugged in a DH123 and it worked. I put the new Wangrow decoder back in and it doesn't work. The Wangrow decoder does work on my test rig. The original Wangrow decoder does NOT work in the test rig. There is something about this loco that the Wangrow decoder does not like.
It is waiting for a new decoder.
I put a TCS T4X in this Atlas loco and it ran fine. The TCS decoder has very good BEMF.
This one came back with a minor cosmetic problem. A chain that connects the front truck to the frame broke off. I glued it back in place and the loco was fine.
The loco has apparently seen some miles since it was converted to DCC about 20 months ago. The wheels are showing signs of wear. They aren't completely worn out yet and they still work but it will need new wheels sometime in the future.
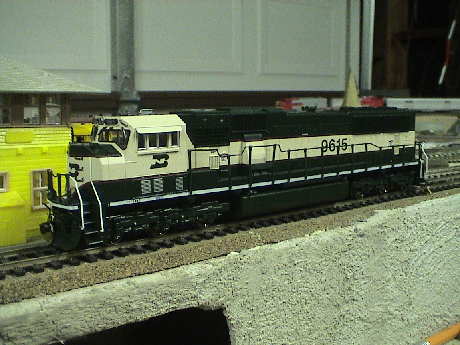
BN 9615 also has a Wangrow decoder and runs well. The loco has some physical damage. It had been dropped. The front coupler is broken, one cab visor is missing and some handrails need a little attention.
I reinstalled the loose handrails and replaced the front coupler and spring. I found the visor and reattached it. Now it is good to go.
Since the club is scrapping the Wangrow decoders, this one never got road tested. I pulled it back to wait for a new TCS decoder.
This loco takes an 8 pin medium plug, but the decoders were delivered with wires. I spliced on the plug from a dead Wangrow and plugged it in, no problems.
It's been nearly 3 years since I last saw this loco. It came back because it was making dry bearing noises. I heard it run that way at the club. Of course, when I took it apart, there was no bearing noise. I lubed all 6 high speed bearings and applied some grease to the worms. It seems fine. It'll go back to the club for more testing.
After all of the first batch and most of the second batch were complete, I picked up two more boxes of locos, 18 in total. We are getting to the bottom of the barrel here and many of these, especially the steamers, are pretty sad. These are listed here in more or less the order that I initially evaluated them.
This is almost a new loco, but it runs badly. It makes very loud gear noise from the front truck. I haven't had it apart yet to figure out what the trouble is, but this will be the first one to work on when I get to it. Otherwise, it's in excellent condition.
After I got into it, I found the problem. The wire clearance under the cab is very tight and the headlight and ditch light wiring gets pinched and pressed down into the front universal joint. When the time comes to put a decoder into this loco, I am going to attach the wires to the shell with CA to keep them where they belong. With the wires out of the way, it runs fine.
This loco can take a multifunction decoder such as a TX4 or DH163 via a 9 pin JST connector.
The headlight wires that were fouling the front U-joint have been glued to the cab floor, that's fixed. The handrails refused to stay on so they have been reattached with very small dabs of CA. This one just needs a decoder and it's ready to go. However, it does not run on 18" radius track, it will derail every time.
This one was simple, it already had a JST plug so I just pulled the jumper plug and plugged in the TCS T4X decoder. It is ready to go.
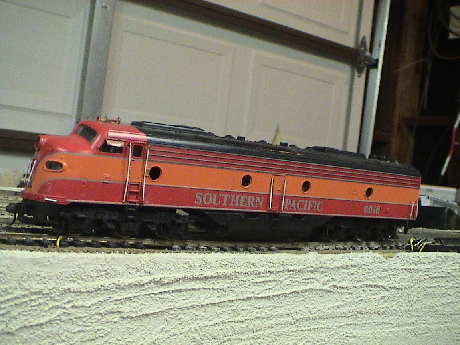
This E8A runs fairly smoothly but it has a tell tale clunking sound which indicates a cracked gear. The couplers need a lot of work.
The clunking sound was coming from a unseated journal on one of the wheels. Pushing it back into place and properly retaining it with the lower cover solved that problem. The couplers are fixed, this one is waiting for a test decoder.
I went to install an MRC test decoder in this one and I noticed that the clunk had returned. I noticed that the front truck would jerk at times so I popped the bottom cover and ALL THREE axle gears are cracked. I need to recover some more wheelsets from some old Athearn hulks that we have.
After I had recovered one good wheelset for SP 6019, I took apart one truck from the last hulk. In that 3 axle truck I found 3 good wheelsets. They went into 6018 and now it runs smoothly enough on straight track to deserve a test decoder so that I can test it at LAMRS.
A test decoder became available so this loco got it's first decoder, a DH121. We'll see how it runs on the club layout as it cannot take the curves on mine.
I tested this loco on the club track today and it did well with the DH121 in it. I installed a headlight and it is good to go.
SP 6018 got it's DH121 swapped for a DH163, no problems. It runs very quietly.
This loco was being used at the club tonight and it started to clunk again. This time, all three axles on the rear truck were cracked. I had new gears so I swapped them out. The loco smoothed right out, no more clunks.
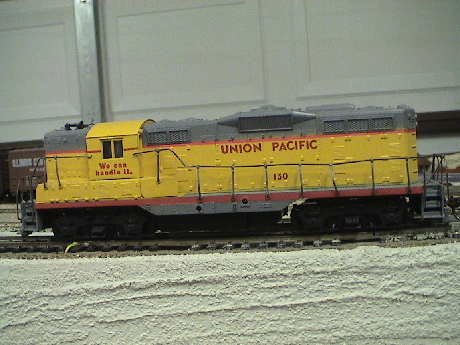
UP 130 is an GP9 dummy. It is in pretty good condition except that the handrails are bent. SInce they are metal, this should be repairable.
The handrails were indeed easy to bend and after some coupler adjustment, this loco is good to go.
At the meeting tonight, the club determined that they didn't need this dummy, it goes to scrap.
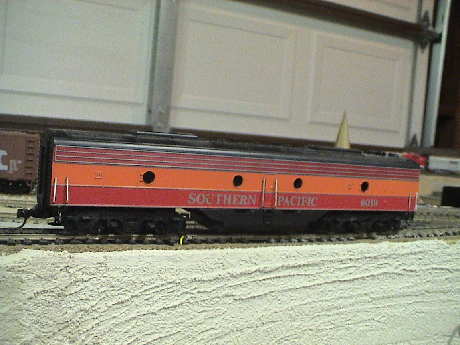
SP 6019 is an E8B. It needs some coupler work. It also does not run at all.
I adjusted the couplers and completely lubed the loco and got it to run. It has been remotored and the motor runs well, but it sounds like there is a split gear in there somewhere. It makes a repeated clunking sound although it runs smoothly enough.
It does have a cracked axle gear. It is the one on the "F" end of the unit (furthest from the steam generators). This is a pretty standard Athearn looking part, we can probably rob one from some other dead Athearn loco.
At the last club meeting I recovered some basket case Athearn locos and recovered a wheelset from one with a truck dangling by it's wire. This fixed the clunking sound. I also touched up some paint on one side skirt with engine black. It still needs some touchup on the body but I don't have the red color for the SP Daylight scheme.
This one is waiting for a test decoder.
In testing prior to installing an MRC test decoder, the clunk came back, this time from the center axle on the rear truck. I need another wheelset.
I recovered 4 Athearn hulks from the club and started taking the wheels out to find one with a crack in the axle gear. I went through half a dozen before I found one. This did not bode well for SP 6018 which still needed THREE wheelsets.
In any event, replacing the one cracked wheelset in SP 6019 fixed the clunk while it was running on the track although the trucks were still hanging up slightly when suspended. At least the one truck didn't jam completely like it did before. When running along a 4 foot or so straight section on my HO layout, it ran smoothly. I could not test either 6019 or 6018 in the curves because these locos simply do not tolerate 18" radius track. I put it in the pile with the other ones waiting test decoders so that I can at least test it at LAMRS.
This one also got a test decoder, a DH121. It seems to run fine on my track, we'll see what it does at the club.
I tested this loco on the club track today and it did well with the DH121 in it. It is good to go.
SP 6019 got it's DH121 swapped for a DH163. It runs very well now.
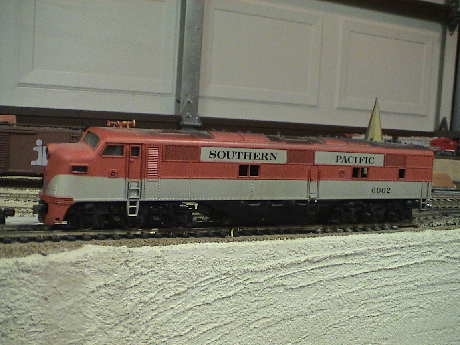
SP 6002 is an E8A. It runs ok with reasonable light current. The couplers had both trip pins cut off and both were jammed in their housings. I replaced the whole works and now this engine runs.
On this loco, and on the similar 6003 unit below, the shell mounting had been modified with screws that go into blocks glued to the insides of the shells.
I ran another DC test on the loco and it was not running well. I lubricated it and after some run in, it started to behave, drawing 250 mA running light. I had an MRC AD350 test decoder come available so I installed it in this loco after removing the low voltage lighting module. I think that the shell is fitted to go in this loco backwards, but I wired the decoder that way so that it now runs "forwards." I did not install any lights, they are not necessary for testing.
This one had two problems during testing this morning at the club before the OPS session. The decoder was behaving badly, it will need to be replaced with a better test decoder and it tended to derail on some turnouts.
The MRC decoder got pitched for a DH121. No cause for the derailments was found, still working on that one.
SP 6002 passed test today at the club so it got a headlight.
The club has elected to sell this one instead of investing in a better decoder.
I removed the decoder and couplers from SP 6002 so I could use the parts elsewhere. The headlight and DCC wiring are still in there.
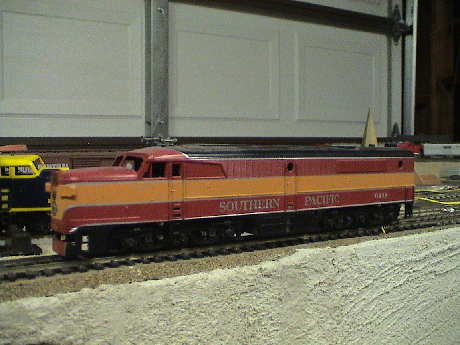
SP 6448 is a PA1 dummy. The couplers are talgo mounted and needed a little adjustment, but otherwise, the loco is good to go.
At the meeting tonight, the club determined that they didn't need this dummy, it goes to scrap.
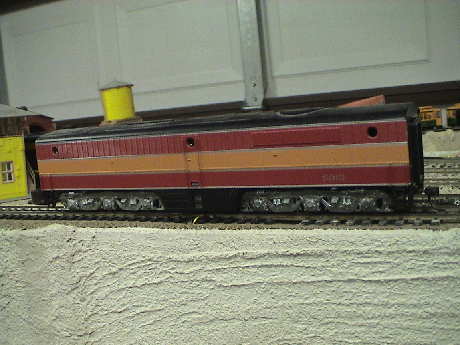
SP 5915 is a PB1 dummy with a talgo coupler in the rear and no coupler in the front. The rear one needed a centering spring.
At the meeting tonight, the club determined that they didn't need this dummy, it goes to scrap.
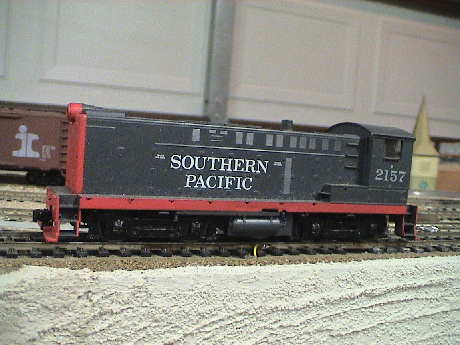
SP 2157 runs poorly, draws lots of current, has no lights, and there is no body detail. I was not able to identify the prototype for this loco. All in all, maybe this one would do better elsewhere, such as in a child's hands.
At the meeting tonight, the club determined that they didn't need this loco, it goes to scrap.

SP 6003 is another E8A. It does not run but it has been remotored. It has a custom lighting module stuck inside the shell, but it is not connected.
After working on 6002, which had the same lighting scheme, I realized that the little plug that was hanging loose was wired in series with the motor. With the plug loose, the engine will not run. The lighting module deals with the low voltage GOW bulbs. All that will have to come out when the loco is converted to DCC and replaced with more conventional lighting.
With the lighting module plugged in, the loco runs fine. It needs couplers at both ends but I used my last ones on 6002.
It was missing the side skirts for the fuel tanks, but I found them in a junk box at the club. It is waiting for a test decoder.
This one was configured similarly to 6002. I removed the custom lighting module and all the GOW bulbs and installed an MRC AD332 N scale decoder. This was a pain, because the black wire broke off during handling, but I figures out where it went and soldered on a new wire. This decoder may not last very long, the red and black wires are not stress relieved at all, they go on the diodes at the very corners of the decoder.
The loco ran well but had no couplers so I installed a set of club Kadee #5's. I also reattached the fuel tank skirts. This one is ready to test. I could not test it much on my layout because, like 6002, it grinds and groans on my 18" curves.
SP 6003 worked well during test, it is waiting for a better decoder and more testing.
I tossed the MRC AD332 that was in there and put in the last DH121. It'll go back to LAMRS for more testing.
SP 6003 passed test today at the club so it got a headlight.
The club has elected to sell this one instead of investing in a better decoder.
I removed the decoder and couplers from SP 6003 so I could use the parts elsewhere. The headlight and DCC wiring are still in there.
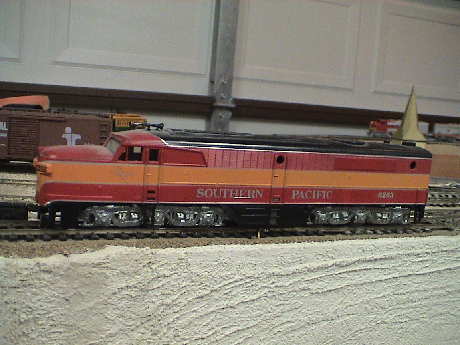
SP 6263 is remotored PA1. It is pretty noisy and does not run well although the current is not very high. The front coupler is missing, the rear is talgo mounted.
After cleaning the contacts from the trucks to the frame and lubricating the whole thing, it started to run better. It still makes some gear noise, but it's not real bad. The current is low. There are no lights.
At the meeting tonight, the club determined that they didn't need this loco, it goes to scrap.
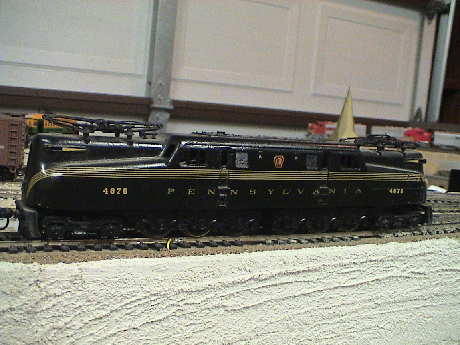
Pennsy 4876 is a die cast 5 stripe GG1. It hardly runs at all and the couplers need work.
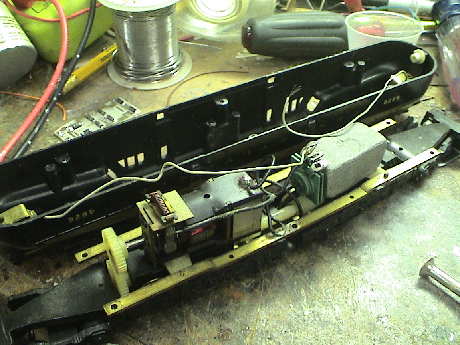 I opened it up and found that a headlight wire had wrapped itself around the drive gears and stalled the motor. After I unwound the wire, lubed motor, commutator and gearing, it actually ran. The current was less than 300 mA but the thing is really noisy. It is also REALLY old. That is a selenium rectifier in there for headlight directionality. I believe that this loco was built by Penn Line. The pantographs actually extend and retract but they are not set up to pick up power.
The loco tracks quite poorly, derailing often on turnouts. It picks up power on 3 brass wheels on each side. Since the prototype would never be found on a road like the GL&W and because it doesn't run all that well, I think that it ought to be sold. The motor would be easy to isolate to allow DCC conversion, but it's just not worth it for the club.
At the meeting tonight, the club determined that they didn't need this loco, it goes to scrap.
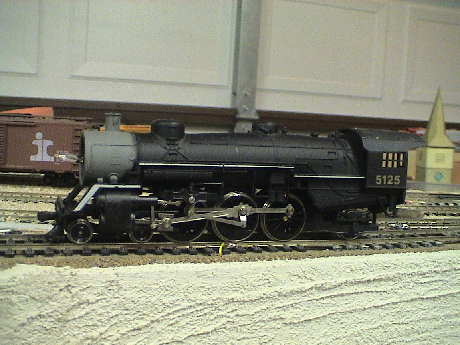
This Mehano Pacific loco does run, as well as it's limited power pickup allows. My son has one of these locos and that one runs pretty well once I jumpered the tender power pickups (for the rear headlight) to the loco. The loco is also missing it's smokebox front. I did identify a tender in the box that goes with this loco.
This loco has a speaker in the tender, it was attached to a long wire with a 3.5mm plug on it so it was probably set up as a static display.
I cleaned and lubricated it and it started to run quite well. As I had it open, I realized that it is probably an older version than the one my son has. His has a can motor and a flywheel. This one has an open frame motor and no flywheel, but there is ample room in the cab above the motor for a decoder. The tender pickups could be jumpered to the loco and it would have good power pickup, 8 wheels worth. The unit also has a smoke generator which could be easily jettisoned.
The only fly in this ointment is the missing smokebox door. However, a version of this loco is still being made so we could probably order an appropriate part from Mehano.
With a smokebox door, I think that this one is a keeper.
At the club meeting last night I got direction to look for a part for this loco so I sent an email to Mehano looking for a smokebox door for a current production loco like this one which is still in production.
I have had little response from Mehano. I may have to make a smokebox door for this one.
I went ahead and installed a DH121 test decoder in the Mehano Pacific so that I could see how it actually runs at LAMRS. The decoder is mounted inside the loco, on top of the motor. I also cut out the headlight and smoke unit. If it fails to make the cut, then the missing part will be unimportant. Part of doing the DCC upgrade is jumpering the tender to the loco which picks up power on only four wheels by itself. The tender has pickups on half the wheels so that will add another four which may be good enough. If the loco works well enough, I'll add the headlight back in.
While testing the DCC installation on my layout, I noticed a problem. At low throttle settings, the thing would just buzz. It took about half throttle before it started to move and then it took off. I opened it up again and realized that the motor was shorting at low speed and current limiting the decoder. I had not seen this before on DC. As the motor spun, a ring of fire would develop around the commutator. At this point, I realized that the motor was near dead. I pulled the decoder and converted it back to DC. It does the same thing on my bench supply. It does not draw a lot of current, but it does still spit fire from the commutator. This one is scrap.
The next few locos are diecast steamers. These all use the tender for pickup, only one of them has a tender attached. There are a bunch of tenders in the box that these came in. I have been able to match tenders to all but one of them. There is an extra tender but it is way too big for the loco that doesn't have one, number 87.
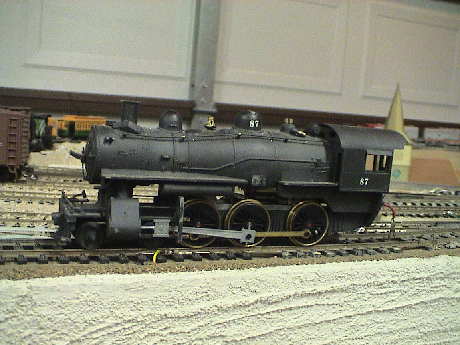
This is the one without a matching tender. Ten Wheeler 87 has some body damage and some broken and missing detail parts. It does run, drawing about 400 mA when the wire dangling out of the cab is touched to a rail. There is some motor noise but it clearly needs lubrication which may help.
I cleaned and lubricated the loco and test ran it on the bench. It draws about 200 mA light, over 400 mA loaded (with my finger). It picks up power on 3 engine drivers. I don't have an appropriate tender for it and it will need a drawbar fabricated.
It is missing some details (headlight and numberboard) but it is otherwise in good condition. There is no visible valve gear.
At the meeting tonight, the club determined that they didn't need this loco, it goes to scrap.
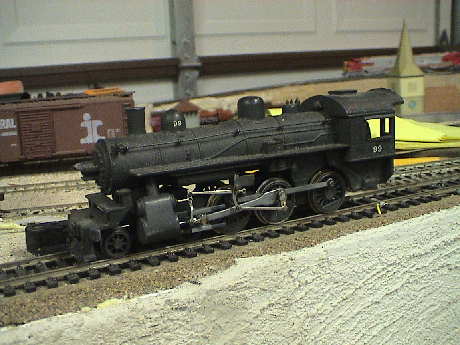
99 is a die cast Ten Wheeler. It does not run at all. It's bodywork is in better condition than 98.
After matching a tender to the loco and building a new drawbar from styrene, then doing a full lubrication and a bench test, I managed to get the thing to run. Unlike 98 which runs with lots of noise, this Varney loco runs quietly and smoothly... when it runs. The power pickup is very flakey and unreliable. I am afraid that this loco is evilBay bait too.
Last night at the LAMRS club meeting I retained 99 for more work. However, this morning, it was having serious motor problems again so I elected to give up on it for cause. It'll be returned for disposal.
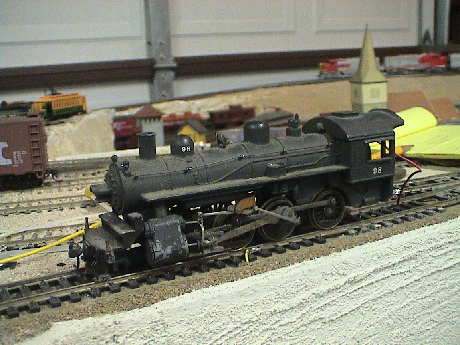
98 is another virtually identical Ten Wheeler to 99. It tries to run, but the mechanism is very gummed up.
After lubrication and run in on the bench, I got it hooked to a tender and ran it on the track. It is very noisy under any kind of load and tends to derail. Sell this puppy.
At the meeting tonight, the club determined that they didn't need this loco, it goes to scrap.

This Mantua Pacific is another die cast loco that does not run.
I located the tender that was intended for this one and then started to work over the loco. The commutator was just not working. After a lot of gentle turning of the motor with a toothpick and lubrication of the commutator with conductive oil, I was able to get it to jerk a little, then a little more and finally it started to run. A complete lubrication and run in was done on the bench. I then cleaned all the wheels, connected the tender and it ran. Actually, it ran very well. It is quiet and smooth and the power pickup is better than any of the other steamers by a lot. It still has problems on insulated frogs (headlight flickers) but on regular track, it seems to do ok. It MIGHT do well enough on the club layout. It draws 400 to 500 mA running light. When restrained from moving, it doesn't slip, it stalls. This is either an indication of very high traction, it is heavy, or low motor torque. Still the stall current isn't high enough to threaten a good decoder. DCC conversion may be complicated by motor isolation issues, but it has been done on similar locos. We need to talk about this one.
The rear coupler is in spec but there is no front coupler, a pocket for one would have to be machined out of the pilot casting.
At the club meeting, I retained 5322 for a possible test conversion to DCC. I really expect that this loco will eventually not make the cut, but I have elected to make it a "project" loco just because I have never converted a metal steam engine and it was the best running of all of the old steamers by quite a margin.
The loco wheels were packed with greasy crud so that I may not have cleaned them as well as I thought. That helped the power pickup a little. It does not stall running light on my HO layout even though it does intermittently lose power at times.
My HO track had some vertical gradients that this loco was sensitive to. At one point as the loco crested a grade at a turnout, the pilot truck would derail about half of the time. I added 1/2 oz of stick on weights to the top of the pilot truck as it was really light. However, one of the weights interfered with a screw and tended to lift the front of the loco as it was entering downward vertical gradients. I ground the weight AND fixed that piece of track, the dip there was just not acceptable. After all the fudging, it now makes it all the way around consistently without derailing or hanging up.
The power pickup will require some work. The unit actually tries to pick up power on the blind center driver on the engineer's side, but it usually doesn't rest on the track anyway. It really needs more pickup on the engineer's side as only two wheels are actually working there. However, there are no other metal wheels on the engineer's side that I can use. The power pickup probably won't get any better than it is, which is marginal and not good enough.
Further, testing under a load of a freight train reveals that the loco has motor torque issues and it tends to stall under load. This will be rough on decoders as the stall current is higher than 2 amps.
I have to reluctantly declare this loco unfit for service as well. It'll go back to the club for disposal.
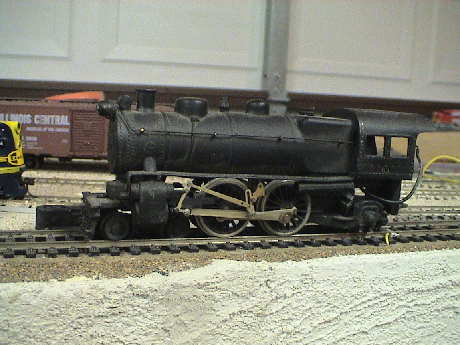
Pennsylvania 63 is clearly an E6 class Atlantic. It does not run.
After cleaning it up an doing a complete lubrication, I got it running on the bench. However, the drive gear looked a little worn. When I attached it's tender and put it on the track, the worm just spun over the drive gear. It can't handle any kind of a load. This one is toast.
At the meeting tonight, the club determined that they didn't need this loco, it goes to scrap.
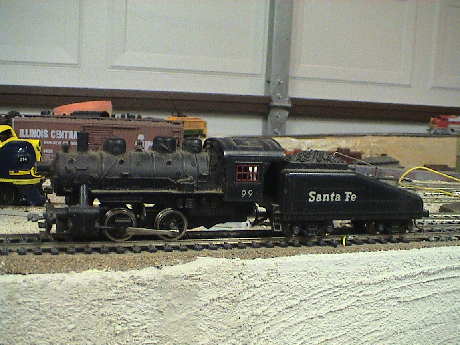
ATSF 99 is a diecast 0-4-0. This is the only one that came with it's tender attached. It sort of runs but clearly needs lubrication. The front coupler is a dummy, the rear needs work.
I cleaned all the dried grease off the drive gear, lubed the gear and motor bearings, lubed the commutator and cleaned the wheels. The loco actually started to run pretty well. After a few minutes to stretch it's legs, it calmed down and ran pretty good. That's the good news.
The bad news is that since it has only two wheels on one side picking up power and four on the other side, it is sensitive to track disruptions and it will always be so. The current dips as it goes over each of the insulated frogs on my Atlas turnouts. The motor is very hard mounted to the frame and would be difficult to isolate. The front coupler would take some work to change out to a functional one.
As much as I like this little loco, I think it would live a happier life on somebody's DC layout.
At the meeting tonight, the club determined that they didn't need this loco, it goes to scrap.
[ Top ]
Birk Binnard graciously donated his layout to the club. Lloyd, two other club members and I went up to his house and tore it down this morning. We recovered the rolling stock, track, turnout motors, trees and buildings along with the DCC system. The rest was cut up for scrap. There were 9 locos in the batch, only two ran and hesitantly at that. All of them have plastic couplers where there are couplers at all.

This Bachmann Consolidation had some minor body damage (the whole pilot assy was loose) but that has been repaired. At first it didn't run at all and the decoder did not respond. However I found that it would analog convert after some minor thrashing on the gear train. This implies that the motor brushes were not making contact. This same problem appears to afflict many of the locos in this batch, without a motor connected, the decoder cannot respond to the command station by driving a pulse of current through the motor.
I did get it running but the pony truck tends to derail easily. This one will require some more work but it is probably a keeper.
DecoderPro cannot read back the decoder type on this decoder so I assumed that it was an NCE decoder, many of the early ones do not support CV7 and CV8. I peeled open the tender because that is where I thought that the decoder might be and it was there. It is an NCE D102EU. Once I told DecoderPro what kind of decoder it was, it was able to read the decoder. I reset the addresses to 3 and 2784 and left it in 4 digit mode. This is an older decoder with a low switching speed so it buzzes some. The decoder is also a 28 step decoder but it does respond to 128 steps, perhaps in "direct drive" mode similar to the Wangrow decoders.
The decoder supports reversing headlights but there doesn't seem to be one installed in this loco. It may be there but I didn't see anything and it didn't work.
The couplers are plastic.
The tender shell isn't held on very well, it comes up easily at the front and releases with two clips at the rear. I haven't been inside the loco, I was able to lubricate it from the outside and by removing the bottom cover to reach the drive gear.
This one ran well at the club but it makes a clunking sound at low speed. I need to figure out what is causing that. It needs a headlight installed.
Over the last few days I've been slowly prying my way into this loco to find the clunk and to fix the headlight. The running gear comes off this loco relatively easily leaving the O-ring driven worm gear in the boiler assembly. The drive train moves easily enough by hand, I have not been able to locate a source of a repeated, one bind per driver turn, problem.
I also have not figured out how to get the smokebox apart so that I can work on the apparently non-existent headlight. It acts like the whole boiler assembly is glued together. The pilot assembly also fell off again but I'm not going to mess with that now.
After much fiddling, I did not figure out how to get the boiler apart, it appears to be glued. There is a hole in the front of the smokebox door behind the headlight which I assume is for a GOW bulb that is either gone or pushed inside. I cannot see any light coming from inside.
I did test the engine assembly on the track by pushing in both directions to see if the drivers bound. At some times, there was a little binding but after the lubrication that I added to all the motion worked it's way into place, the binding virtually vanished. I also replaced the missing screw that held the tender shell on so now it stays in place.
I put the loco back together and test ran it. All the tendency to clunk or bind is gone. However, the motor reacts to the low switching frequency of the old NCE decoder by buzzing annoyingly. This thing needs a "silent" decoder, preferably one with BEMF. The pony truck derails every time on the two tightest curves of my test layout. The curves are under 18" for short distances. This is because the pony truck has limited motion and it interferes with the cylinders. Somebody has ground away at the cylinders before to make more clearance but it isn't quite enough for my layout. This won't be a problem at the club as the minimum curves are MUCH wider than 18" and it runs on 18" curves well enough.
It's time to return this loco to the club for more testing and disposition by the board. If the missing headlight is a show stopper, then it maybe somebody else can figure out how to get it apart. If the lack of a headlight is acceptable, then the thing runs smoothly enough to deserve a better decoder.
This one got tested at the club tonight and passed operational tests. The club didn't think that the non-operational headlight was that big a deal so I'm going to fix the pilot, change out the couplers and we'll retest it later.
I have managed to install a Kadee whisker type coupler in the pilot. The Kadee was a few mils thicker than the Bachmann EZ-Mate coupler that came out so the coupler pocket required a little filing, but it fit. A whisker type Kadee fit on the tender without difficulty.
After reinforcing the pilot mount with a chunk of styrene attached to the frame and pilot with Zap CA, the pilot seems secure enough and the coupler is at the right height. The loco now runs well enough but it could use a better decoder. The low PRF of the motor driver causes the motor to growl and buzz in a quite annoying fashion. The loco could also use a sound decoder, the club has a few SFX064D sound/function decoders in stock.
I'll return this one to the club at my next opportunity to submit for retest and certification.
I ran this one on the layout before the OPS session today and it did fine. I left it for certification.
I investigated the installation of a Digitrax SFX064D sound decoder in the tender and it became obvious that it wasn't going to fit. The existing Bachmann interface board and the existing NCE DCC decoder took up all the room in the back of the tender. The tender shell mounting post consumed the sweet spot in the front half. The sound decoder would not fit sideways, either across or up and down anywhere. The speaker would not be a big deal, it could go under the coal load. If we want to install sound in this loco, it will take a combined sound/motor decoder like a QSI, Tsunami or ESU LokSound v3.5 or Select. One of these could go where the existing NCE decoder is.
Last night, I returned 2784 to the club and tried to test run it before I put it back in Steve's ToDo box for certification. It shorted the track. The short was in the tender. I brought it home to see what happened and I found that a wheelset on the rear tender truck had been reversed. This shorted the track within the truck itself. I reversed the wheelset so that the rear truck was opposite the front truck and the short cleared and the loco ran. It'll go back for certification next week.
B&O 2784 was not an easy conversion. I hadn't noticed before, but whoever installed the NCE decoder in it soldered the wires directly to the socket, ruining it as a socket. I solder wicked it out and installed two rows of 4 SIP pins to make a new socket. Then I could plug in the DH163PS that the club purchased for this loco. It runs fine.
After 18 months, this one came back with a bad order tag of "slow." It was slow and unsteady. It drew a lot of current, about a half amp, and as it ran, it sped up a little and the current went down. This is clearly a load issue. Something is not running free.
The bottom end of the Bachmann 2-8-0 comes off easily with three screws. The drive train separates at an O-ring driven worm and the mating gear. With the bottom end off, it was clear that some old lubricant had gummed up. The movement was really sticky. Since there is no other gearing or bearings in the bottom end except for the axles, I lubricated them with a bit of light oil and the mechanism immediately started to free up. I reassembled it and gave it a test run and it seems to do fine now.
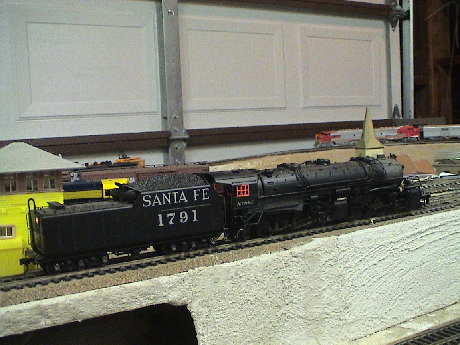
ATSF 1791 is a Proto 2000 USRA Mallet, a 2-8-8-2. It does not run or respond to the programming track.
This one had tender pickup problems too. It has an NCE D104AU in the tender, after the pickup problems were resolved, DecoderPro could read the decoder after being told what kind it was. I set the addresses to 3 and 1791 and left it in 4 digit address mode with analog conversion enabled.
A run test demonstrated that it needed lubrication. It ran very quietly but very slowly and drew a lot of current, varying between 1 and 2 amps on DCC or DC. As it ran, it started to speed up and the current went down, but it never really stabilized. I lubricated the lower engines, but I could not determine how to remove the shell to access the motor shafts for lubrication.
The tender shell just pulls off. The drawbar is attached via a clip, either push or pull to snap it on or off.
I managed to get the shell off, snap off the cab (remove handrails first) then remove a single screw under a dome in the center of the shell. The shell lifts off. I lubed what I could reach and put it back on the track, same story. Then it died completely.
There was 12 volts on the motor contact tabs but no motor movement. I took the motor out and it is open circuit. Apparently it had a bad motor all along as the gearing feels quite free.
A few days ago, I ordered a motor from Walthers for this loco. It was $25 plus tax and shipping and I ought to see it in a week or two.
The replacement motor arrived from Walther's today ($36.75 total) and I installed it immediately. The loco now runs very well. I changed out the couplers, adjusted the trip pin on the tender, checked the wheel gauge and put it in the box to return to the club for testing and hopefully, certification.
I tried the old motor again. At 4 volts, it ran slowly, drew nearly 1.5 amps and smoked. The new motor drew only 90 mA at 10 volts before I installed it in the loco.
ATSF 1791 ran fine in a short test at LAMRS, I left it for certification.
Steve hadn't got to certifying ATSF 1791 yet so I pulled it back to install a club supplied Digitrax SFX064D sound decoder in the tender. This is not the greatest sound system in the world and it typically hurts for sound volume, but it does work.
I mounted the supplied 1" 32Ω speaker on a piece of 30 mil styrene sheet hot glued and sealed under the coal load and drilled an array of 60 mil holes in the coal load. I glued on a combination of crushed Welch steam coal and black #10 chicken grit on the top of the load with JoAnn's Tacky Glue to help mask the holes. The balance of the tender shell volume provides the enclosure for the speaker. The decoder itself goes inside the tender shell and hooks to the power pickups which are parallelled with the engine. Both decoders are in parallel so that I have used the dual address trick (described below) on the decoders. Both decoders get a 4 digit address of 1791, the motor decoder has a 2 digit address of 3 and the sound decoder has a 2 digit address of 4. This way, they can be "split" apart in 2 digit mode to allow OPS mode programming. The 4 digit addresses can be set together to another address for the club either on the programming track or in OPS mode.
I finished the installation without a lot of difficulty, but the rear headlight stopped working. The headlight assembly mounts on two small brass tubes which are also the electrical connection. The wires from the headlight are threaded down the tubes and one, probably the short one, wasn't making contact. I bent the bulb leads a little so that they have to rub against the inside of the tube and the light worked again.
This thing is done, ready to certify and assign a club address to. I did not mess with the sound decoder programming at all except for the address. The chuff isn't 4 per driver turn, but the sound system cannot keep up at that rate anyway and it has no capability to do a dual chuff for the two engines anyway. If we want that, it will take a much better sound decoder to do it.
ATSF 1791 has seen some rough handling. I pulled it out of the cabinet to use at an OPS session yesterday and I found that the drawbar was broken. The bell was also gone and one side of the bell bracket was broken off. This drawbar clips over a post when pushed into the tender, but one side of the clip on the end of the drawbar was broken off. I could probably get parts for this loco but instead I fabricated a new clip from 0.025" music wire and attached it back to the drawbar with CA to hold it in place and then reinforced epoxy to secure it.
The clip has higher insertion and removal force that I recall from the original plastic clip. I tested the engine with the tender restrained and the loco at full slip. It did not disconnect.
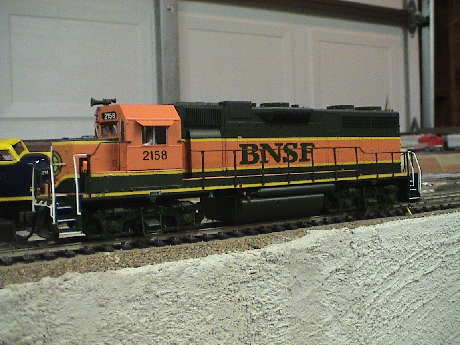
This Atlas GP38 reports an address of 58 but it does not run on DCC. It does analog convert and runs quietly.
This one responds identically to CSX 2121. It is an Atlas loco with a Dual Mode decoder. I reset the addresses to 3 and 2158 an left analog conversion on. The headlight responds to address 2158 but the loco does not run. Apparently, I am not talking to this decoder sweetly enough.
I have not been inside this loco yet.
The problem with this one is that it had an advanced consist address. I reset CV19 to 0 and now it runs well.
This one ran well and the club accepted it for certification. They will handle upgrading the couplers.
This one had been at the club for 3 years since the last time I saw it. It looks like it had been ridden hard and put away wet. The wheels were totally shot. Since I just replaced the wheels on ATSF 200C and I had 8 left over, I replaced the wheels on BNSF 2158 as well with NWSL solid nickel silver wheels. It runs much better now.
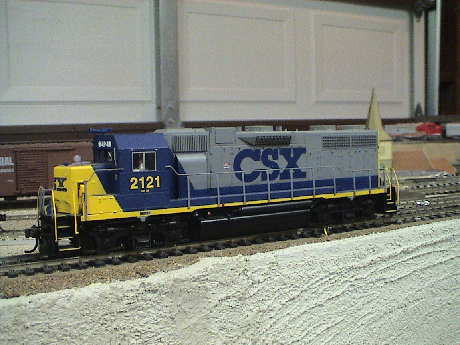
This Atlas GP38 reports and address of 21 but it does not run on DCC. It also analog converts quietly. The decoder reports itself as an Atlas Dual Mode.
I worked on this one but I did not get it running. I was able to read a decoder type with JMRI (Atlas Dual Mode) and read the whole decoder. I changed the addresses to 3 and 2121 and set 4 digit addressing. JMRI reports that this is a 28 step decoder. However, even status editing the Digitrax system to 28, or even 14, steps. I could not get the motor to run on DCC. The headlight does respond to F0 at address 2121 but not to direction commands. The decoder appears to have been built into this loco.
The couplers are an odd plastic configuration. They are built in two parts. It looks like a Kadee #5 will fit.
I have not been inside this loco yet except I pulled off the dynamic brake section of the shell to inspect the decoder.
The problem with this one is that it had an advanced consist address. I reset CV19 to 0 and now it runs well.
This one ran well and the club accepted it for certification. They will handle upgrading the couplers.
CSX 2121 was bad ordered for worn wheels. They are not as bad as some I've seen but they collect crud too quickly and the loco became unreliable about halfway through an OP session. It'll need $8 worth of Kato wheels which fit Atlas locos.
The wheels on this one just wore out and started collecting dirt like crazy. It got a new set of Kato wheels.
This one came back with a bad order tag of "no run." It ran for me, but not well. Something is making some noise inside. Normally, Atlas locos are fairly easy to get apart. This one is resisting disassembly. There are still some screws or clips that I have not found as the shell refuses to come off.
I retreated to the internet to find out how to get this puppy apart. I found instructions at the Atlas Support Site. There are 6 clips that have to be pressed inward. All can be accessed from the bottom (two under the tank, two each at the ends of the shell) and then the shell and walkways can be removed. The handrails should be pulled from the cab sides to prevent damage but I broke one anyway.
The loco was apparently straining under the load of the upper end bearings which were dry. I lubed all 6 (two on each gear tower, two on the motor) and it loco started to pick up speed after running for a few seconds to distribute the oil inside the bearings. After a minute, it seemed to be running fine.
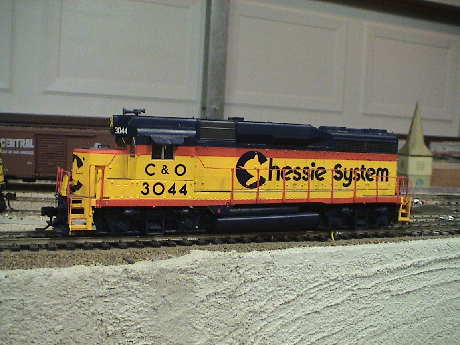
This Life-Like GP30 neither runs or reports the existence of a decoder.
I took this one apart to see what was going on. I found an NCE D104P2K decoder plugged into the same little adaptor board (with the same wiring issue) as ATSF 2790. Since this decoder doesn't use the incorrectly wired pin 3, I didn't modify the board.
I took the decoder out and plugged in a DC jumper plug and the loco ran, although with some significant bearing howl at high forward speeds. The decoder itself did not want to respond to the programming track in my 8 pin test fixture. It was reporting addresses, but it didn't respond to those addresses. I reset the addresses to 3 and 3044 then enabled 4 digit address and the decoder started to work. After lubing the motor and gear tower bearings, I reinserted the decoder and the loco ran well.
It'll need new couplers to meet club standards, the stock one work but are plastic. Kadee #5 couplers will fit right on.
The GP30 is fairly easy to get apart. Remove the couplers and pull off the fuel tank. Remove two small screws that hold on the shell.
This one ran well and the club accepted it for certification. They will handle upgrading the couplers.
C&O 3044 went back to the club for certification but it failed. It started making bad bearing sounds that it didn't do when I had it before. I took it back and verified the bearing sound and then lubricated it again, but from the oil that was around the gear tower and motor bearings, it had been lubricated already. I lubed it again just to make sure that I hadn't missed a spot and it still howled. Further, it started making a clunking sound when running indicating a cracked gear. This one isn't worth the effort to make right so I recommend disposing of it.
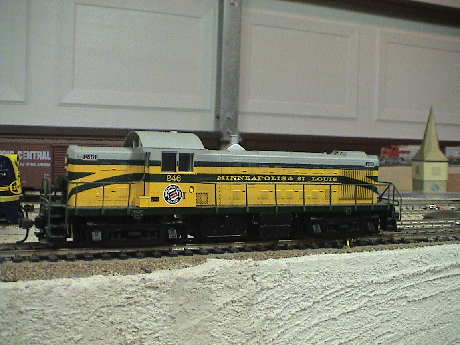
This Atlas RS-1 reports and address of 4 but it does not run on DCC. The headlight is on. It does analog converts but makes some pretty severe bearing noise, it will need lubrication.
I tried to get into this one this morning to see what was going on, but I could not determine how to peel it open. Somebody at the club probably knows the secret.
I pulled and prodded enough to figure it out. You just pull the shell off the frame (after detaching the handrails). It had an NCE decoder in it, but there was no model number on the PWB. Since the headlights were non-directional, I guess that it might be a version of a D102US. It appears to program properly but still won't run under DCC. I did lube it an the bearing noise went away.
The problem with this one is that it had an advanced consist address. I reset CV19 to 0 and now it runs well. NCE tells me that this is a very early v3.1 firmware decoder. It is of similar vintage to the DH155 Wangrow decoder.
This one ran well and the club accepted it for certification. They will handle upgrading the couplers. This is the oldest decoder of the bunch. It may need a better one but that will be determined later.
Minneapolis & St. Louis 246 took a drop in decoder. This was a DH165AO, a newer type than the DH163's that were used in a lot of other locos. I apparently got the decoder in backwards (I followed the one that was in there) as the lights were reversed and quite dim. I set the NDOT bit in CV29 to reverse and that got the headlights to match the throttle. Then I had to reverse the motor wires to get it to run in the right direction. The decoder supplies constant current for lighting and the default was 15 mA, appropriate for an LED. I had to cut a jumper on the decoder to get it to source 30 mA. The headlights are not overly bright, but they are visible. The loco runs very well.
246 ran unreliably at the club ops session today so I brought it home. All I found was incredibly dirty wheels. I cleaned them and it seemed to be fine.
The wheel cleaning wasn't enough. The wheels are simply worn out and collect crud at an alarming rate. The wheels will need to be replaced or the loco should be scrapped. Interestingly, Kato and Atlas wheels and gears are interchangeable.
This loco got new wheels tonight. The old ones were so worn that they just packed up that black organic stuff that contaminates the track. After about half way around, it would sputter. By the time that that it got all the way from one end to the other, the loco was almost unusable. With the new wheels, no problem.
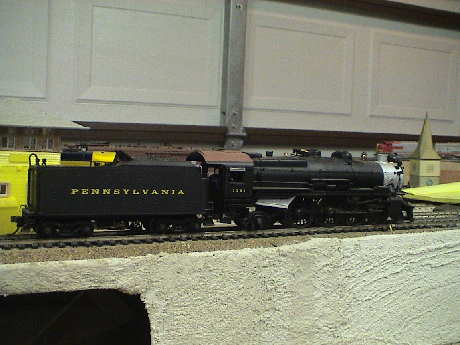
This Bachmann K4 Pacific reports and address of 2. Initially, it did not run, but it would sort of analog convert. However, it could not decide in which direction it should run. After thrashing on it a bit, it settled down a little on DC and started to run on DCC. Eventually, it started to run smoothly. However, the tender tends to derail on curves less than 18" radius.
The loco has an NCE D104 decoder wedged into the tender. It's address is set at 3 and 1361. I left it in 4 digit addressing with analog conversion enabled for testing. The tender shell can be removed via two screws underneath along the centerline. Be aware that it is not easy to get the shell back on until the decoder is settled into a position along a wall.
This one ran well and the club accepted it for certification. They will handle upgrading the couplers.
An 8 pin DH163 fit into the tender and the loco ran fine.
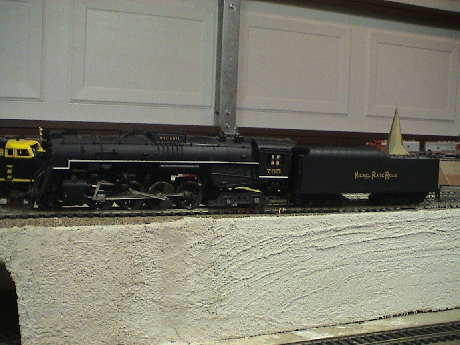
This Riverossi 2-8-4 neither runs or responds to the programming track.
This one had bad tender pickup too. It also is a plastic loco that uses the drivers and rear truck on the loco on the engineer's side and 4 of the 6 tender wheels on the fireman's side. The connection between the engine and tender is the drawbar. The big problem is that the drawbar pin on the tender was very loose and not making contact to the tender wiring. After that was fixed, it ran quite smoothly.
The decoder is inside the loco. It is an NCE D102EU. I had to tell DecoderPro what it was before I could program it. Along with the power pickup fixes, then DecoderPro could read the decoder. It is a 28 step decoder but it responds to 128 step commands. I set the addresses to 3 and 765 and left it in 4 digit addressing with analog conversion enabled.
This one will require testing on the layout to determine if it is reliable enough. It does not like my tight radius track and Atlas turnouts as it has no blind drivers.
The loco shell can be removed by removing a screw inside the smokestack and another large screw under the cab. Carefully pull out an end of two grab irons at the rear of the cab before removing the shell.
This one ran well and the club accepted it for certification. They will handle upgrading the couplers.
A club member had this one for replacement of the front coupler, but I found it with some other dead engines. The main drive gear has stripped or split or both. It no longer runs and is probably not worth repairing. I've moved it to the dead line.
Last week, we salvaged a crankpin from 765 to fix UP 841. I finally got information back from Hornby America concerning parts for Riverossi locos. The short answer is that there aren't any. Unless we can find another Riverossi junker to raid for parts, this one may be down for the count. I'm going to look at it to see if it uses the same motor brushes as UP 4005.

This Riverossi streamlined 4-6-4 also does not run. It does not respond to the programming track either. The headlight is on. The rear coupler is broken.
This is a model of the only streamlined Hudson that ATSF owned, it was the first in it's class. This one was called the Blue Goose.
This loco's problem is that it was not picking up power reliably enough. This is a plastic loco, but it picks up the right rail on the engineer's side of the loco on 3 wheels (one blind) and on 4 wheels on the fireman's side of the tender. The tender axle wipers were essentially not working until I "adjusted" them. Then it responded to DecoderPro and ran. It has a Digitrax DH141 28 speed step decoder in it although it responds to 128 speed step commands. I set the addresses at 3 and 3460 and left it in 4 digit mode with analog conversion enabled. Now it runs fairly well, it'll need evaluation at LAMRS to see if the power pickup is reliable enough.
I have not been inside the loco. The tender shell comes off easily by unscrewing the drawbar pin.
This one exhibited marginal power pickup at the club. It is not expected to get better without a lot of work and the club elected to abandon it.
This one was sold to a club member at the swap meet today.
[ Top ]
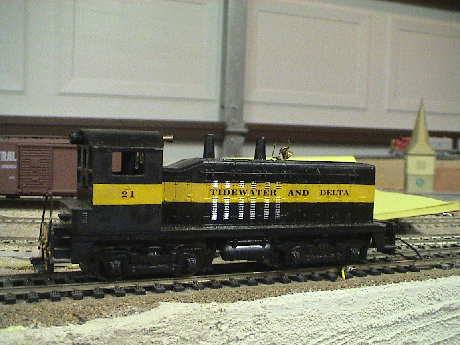
I picked this one up at the club meeting tonight and gave it a spin. It's a loser on many fronts. This is a die cast loco and it is fairly heavy, but it has only two wheels on each side that pick up power, further, they are brass. The loco was so badly gummed up that it didn't run. Actually, it was a dead short.
After I disassembled it I found that every bearing and gear was totally dry and the drag of just driving it by hand was very high. After lubrication with the two trucks removed from the loco, I was able to run it on my bench and it sputtered to life. The current was still hovering close to 0.7 amps which isn't good. After reassembling it, I put it on the track and it was shorted again. It was spitting fire from several points. The worst of these is that the metal truck frames on the front truck (the one with the motor) was mounted on an insulated bolster, but the truck frames were dragging on the brass screws that hold the insulator to the frame. There were sparks coming from somewhere else as well. I just gave up. This one goes directly to the dead line.
[ Top ]
The club found three more DC locos to evaluate, all Kato. These run well and are worth converting. Unfortunately, two of them have the same road number.
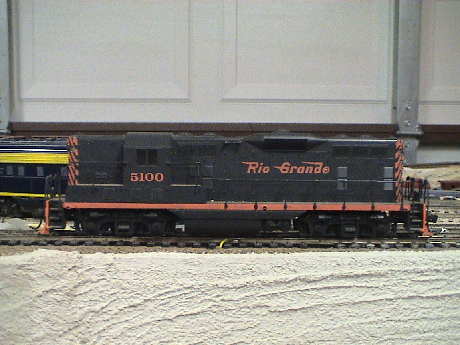
This one runs quite well with a medium noise level. It is in good condition except that both couplers have a large amount of vertical slop and need their mounting tightened up. The loco draws about 500 mA running light which is a little high but lubrication may bring that down.
This Kato loco has a similar structure inside, except the walkways are part of the frame and the shell lifts off. Some handrails need to be removed before pulling the shell.
This one has a single non directional headlight in the center and plastic light pipes to conduct the light to the headlights. There might be a drop in decoder board configured for this loco however, looking at the Digitrax and NCE websites, I don't see anything obvious.
After lubrication and run in on the bench, the current came down from 500 mA to about 270 mA with the headlight running.
Somebody had improperly mounted the couplers, installing the cover backwards on one end and leaving it out completely on the other. I corrected the coupler mounts and the slop went away.
This one got a "drop-in" TCS-A4X decoder. It as actually a "kludge in" as it didn't actually fit. The clear plastic light guides that lead to the original central headlight bulb interfered with the decoder. I had to adjust the position of both guides and grind down some of the front one to allow the shell to fit back on.
This loco got new wheels tonight. The old ones were so worn that they just packed up that black organic stuff that contaminates the track. After about half way around, it would sputter. By the time that that it got all the way from one end to the other, the loco was almost unusable. With the new wheels, no problem.
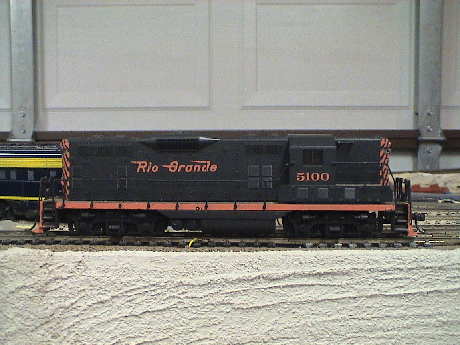
This Kato high nose GP9 is identical to the previous one but it's shell is loose and may need some adjustments or repairs. The couplers are mounted better but the front one doesn't center properly. This one draws about 400 mA running light. It's noise level is similar to the other one.
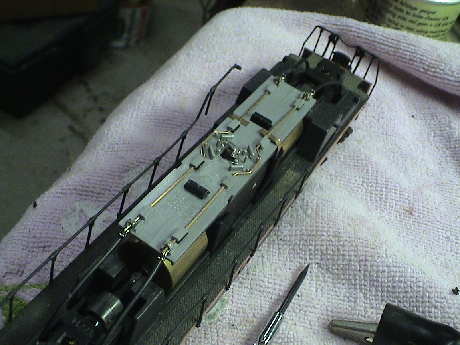
I lubricated this loco and the current came down to 250 mA. This is the inside, like it's buddy above, there may be a decoder to fit but I didn't locate one immediately.
The second one of the same road number got the same treatment.
This one got a "drop-in" TCS-A4X decoder. It as actually a "kludge in" as it didn't actually fit. The clear plastic light guides that lead to the original central headlight bulb interfered with the decoder. I had to adjust the position of both guides and grind down some of the front one to allow the shell to fit back on.
This loco got new wheels tonight. The old ones were so worn that they just packed up that black organic stuff that contaminates the track. After about half way around, it would sputter. By the time that that it got all the way from one end to the other, the loco was almost unusable. With the new wheels, no problem.
During the last OPS session, I saw somebody pick this loco up by the shell and it just lifted off the frame. I took it home and found that was was left of the clip that held the rear of the shell on was totally gone. I fabricated a new clip from styrene but I don't know how well it will hold up.
Since the last time I saw this one, somebody had renumbered it from 5100 to 5109 so that it wouldn't duplicate the other identical loco.

This is Kato GP35 that runs at lower current and more quietly that the two Rio Grande units. The front coupler needs to be shimmed upward a little and the front handrail fell off, but otherwise it is in good physical condition. It draws about 300 mA.
Somebody had installed Kadee #5 couplers incorrectly resulting in some slop at the front. Also the rear handrails are outright missing. I reattached some other loose handrails with CA and glued the shell to the walkways as the shell was a little loose. I also lubricated and tested the unit. The current came down to about 180 mA.
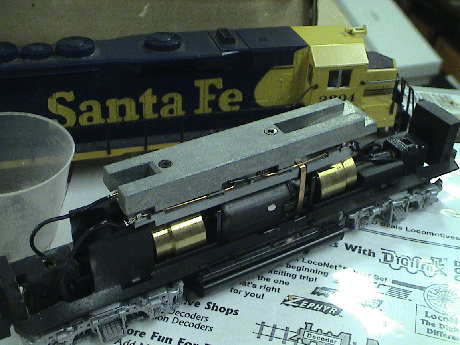 It is not designed to accept DCC but installation of a wired decoder will not be too difficult. The motor is a can motor with easily isolatable contact straps. The headlights are buried in the weight at the top, but they appear to connect to a small PWB with the direction setting diodes on it. There will be a way to isolate those also. There might be a substitution type decoder for this loco, some research is needed.
I didn't have any more drop in decoders and even if I used one, I'd loose the weight so I wired in a TCS T4X. I would have gone more smoothly if I had initially installed the decoder at the right end of the loco (rear) so I had to move it. The loco ran right off 2804and is ready to go.
The wheels on this one just wore out and started collecting dirt like crazy. It got a new set of Kato wheels.
Last night at a run session, I picked up four locos, three that I had worked on before and a new one that I found in the club rolling stock cabinet.
Southern Pacific 3343 is suspected of just having wheels that are nearly worn out. It rumbles as it runs as it generates acoustic noise and transmits it into the layout. It also stutters on dirty track that most other locos don't have serious trouble dealing with. Baltimore & Ohio 2784 has a short inside the tender. Amtrak 809 just didn't run very well.
Then there was a nice looking Pacific in the cabinet that had not been converted to DCC and doesn't show up on the club inventory. I took it home for evaluation.
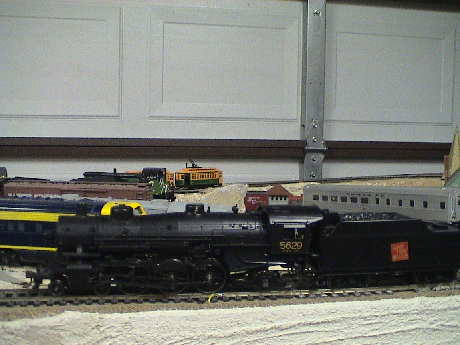
This one was sitting in the cabinet. I assumed that it was certified and put it on the track. It buzzed as it was not converted to DCC. This was obvious because there is a harness out of the back of the engine with a 9 pin JST connector and a jumper plug. There is a pocket in the front of the tender that looks like it is intended to accept a decoder. The tender does not have power pickups.
Unfortunately, this one probably has a broken gear as it makes a pronounced clunk once per driver turn.
I just found out that this loco belongs to an inactive club member so it is going back to the club.
I met the owner of this loco at the Open House today and we spoke some about his loco. He was unaware that it had failed. He gave the club authorization to fix it if we chose to. After playing with it a little more today, it clearly has a split and possible partially stripped axle drive gear. It makes one clunk per driver turn and when loaded it will slip at that point. I tried to get the loco apart to see what was wrong, but it didn't yield it's secrets. I'll work on it more later.
Athearn does not have parts for this loco, but apparently NWSL has the drive gear. It's $10 with $4 shipping. I am going to submit this loco to the club to invest $14 in to get it running again. Then it will need a decoder but at least the install will be easy. I also got disassembly instructions from Athearn.
I got this one back with a bad order tag of sputters. The loco was run in an OPS session yesterday and had power pickup problems. The wheels were dirty. A cleaning cleared up the problem.
C&O 3044 was returned for running noise issues. Check the link for details, but we elected to scrap it. There was another return and six other "new" locos that I found in a cabinet.
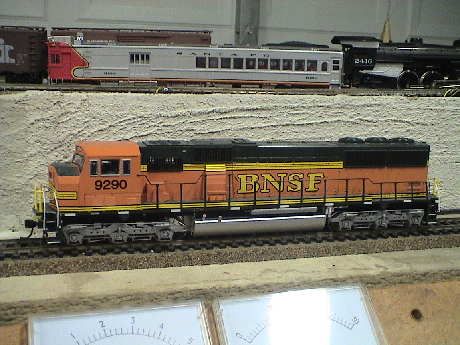
BNSF 9290 is an SD70MAC that had been club certified and used in OP sessions, but it didn't speed match very well and it started to display problems.
Without taking it apart, I can tell that it has an older decoder, due to the decoder buzz. It also has some bearing problems as it howls some. I'll get inside it later.
I peeled this one open and found a neatly installed Wangrow decoder inside. This is why the speed matching was no good. Unless the Wangrow decoder is "status edited" on the Digitrax throttle to 28 speed steps, it runs in "direct drive" mode and ignores all speed tables.
There was a dry bearing, lubrication of the motor shafts and the worm shafts solved that problem.
This loco needs a better decoder but otherwise, it's good to go.
I installed a DH163 into this loco and it ran, but the lights don't work. The decoder works in my test fixture. I did a little testing and it appears that the bulbs are both bad. Also, the dry bearing started acting up again so I'll need to do some more lubrication.
I recall that there was one gear tower bearing that was not easy to get to (the very front on is encased by the weight) so it didn't get lubricated the last time. It was the one. I partially removed the weight and touched it with some oil and the bearing noise ceased.
Both headlight bulbs were burned out, I replaced them with club supplied incandescent bulbs. This one is now ready to go.
The bearing noise returned so I lubricated the high speed bearings and the noise went away... again.
This one came back with lugging and bearing problems again. Maybe this time it is time to recover the decoder and scrap the loco for parts.
I took one more whack at this one. On my test track, it drew too much current (400 mA) and was sluggish. Further, within a couple of running distance, it started to whine. There is a dry and probably worn out high speed bearing. There are 6 of them, two on the motor and two on each gear tower.
I started by lubricating the motor bearings one at a time. There was no improvement. Then I went to the front truck and lubricated the rear gear tower bearing, there was some improvement, but by listening to carefully to the loco, I could tell that the noise was coming from the rear gear tower. I lubed the forward bearing and the noise improved and the loco started to run smoothly, but it still whined some. After hitting the rear bearing on the rear truck, the whine went away.
This loco is in very good condition except for the bearings and it doesn't have a lot of miles. I suspect that whoever bought this loco new didn't lubricate it and wore it out quickly. In any event, the bearings will probably have to be replaced. Fortunately, this Proto-2000 loco (labeled as Life-Like) uses common square bushings which the club probably has in some other loco in the sell box. It will not be extremely difficult to replace them.
It came back again with the complaint of noise. This is not surprising, it needs new bearings. I took it back to the club for storage and somebody probably tried to use it. I think that I'll keep this one at home until I find some loco or hulk that I can raid for some gear tower upper bearings.
I tore into 9290 and ran it without the shell. At first, it was all bound up and didn't run. Then it sort of ran, then loosened up some, then started to whine pretty loudly. I could tell that the loudest of the noise was coming from the front truck. It was a pain to drop the truck, but I did it and removed the worm assembly. The end bearing was all gummed up and the other one wasn't a lot better. I cleaned both with alcohol and then relubricated them with new oil. Now the bearings turned easily and didn't show signs of inordinate wear. After reassembling the front truck and testing the loco again, it was still whining, but the remaining whine was coming from the rear truck. Working on the rear truck was a little easier and I found much of the same issue. Whatever lubrication was in there from long ago had gummed up and needed to be removed and replaced. I reassembled the loco again and it ran, a little hesitantly at first, but after a minute or so it smoothed out and started to run properly.
I still don't completely trust this puppy but I'll return it to the club to see if it misbehaves further.
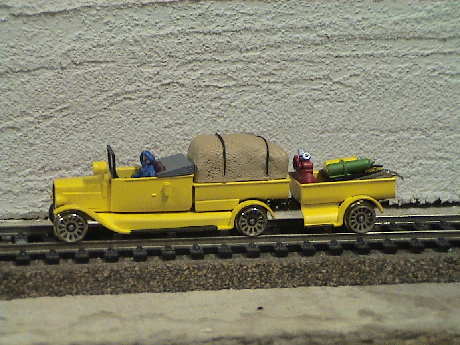
This one is kind of unique. It's a brass and diecast inspection car with a trailer. It actually runs pretty well but with some noise. There is room underneath for a Z-scale decoder.
This car has only 4 brass wheels that pick up power but it seemed to do well on my Atlas insulated frog turnouts. This car is a novelty item that would only fit into the club's Period 1 and 2 operating plan if the dispatcher sent it out as an extra in a effort to "clog" up the works and add some operating "excitement." I personally really like these little self powered things.
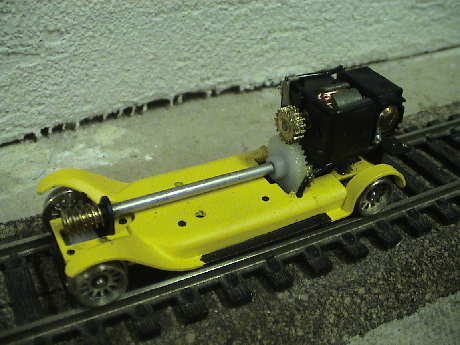 I opened the inspection car up to provide access to more bearings and the motor so that I could lubricate it better. The thing is very simple and both motor leads are via wires so that a DCC installation would be a piece of cake, a four wire installation. The decoder would be taped underneath the frame.
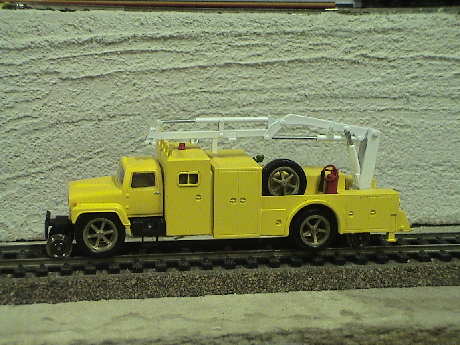
The more modern Hi-Rail truck is a Period 4 version of the inspection car. Unfortunately, it does not run as well as the inspection car, it would stall on every insulated frog on my layout. The brass railroad wheels are used to support the truck and pick up power, but the unit is actually driven via the tires on the rear axle, just like a real Hi-Rail truck. It could also be used in a modern period OP session for a little variety. Mechanically, it seems fine and it is brand new.
However, when placed on the LAMRS layout against other truck models from the same period, it looks large, maybe as large as S scale. The club has tentatively elected to sell this one.
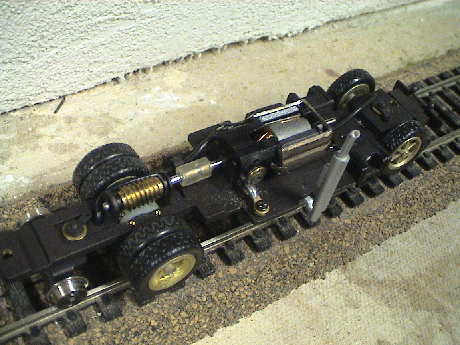 I opened the Hi-Rail truck too to see what it would take to install DCC and lubricate it better. This one too would be easy. A Z scale decoder would fit nicely under the "hood" and the wiring would be straightforward.
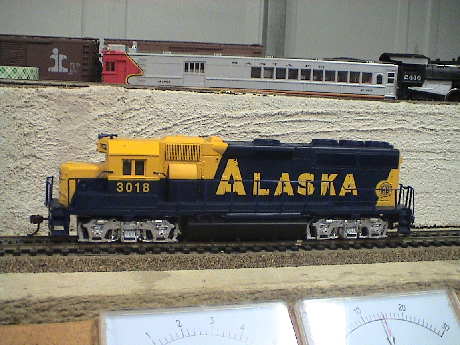
Alaska GP40 3018 is a new-in-the-box Bachmann DCC equipped loco. This means that the decoder is crummy and won't speed match worth beans. It made a lot of noise out of the box but after a lubrication, it quieted right down and runs quite well. The internals are essentially identical to a loco that Marvin has.
The decoder itself is built into the loco. Either a "drop in" designed for Bachmann locos would have to be installed, or the whole board ripped out and replaced with a wired decoder. There is no socket for a plug in decoder.
At the OPS session last Sunday, the club elected to sell this loco as it will take more work to get a decoder in it and the club already has several GP38's and GP40's in more appropriate road names.
This loco was sold to a club member at the swap meet today.
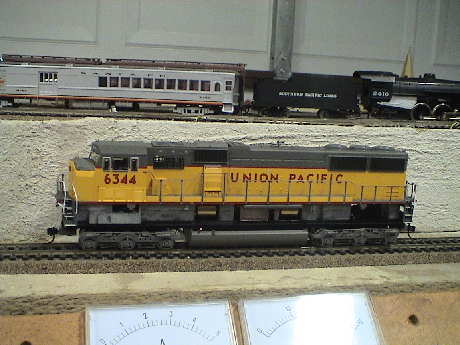
The Proto2000 SD60M came in a factory box with the shell detached. I just set it on the loco for this picture. It wouldn't fit all the way on without removing the couplers.
This one didn't run out of the box. A visual inspection revealed that the gray wire leading to the motor was floating in the breeze. I soldered it back to the motor tab and it ran, sort of. The thing was all gummed up from probably years of inactivity. It drew over 800 mA and ran slowly. I backed it down to a crawl and let it go for awhile. The speed picked up and the current started to drop. After 5 minutes of running in both directions at a variety of speeds, the current dropped to 300 mA and the maximum speed moved into the normal range.
The unit needs a decoder. There is a small PWB with the lighting circuits on it that will have to come out to make way for a decoder with an 8 pin plug. The headlights will also have to be changed out to 14 volt bulbs which we have.
I changed the 1.5 volt bulbs to 12 volt bulbs. There were three, I didn't install a new one for the front numberboards because I ran out of bulbs. The old lighting board got tossed so that I could flip over the socket and plug the DH163PS in. It was a little sluggish again, I lubed it and it did better. It still needs some break in before it gets speed matched.
UP 6344 came back with the report of howling. This was the same as a bunch of older Proto2000 and Life-Like locos recently. Whatever lubricant was being used at the factory doesn't stand the test of time. It gets sticky and does not dissolve in new oil so just oiling the bearings only helps for awhile. I had to disassemble the truck upper ends, remove the worms and bearings and clean the whole works in alcohol to dissolve all the old goop. I then re-oiled and greased the bearings and worm and reassembled it. Then it ran virtually without a sound.
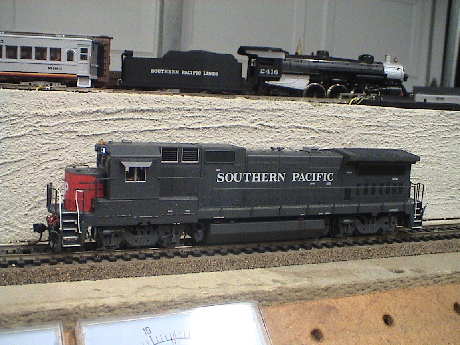
This Atlas B40-8 has an Atlas Dual Mode decoder in it and it ran fine right out of the box. All it needs is a decal to assign a road number.
I was told that the loco has been numbered 8027 as there actually was one with that number. It got certified and is in the cabinet.
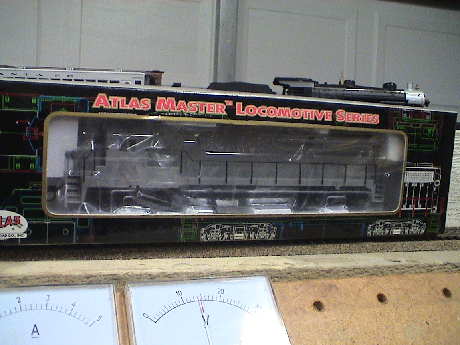
This is another Atlas B40-8 but undecorated. The box is still sealed and I elected to not open it. It also has an Atlas Dual Mode decoder in it and it likely runs, but testing it would reduce it's resale value. Painting and assembling the loco would take a lot of work and we have several B40-8's already.
At the OPS session last Sunday, the club elected to sell this loco without removing it from it's packaging. See how hard it has been to get somebody to just letter a loco, getting it painted, assembled and lettered will not likely happen. The club will sell this MINT condition loco instead. We already have several B40-8 locos in club stock.
At the OPS session at the club today, I picked up three more locos. One had been converted but didn't run well, one that did not run and one new in the box with a set of 6 auto racks.
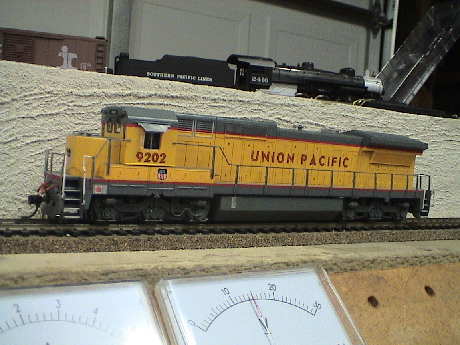
UP 9202 is a previously converted C40-9 club loco that was given to me because it did not run right. Something was very odd about this one. It ran, but slowly and it made almost no power. It would not slip it's drivers and sometimes would buzz but not even start until given a push. The lights did not work.
It had a Digitrax DN121 in it. I substituted a DH123 and it ran fine but only the rear headlight worked and in the wrong direction. I tested the DN121 and it seemed to respond so I simply reset it (CV8=8) to the factory settings and tried it again. Then the loco ran properly so that something was really messed up in the configuration of the decoder. I don't know what someone could do to a decoder to make it act this way, but it was way different that before. However the lights still didn't work. This is an indication that the decoder was plugged in backwards. I reversed it and the lights started to work, but the loco ran backwards. By playing with the motor leads, I got the motor to run in the same direction as the lights, but it was still backwards with respect to the throttle so I set bit 1 of CV29 (Normal Direction of Travel) to 1 (reversed) and then it ran in the direction indicated by the throttle AND the lights agreed. Something is very odd with Bachmann's wiring. However, it runs now. The DN121 is an older decoder, we'll have to see if it can be speed matched with 128 step commands.
Even though this loco runs well, the club has elected to sell it. We just have too many modern UP locos.
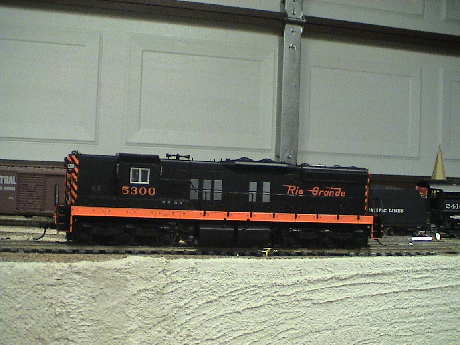
This Proto2000 SD7 has some serious wiring problems. It draws 2 to 3 amps on DC as it tries to run. The motor itself appears to be ok, run from a bench supply, it draws much less than an amp. The lights do not work, but the bulbs appear to be ok as they have a resistance of 45Ω. I'm going to have to work on this one some more, the source of the near short is not obvious.
After a little more looking around, it was obvious that the short was due to the funny lighting circuits that were there to deal with the 1.5 volt bulbs. I had no need for this stuff so I simply ripped all the unnecessary parts off the board and installed club supplied 14 volt GOW bulbs and a couple of wire jumpers to get the blue wire to the right place. I plugged in a personally owned test DH123 and the loco ran and the lights work. The harness for this decoder isn't quite long enough to allow it to reach into the cab area where an HO decoder will fit but it was sufficient to test the loco. This one will need a 9 pin JST decoder with a medium length 8 pin plug.
There are a few detail parts left in the box to attach, but this loco is about ready to go. It moves out of triage and into the club disposition bin.
There is only one visor in the box so I didn't attach it. The orange steps simply snap on, held in place by the air hoses. It is much easier to remove these pieces to lift the shell that the more typical method of removing the couplers. The shell snaps on anyway.
I tested the loco enough to know that it was going to work so I removed my decoder and converted it back to DC. It is awaiting disposition by LAMRS.
Rio Grande 5300 presented no difficulties, A DH163P went in easily and it worked fine.
This one came back with the front truck hanging out of the loco at an odd angle. The clip over the worm gear had apparently come off. The clip also holds the truck on. I disassembled the loco, snapped the truck retainer clip back on and reassembled the loco.
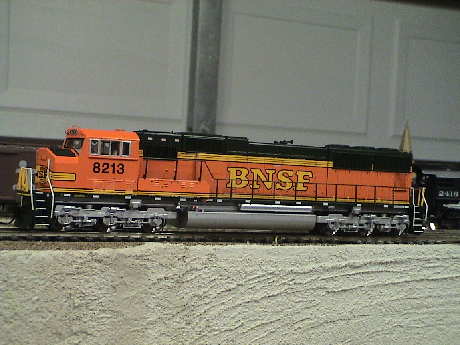
Jim had a club owned Athearn Genesis set of an SD75MAC and six auto racks still in shrink wrap. I did not evaluate the racks, but the loco runs fine. It draws about 300 mA running light and 400 mA slipping. It is quiet and smooth. The couplers are plastic.
It is set up for a drop in decoder, this would probably be the easiest way to deal with it.
Even though my notes here indicated that it needed a drop in decoder, I bought an 8 pin decoder for it. This one will have to wait for another decoder order to get an DH165AO or something similar.
A drop in decoder was ordered and has arrived, but I didn't pick this loco up the last time I was at the club. It seems to be hard to get the loco and the decoder in the same place at the same time.
I picked this one up at the club tonight and installed the decoder. I really don't like the drop in style decoders. Those little plastic caps are a pain in the backside and these didn't fit on the Digitrax decoder so I soldered the wires.
Note that the lamps are 1.5 V 15 mA bulbs, two in parallel in the rear, FOUR in parallel at the front. Two of them are ditch lights. Since the DH165AO is a constant current decoder for F0F and F0R, I cut the jumper to make it provide 30 mA and the lamps worked. However, I did not rewire the ditch lights, I just insulated the wires. I could have soldered them to decoder functions, but the members probably would not know that they were there anyway and if they are connected to available function pads on the decoder, they WILL NEED series dropping resistors of 1000 ohms each.
Then I discovered that the lights don't match the direction of operation and the rear lights stopped working completely. I have to figure this one out later.
It appears that the "30 ma" setting on the DH165AO is somewhat more than 30 mA as it didn't take long to burn out both sets of 1.5 volt bulbs. It would appear the the optimal current for the bulbs is 14 mA each at 1.5 volts based on bench tests. They were brighter in the loco. When one bulb blew, then the decoder shoved the whole 30+ mA into the other bulb and it died in short order. I replaced both bulb sets with 14 volt 30 mA bulbs that are about right for intensity and won't burn out. I also flipped over the decoder so that the right end was to the rear so that the headlights went in the right direction.
.I just do not know where all these things are coming from. At the meeting tonight, 6.5 more locos showed up in my bin for triage. Several of them were already destined for sale before I touched them, but I wanted to know if they ran so maybe we could sell them for a little more if they did. The half a loco was the shell of an SD40 and a box of hulks. I am going to try to reassemble that one from parts due to the custom paint job on the shell.
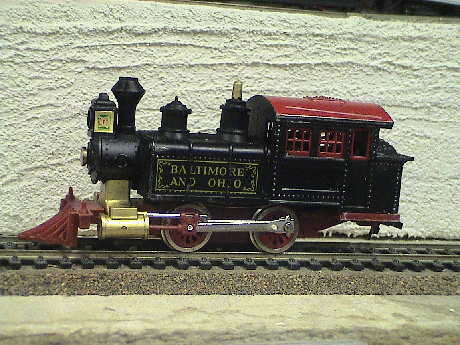
While we were cleaning up for the upcoming open house, I found yet more locos. This one does not run, the motor buzzes badly on the MRC9300 power pack and the gear train is loose. It is an obvious scrap case.
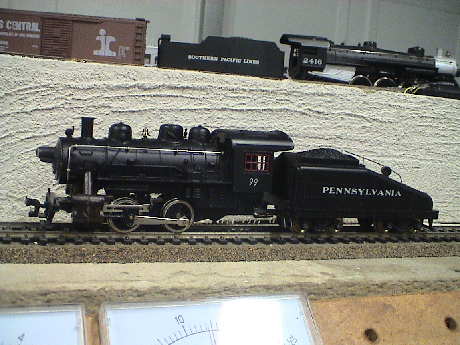
Pennsy 99 runs pretty well for it's limited wheel count on the track. However, it is going to be sold.
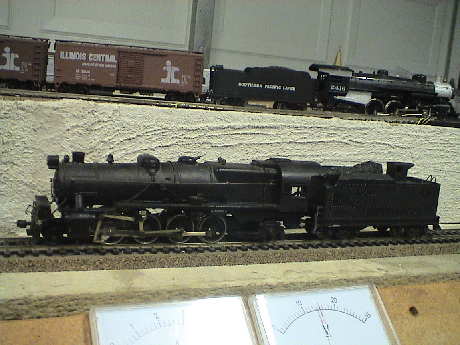
This obviously Pennsy loco is an L1s class 2-8-2. It is a heavy diecast model and actually runs fairly well, but the club is going to sell it anyway. It draws about a half an amp and makes moderate noise.
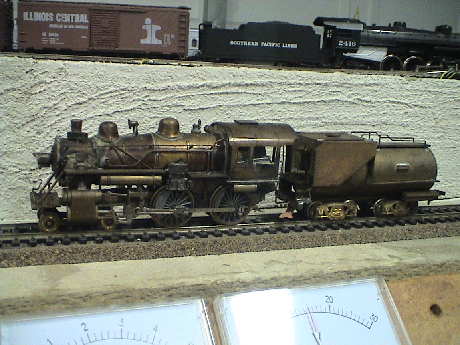
The box says that this is an SP loco from Continental Models. The price tag is $24.95 for a brass loco. This one is clearly pretty old. It wasn't assembled all that well either as the assembler obviously left flux on some of the solder joints. It runs but the one of the motor bearings is dry and it makes a pretty terrible screeching sound. It will be sold.
This loco was sold to a club member at the swap meet today.
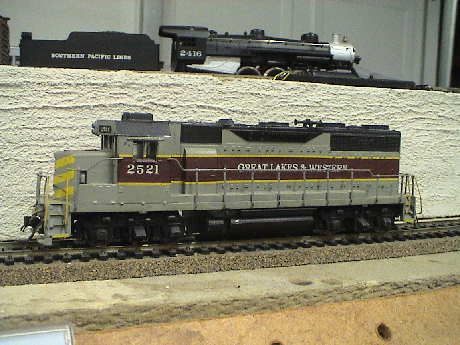
The Great Lakes and Western is the namesake road for the LAMRS. This is one of three locos painted in this scheme. This is a GP40 that has been remotored, it used to be an Athearn loco. It actually runs quite well and should be converted to DCC.
The club ordered a good decoder for this one, but it hasn't arrived so I did part of the wiring and installed a test decoder. It runs well but still needs lights and the final decoder installed.
I had to remount the motor as the remotoring job that somebody did in the past was falling apart. I attached the loose saddle to the frame with gap filling CA and the foam tape that held the motor to the saddle was replaced.
I bought some 14 volt 30 mA bulbs for the three GL&W locos, this one took 3 bulbs, 2 in the front and one in the rear. A DH163 replaced the DH121 test decoder without difficulty.

This SD45 is yet another GL&W loco. It has also been remotored and it runs fairly well for it's age. It should be converted to DCC. The couplers are not well mounted and will need some work.
I brought this one home to test again because Matt identified as one that used to wobble a little. It does wobble a little bit but not a lot. The problem is that the trucks rest against the frame on a small circular protrusion around the king post. This washer like surface is pretty narrow. It could be ground flat to widen the support base, but it wouldn't help much as the metal strip on the top of the truck that the surface bears against isn't much wider. Changing the geometry would also cause the truck to degrade it's rough track tracking capability. I elected to leave it alone and just put up with the minor wobble.
I wired a test decoder, a DH121, into this one. It works but still needs the final decoder and lights.
I bought some 14 volt 30 mA bulbs for the three GL&W locos, this one took 3 bulbs, 2 in the front and one in the rear. A DH163 replaced the DH121 test decoder without difficulty.

This custom painted GL&W SD40 shell and frame has no trucks and probably no motor. However, I have a box of basket case locos and I am going to try to assemble what is missing from parts. The trucks won't be right, but sometimes loco trucks got swapped with parts from wrecks. This one may take a while to complete.
I found that the Atlas type frame had been remotored with Athearn type ball joints in the flywheel. The motor was good but the trucks and drivelines were missing. I found another identical Atlas frame that had flexicoil Athearn trucks on it. This was obvious, use the Athearn trucks. However, I didn't have enough driveline parts among all the hulks to make things reach. Apparently the motor was installed off center so that the driveline was compressed on one side and expanded on the other. So I glued the slip joint drive shaft in one of the ball joints so that it would reliably reach to the other end.
One truck was missing three wheelsets so I took the last three that were still left on the hulks (after I had raided them to fix other locos). All three were cracked. Further, the ones on the other truck were cracked too. I installed them anyway.
The initial track test was a short. The cracked gears were not holding the wheels in gauge and several were badly undergauge such that the half axles intermittently touched inside the cracked gears. I reset the gauge (it is not stable but it was a test) and the shorts went away. However, the loco clunks like crazy and sometimes jams. I will need 6 good wheelsets. I'll either raid them from one of the locos destined for sale or maybe we can get new ones from Athearn.
I got some replacement gears for GL&W 3041 (Athearn #60024, $4.98 for a package of 6) and replaced them all. All the clunking went away and now the loco runs well.
I wired a test decoder, a DH121, into this one. It works but still needs the final decoder and lights.
I bought some 14 volt 30 mA bulbs for the three GL&W locos, this one took 2 bulbs. A DH163 replaced the DH121 test decoder without difficulty.
GL&W 3041 also had no couplers. It took a standard Kadee #5 on the rear and a long shank version on the front. Fortunately, the last two club supplied couplers that I had fit this loco.
While we were sorting things out for the Open House and swap meet tomorrow, I found four more locos in older sell boxes. These are all clearly from train sets and none is worth the powder it would take to blow it up. They go in the sell bin, but it might be really hard to sell them.
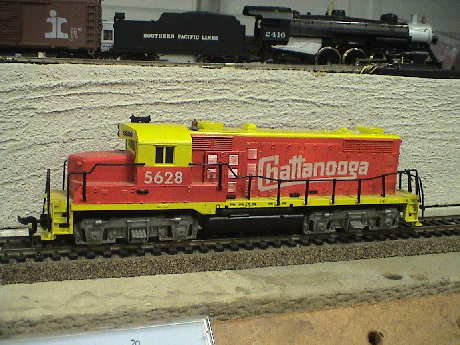
This Tyco loco is a road switcher of some kind but it doesn't look like any real loco. It's close to a GP7 but a lot of detail is wrong. Further, it runs for crap. It is 4 wheel drive, picks up power on only 4 wheels and it makes a lot of noise.
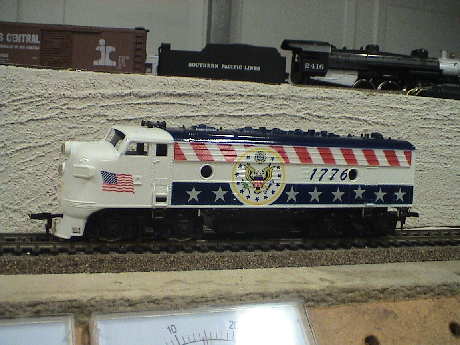
This Life-Like F7 is also only 4 wheel drive and it is very noisy.
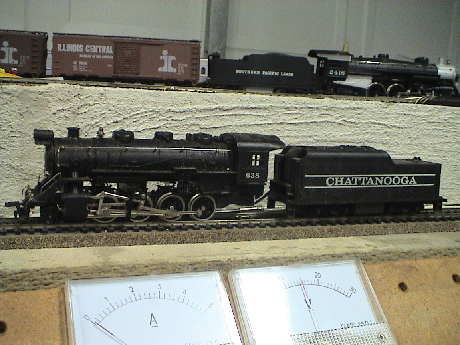
This ALM 2-8-0 does not run. The motor is in the tender, the loco freewheels. It has oddly arranged drive wheels. The center two axles are driven (but they don't work) and the end two axles are arranged like pony trucks.
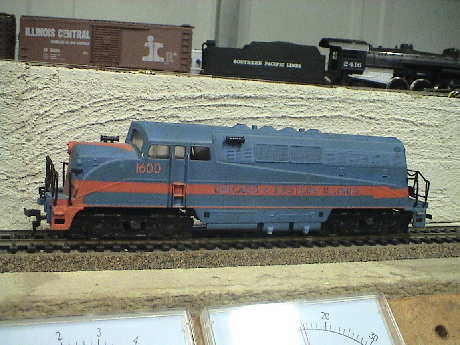
This Tyco BL2 is also 4 wheel drive and pretty noisy.
This one was identified to me this morning at the Open House as a loco that ran poorly. Nobody had bothered to bad order it so it was just sitting out on the layout. I brought it home to see what was up with this previously certified loco.
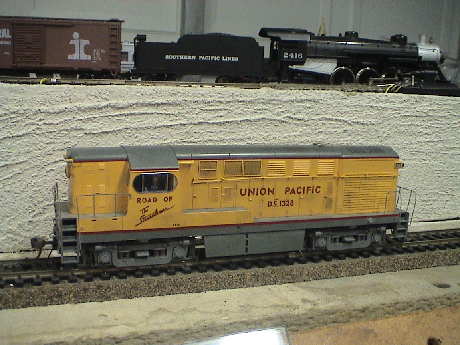
This FM H-15-44 had been previously certified by the club. It didn't take long to determine at least one problem. It ran like crap. Power pickup at low speed was very poor although it smoothed out at higher speeds. The wheels were dirty and needed an alcohol wipe AND an light abrasive clean. That improved the situation but did not fix it. I flipped it over and determined that the front truck (the long hood is the front on these locos) had intermittent power pickup on both wheelsets. This probably means a connectivity issue in the truck or loco wiring. I need to peel it apart to take a look around but it didn't yield easily. I'll get back to it later.
I had a little more time to work on this one and I finally managed to get the shell off. Inside I found a cleanly installed drop in sound decoder. Most of the wiring was soldered to the drop in board and I found no flakey connections. The decoder identifies itself as a Soundtraxx Throttle-Up, one of three model numbers which all seem to have the same set of CV's. The prime mover sound is weak on this decoder and I could not make it any louder than it was.
After yet another wheel cleaning and a light application of AeroCar conductive oil to the wheel journals and an extended run in, it seemed to improve and much of the flakey power pickup went away. Early Soundtraxx decoders, and this is one of them, did not have particularly good resistance to intermittent power pickup. The loco has, based on headlight flickering, about average power pickup for a B-B loco. The decoder is sensitive to this so the tendency to act flakey on dirty track and wheels probably cannot be improved without a decoder upgrade.
This one is already certified so it will go back to the club for testing there in actual operations.
UP 1328 was bad ordered almost 2 years after I last touched it. It had very poor power pickup. This Atlas loco had badly worn wheels so I replaced the wheels with new Kato wheels. Then it ran fine. The sound is still a little flakey. Whatever sound system is in there doesn't have enough hold up capacitance so that it crackles a little even when there is no visible flicker in the headlights. This is the way that this one will work.
Since last week, the club found even more locos, two Kato SD45's, one undecorated B40-8W, an SD50 and NINE VO 1000's. Except for the paint, the Kato's are identical. The nine VO 1000's are also identical except for the paint.
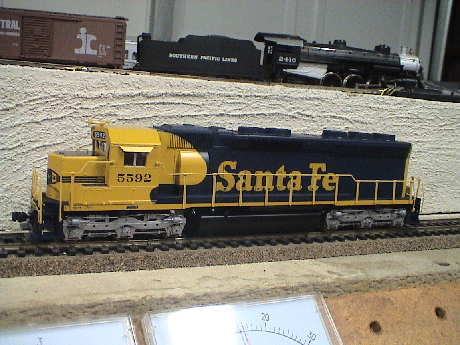
Kato SD45 ATSF 5592 is like new in the box. Somebody has assembled it well and it runs well on DC. The instructions indicate that it takes a 8 pin decoder.
A batch of decoders arrived today so ATSF 5596 got a DH163-PS. Kato provided a place to plug the decoder in but didn't provide a place to put it. I had to hack off a part of the weight attached to the shell to make room for the decoder.
The stock Kato couplers were plastic. ATSF 5596 got Kadee #5 couplers. They fit in the existing boxes.
I got ATSF 5592 back tonight for 3 wheelsets that are slightly undergauge. Kato truck covers are retained with six stirrup type clips on each cover. The need to be gently pried open, one at a time, to release the cover. To prevent the clips for reconnecting too soon, a small screwdriver can be pressed into the gap between the truck and bottom cover to hold them apart a little as each clip is worked in turn. When the cover comes off, the four pins on each cover which retain the sideframes also come out with the cover and the sideframes are released so that the wheelsets can be individually removed. At that point, a simple twist and pull on each wheelset will allow it to be regauged. I greased the gears on each truck and reassembled it.
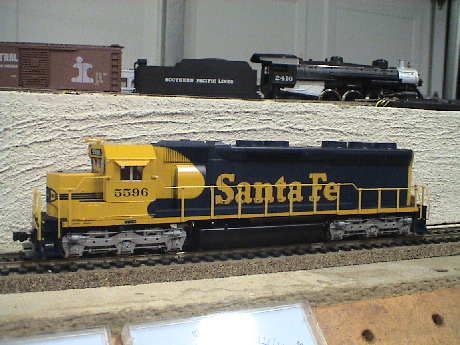
Kato SD45 ATSF 5596 is like new in the box. Somebody has assembled it well and it runs well on DC. The instructions indicate that it takes a 8 pin decoder.
A batch of decoders arrived today so ATSF 5596 got a DH163-PS. Kato provided a place to plug the decoder in but didn't provide a place to put it. I had to hack off a part of the weight attached to the shell to make room for the decoder.
The stock Kato couplers were plastic. ATSF 5596 got the last set of whisker Kadee couplers that I had. They fit in the existing boxes.
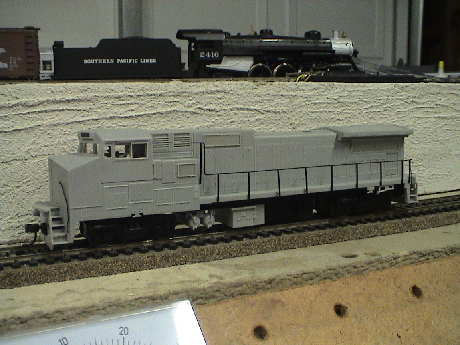
This Atlas B40-8W (I think) is not quite in new condition. It is missing it's turbo stack and maybe some detail parts. It runs well on DC but unless we can find somebody to paint it, it won't do the club much good.
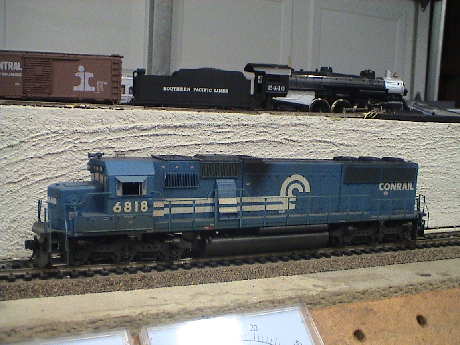
Conrail 6818 is a Life-Like SD50. This is an older weathered loco with an open frame motor, but it seems to run well enough. It would take a 9 pin JST decoder.
The club voted to keep this one so I used the last DH163 in it. However, the motor won't run on the decoder. The lights work. The decoder tests good so there is some weirdness in the wiring.
The problem was pretty simple, my DCC system was in a standby state with the indicator on the DT400 flashing. By the time that I noticed that, I had pulled the DH163 to go into UP 841 and put a DH121 test decoder. Restoring full track power allowed the loco to run. When the new decoders arrive, I'll swap out the test decoder for another DH163.
The decoders arrived so the DH121 got swapped for a DH163. The loco also got a new front coupler as it did not have one.
This one came back bad ordered for broken front grabs. I patched those. However, it did not run either. I reprogrammed the address into it and then it did run.
The next nine locos are all virtually identical except for the paint.
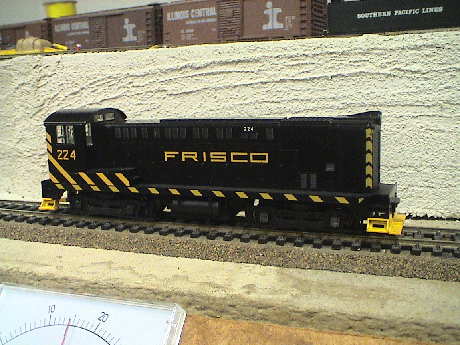
This Steward VO 1000 switcher is in like new condition except that it is missing it's couplers and handrails. It runs well and sips current. It takes an 8 pin decoder.
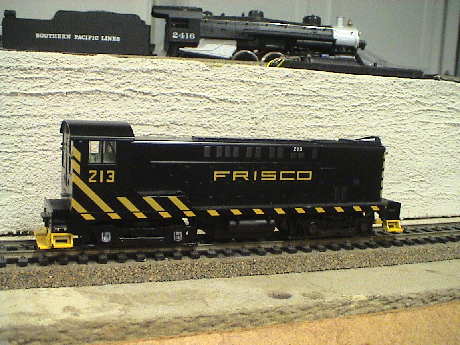
This Steward VO 1000 switcher is in like new condition except that it is missing it's couplers and handrails. It runs well and sips current. It takes an 8 pin decoder.
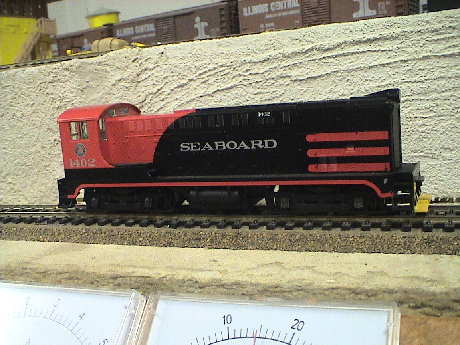
This Steward VO 1000 switcher is in like new condition except that it is missing it's couplers and handrails. It runs well and sips current. It takes an 8 pin decoder.
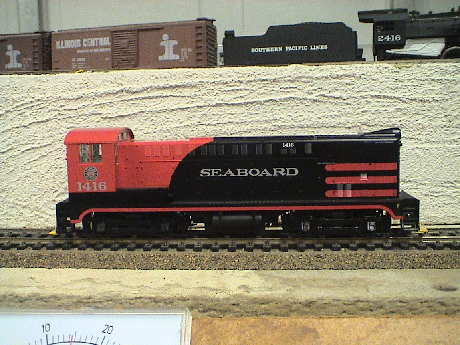
This Steward VO 1000 switcher is in like new condition except that it is missing it's couplers and handrails. It runs well and sips current. It takes an 8 pin decoder.
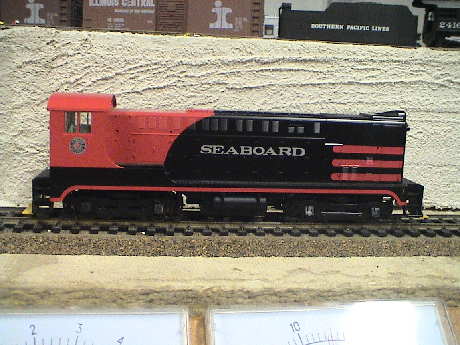
This Steward VO 1000 switcher is in like new condition except that it is missing it's couplers and handrails. It runs well and sips current. It takes an 8 pin decoder.
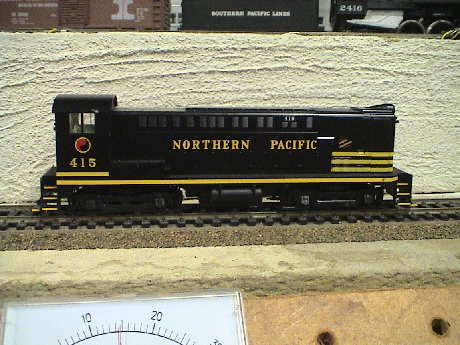
This Steward VO 1000 switcher is in like new condition except that it is missing it's couplers and handrails. It runs well and sips current. It takes an 8 pin decoder.
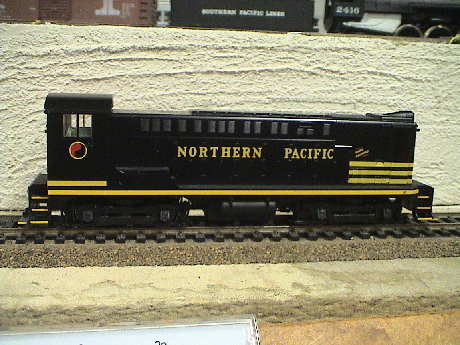
This Steward VO 1000 switcher is in like new condition except that it is missing it's couplers and handrails. It runs well and sips current. It takes an 8 pin decoder.
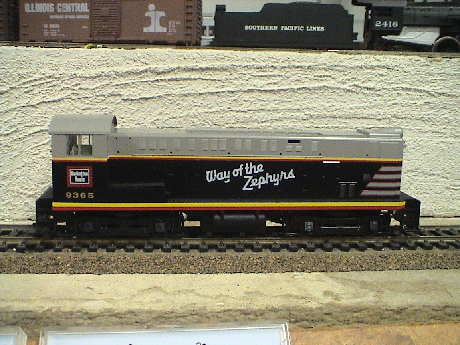
This Steward VO 1000 switcher is in like new condition except that it is missing it's couplers and handrails. It runs well and sips current. It takes an 8 pin decoder.
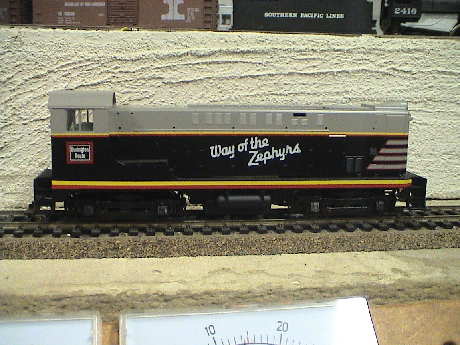
This Steward VO 1000 switcher is in like new condition except that it is missing it's couplers and handrails. It runs well and sips current. It takes an 8 pin decoder. The hood on this one is loose and snaps off easily.
These three locos have been sitting on the layout for since the dawn of time. At least two of them were there in the mid 90's when I visited the layout. They were parked on ready tracks next to the Ford roundhouse as props. Nobody seemed to know much about them except that they were dead. One of the club members got so tired of seeing them there that he moved them off the layout. I picked them up to see what was actually wrong with them.
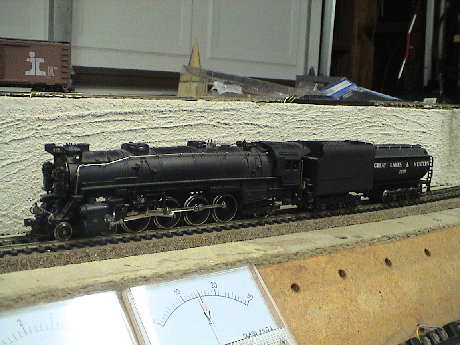
I'm not sure where this one came from as it wasn't in the Ford engine yard. It has a yellow sticker on the bottom with the number 31. It belongs to an inactive member.
This is apparently a model of a USRA heavy Mountain type in the style of the C&O. The compressors on the front, the low mounted headlight and the 6 axle Vanderbilt tender are the main spotting features.
This Mehano 4-8-2 ran when I put it on the track. The only thing that I could see that was wrong is that a wire was broken on the connector that leads to the tender. That got fixed. The rear coupler knuckle spring was also replaced. It seems to run ok but it needs more testing on the club layout as it will not stay on the track on my tight radius test layout.
I installed a personal DH123 test decoder in the loco and it runs. This particular DH123 has a blown out F0F function, the white wire. I wired the headlight to the yellow wire (F0R) and remapped the headlight to the yellow wire so that it work properly. Next week, I'll take it back to the club layout and let it stretch it's legs.
The DH123 barely fits, actually it doesn't fit and the shell doesn't close completely without some distortion. The blue and white headlight wires should be rerouted too as they are actually visible under the boiler. However, the current configuration will be good enough for testing. If it accepted for a decoder upgrade, an N scale decoder would be a much better fit.
I was testing GL&W 205 again today and found a problem. The loco would just stop dead sometimes when a crosshead was on the backstroke. The crosshead was hanging up on a bracket above it. The crosshead guides themselves were a little sloppy and could move up and down. When they moved up, the crosshead could hang up. A little drop of CA on the guide where it exited the cylinder assembly holds it in place prevents this slop. This has seemed to fix this issue, but some serious testing on the LAMRS layout is required to see if anything else is causing problems. This loco got sidetracked for a reason many moons ago and I haven't found anything serious enough (except maybe this crosshead issue) that would have caused somebody to abandon such a nice looking loco.
I checked the tender wheels for power pickup, two wheels on each truck are used for pickup. That was working but when I took a good look at the front truck, the rear axle was misaligned. The truck frame was melted on one side and the axle was pushed forward on one side. This was probably the result of some high current derailment in the past that heated the wheelset enough to cause it to move about 50 mils or so. The resulting misalignment must have been bad for tracking so I ground off the plastic that was in the wrong place and then glued in another piece of 0.030" x 0.125" styrene on the inside of the truck and then filed in a new axle slot in the right place.
I took the tender shell off to inspect for any other possible high current induced damage and I found it. The wire leading from the connector to the front truck had the insulation melted right off of it. The wire got replaced. The wire leading to the loco however, was not damaged, it is a little heavier gauge so it apparently didn't heat as much. When I had the loco apart to install the DCC decoder, I also saw no sign of over heating of any of the loco's internal wiring.
Once the crosshead issue on the loco was fixed, I tried more test runs on my tight radius track (18" with one spot that is a little less) and it derailed badly. The problem was interference between the pilot truck and the front coupler mount. After grinding off some useless tabs on the top of the pilot truck, it got better, but the inside wheel would lift badly on every turn. I ground as much off the Kadee box that I could but it wasn't enough. I remounted the coupler box forward and used a short shank whisker Kadee so that I could grind more off the box behind the mounting screw. This helped but it wasn't enough. I remounted the box as far forward as it could go and, along with yet more grinding on the rear of the coupler box, it FINALLY worked and the pilot truck would stay on the track even in the very tight section.
The loco actually runs very well and very quietly. I can hardly hear it move. The tender makes more rolling noise than the loco.
GL&W 205 was tested at LAMRS and ran very well. I brought it home to remove my test decoder so I could re-use the decoder in my large scale handcar. It is awaiting disposition from LAMRS before anything else happens to it.
I finally peeled 205 open and removed my DH123. I tried to install a club DH121 into the same spot, but the DH121 is thicker and would not fit so I left the loco without a decoder until it gets dispositioned by the club. This one should get an N scale decoder.
A DN163 was ordered for this loco with the last batch of decoders, but it got back ordered. GL&W 205 will have to wait until it's decoder arrives.
The backordered decoder arrived today and was promptly installed in the loco. Apart from some minor wire routing necessary to keep the wires from rubbing on the flywheel, it went in fine.
While I was testing this loco at the club, it developed a problem running in reverse. I brought it home again and found that there was a wiring interference with the flywheel. I fixed that and it is ready to go... again.
GL&W 205 had been waiting several months for certification. It got close, but didn't quite make it. It appeared to be non-responsive to some speed commands where it didn't want to speed up or slow down as commanded. This looked like a decoder issue so I brought it home for more evaluation. I could not reproduce the possible decoder issue on my layout, but I did notice that it stalled on some turnouts. Since the tender was wired to collect power, I suspected a problem, which I found.
When I originally got the loco, it had a broken wire between the tender and the loco. I patched it, but the patch didn't appear to hold as the connection was open. A wire had indeed broken at the connector to the tender but was held in place by the encapsulation that I had applied. I peeled that off and removed the female contact from the locomotive connector shell and resoldered the wire. Since I couldn't recrimp it, I used Loctite Gel CA to bond the insulation on the wire back to the contact to stress relieve the solder joint.
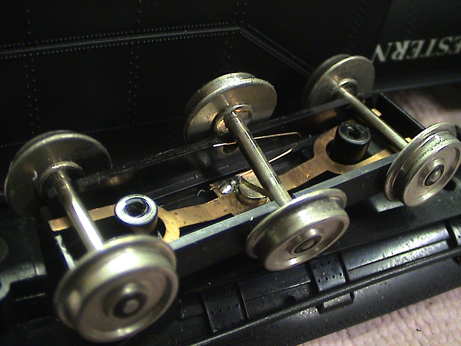 The tender is wired to collect power from two wheels on each truck via the axles, one truck to one rail and the other truck to the other rail. Installing wipers on the insulated wheels would be cumbersome and it would push all the axles over to one side and interfere with the tracking of the tender trucks. However, adding a center axle pickup to each truck was easy. I simply soldered a piece of 8 mil phosphor bronze wire to the existing contact tab so that it would bear on the center axle.
The loco picked up power on both rails, but only on 3 of the 4 drivers on each side. The geared driver didn't have pickups. The leading and trailing truck do not participate in power pickup. I added pickup wipers to the geared driver set which did not pick up power before. Now the engine runs well even without the tender connected. With the tender connected, there are 14 wheels picking up power which should be adequate.
One of the wires between the tender and loco that I patched before broke off. I attempted to resolder it but there wasn't enough left of the old connector to work with. After a trip to my connector junk box, I found a considerably more substantial connector that fit and spliced it in.
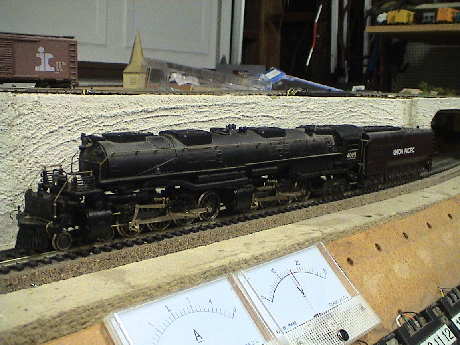
This Riverossi Big Boy was in poor shape. It had been sitting on a Ford Engine Yard garden track for years. I remember it there from when I visited the club 15 years ago. I was told that it was dead and could not be revived. To me, this sounded like a challenge. It took it home to see what it could do.
It tried to sputter but it essentially did not run. A rear driver on the front engine had not been reassembled properly and the drive rod fell off. I recovered the screw and washer and got the wheels back in line and reinstalled the connecting rod. Then it sort of ran.
The motor is hanging right out of the cab so I clip leaded to the contacts and and ran it on it's back while on the bench. The commutator on this motor is an odd flat design and it wasn't working. Some conductive oil and a little persuasion got the motor to turn hesitantly. After some run in, the current dropped from nearly an amp to 350 mA and it ran fairly smoothly. However it was pulling some pretty serious commutation spikes.
The power pickup is very flakey. It won't run very well on the track but I haven't cleaned anything yet. This one is going to take quite a bit more work to even determine if it can be saved.
After more careful inspection of the loco, I find that with 16 drivers on the rails, it only uses 4 of them to pick up power, two on each engine. Two wheels on the pilot truck are hooked to one side and two of the wheels on the trailing truck hook to the other. Once I got those wheels cleaned and actually connected to the loco, it ran better.
Both of the motor brushes continue to spark when it is running indicating that there are commutation issues. The pickup problems can be improved, but the commutation issues will continue to cause trouble.
The loco does track well enough, it handles my 18" radius track without difficulty although it is taller than anything that I have run before because it hangs up in one particularly low tunnel.
The loco still has spotty performance after it has been sitting for awhile. Messing with the brushes seems to make it perk up. The brush on the engineer's side looks pretty normal but it is somewhat depressed in it's holder indicating that it is worn. This is the one that used to spark until I pressed on it, then it stopped. The one on the fireman's side is in much worse condition. This one now sparks worse that it did when I first noticed it and it doesn't respond to pressure like the other one. The visible end of the brush also appears much different. It looks like there is a fuzz button on the end. It is also pretty deep in it's holder so I suspect that it is fully worn and no longer is subject to spring pressure. If I use a small screwdriver to twist the brush while the motor is running, the arc pattern changes significantly also indicating that the brush is toast. If I can find parts, the brushes could be replaced, but it is probable that the commutator is also worn and pitted from high miles and lots of arcing. If the club elects to recover this loco, a new motor might not be a bad plan.
I did clear the obstruction inside my tunnel so that I could run the loco continuously, but after a few laps it started to misbehave with obvious brush problems and more serious arcing. I don't think that I'll run the loco anymore until at least the one brush is replaced.
The brush holder is about 105 mils in diameter. I don't have any brushes left at all. If we can find on that is close to fitting, it could probably be "adjusted" to fit and we could give the loco a good test. Since one brush is behaving, maybe the commutator surface is ok and all it really needs is another brush.
The rest of it seems to be doing ok except that the headlight did not work. The problem with the headlight was that it wasn't connected as the screw that held the contact strap in place was gone. The screw also held the equipment assembly in place on the pilot and it tended to fall off. When the contact strap was secured with a new screw, it shorted the loco. This is probably why the screw was missing. It took a fiber washer under the contact strap to prevent the screw pressure from shorting it to the frame. The headlight now works but it is very dim, nearly useless. If the loco is recovered, the headlight can be converted to an LED fairly easily.
The tender on the Big Boy (and on UP 841 below) are identical except for the road numbers painted on the rear. They are a centipede arrangement with the last axle allowed to pivot. The tenders do not pick up power, but this could be arranged with some difficulty if necessary.
The loco has no front coupler but there is a place to install one. The current pilot has a piece that rotates and exposes a dummy front coupler. There is a pin that holds that feature in place. It can be pushed out leaving room for a Kadee coupler box. The rear coupler needs work, somebody hacked one on but the mount is not acceptable.
While testing UP 841, I noticed some wobbling of the tender, especially over turnouts. The flanges on the tenders for 841 and 4005 have really big flanges, between 50 and 55 mils. A typical HO loco has a 20 mil flange. These large flanges were bumping on some spike heads and flangeways on turnouts. This is causing at least part of the wobble. I used a Dremel tool with a felted polishing tool to spin each wheel of the tender for 4005 while I filed the other flange down to between 35 and 40 mils. I'll take that tender back to the layout to see if it behaves better over turnouts. If so, I'll do the same to the tender for 841.
The tender wheel work improved things, but I didn't go far enough.
The engine was still down with a bad brush, but it occurred to me that only one end was burnt. I flipped it around and it still sparks a little, but nothing like it used to. So I elected to pop a club test decoder in it.
The loco shell comes off with a large screw under the cab, a small one under a small dome between the sand domes and a hex head screw that holds the bell on. There is plenty of room inside. Wiring the DH121 to the motor was easy. However the original headlight didn't work very well and it was configured so that it was connected to the frame so it had to go. I put a 3 mm white LED up inside the headlight assembly wired back to the decoder through a 1K resistor. It is now bright enough to see. The loco runs well enough but I can't run it all the way around my layout because it is too tall and hangs up in a low tunnel. However, it is not as tall as a double stack so it ought to run ok at the LAMRS. I'll take it back for test at the run night next week.
I worked on the tender wheels some more, taking them down to 27 to 32 mils. This time, I used a grinding wheel as the abrasive block instead of a file. That went faster. We'll see how that works. I also properly mounted the coupler.
The loco got tested at LAMRS today and did fairly well. As expected, the "pizza cutter" wheels on the loco bounced on some spike heads and frogs here and there and made it look jumpy. It also had power pickup issues, which were also expected. However, it ran and the motor issues seem to be solved.
For the last couple of days, I've been grinding down the flanges on 4005. For the pilot and trailing truck wheels, I spin them up with a Dremel tool with a felted polishing tool and then use a file on the other flange on that axle to file it down. This goes pretty slowly, but it gets the job done. The drivers go quicker. I run the loco at full speed on it's back and then use a Dremel tool with a grinding wheel to take off most of the metal that I want to remove and then smooth the result with a file until the flange is between 30 and 35 mils.
Adding power pickup to the lead tender truck will be fairly easy with phosphor bronze wire. I can probably kludge something for four of the five rear axles as well if necessary.
I added wiper pickups with 8 mil phosphor bronze wire to the lead truck and the first two axles of the centipede truck in the tender. The tender is connected back to the loco with SIP connectors. Power pickup did improve, but tracking on my tight radius turns degraded.
The tender's derailment issues were due to wire interferences. I had to make the wires to the SIP pins longer and fasten them to the tender frame to keep them from getting hung up on the front truck. The engine also developed a derailment of the rear engine on one turnout. The track wasn't level there, but it derailed even when the track was fixed. The 2nd driver on the rear engine was hanging up on the frog and lifting the rear engine. There were two issues there. First, some of the driver sets were slightly undergauge. Second, when I ground those drivers, I left a sharp edge on the inside with a little roughness. I flipped the engine over and broke the inside edges of all the flanges to clear out any roughness left from the grinding. THEN it made it through the bad spot.
It's time to take the loco back to the club for more testing. The pilot and trailing truck flanges are maybe still a little too tall, but it was more difficult to file them down because the trucks were difficult to restrain. I got the flanges down to 40 mils or so, but I may have to go further if they still misbehave.
I tested the loco at the club a couple of weeks ago and, for the most part, it did fine. It could handle up to about 15 cars on the Garrison grade. It ran out of torque before it ran out of traction. The power pickup modifications I made to the tender seemed to do the job, there were no power pickup problems. There was a systematic tender derailment problem on the double slip switches in Ford Yard.
I brought the loco home and checked the tender wheels. Some were still a little oversized and all of them had flash on the inside edge of the flange. I assume that this was the cause of the derailment. The rough flash was probably catching on guard and wing rails. I filed the larger wheels back down to near 30 mils and cleaned up the flash on both sides of each flange until it felt smooth to the touch.
The loco still needed a working front coupler. There was a fold away dummy there, but it would not couple with a Kadee. The fold away coupler was retained by a simple pin, it was easy to get it out. This left a large pocket in the pilot where the lower surface was just right to mount a Kadee #5. I drilled and tapped the lower hole that the pin used to go into for #2-56. I then drilled the upper hole in the pilot to about 0.16" to clear the head of a #2-56 round head screw. The pocket wasn't quite deep enough to hold a #5 box but after the rear wall (unneeded) of the box was ground off, it fit and lined up with the mounting holes. A #2-56 screw was dropped in the upper hole and then driven into the thread in the lower hole and the coupler was mounted at the right height.
This one is ready for more testing which it will get next week.
I tested it at the run night tonight and the result was less that spectacular. The power pickup was ok, but the tender still derails on the double slip switches in Ford Yard. Also, I was pulling a pretty heavy load and it would not make the Garrison grade. After I backed it down to Ford, I detected that the motor was pretty hot. Since the thing was stalling and not slipping, the motor torque is low which indicates weak magnets. Magnets tend to get weaker as they get hot, older magnets (non-rare earth) get much weaker. I think that the next step is some kind of remotor job. I'll have to improvise this one from the parts that we have at the club.
I brought home a box of hulks, some with can motors, to try to fit UP 4005 for a new motor. The old one just isn't going to cut it.
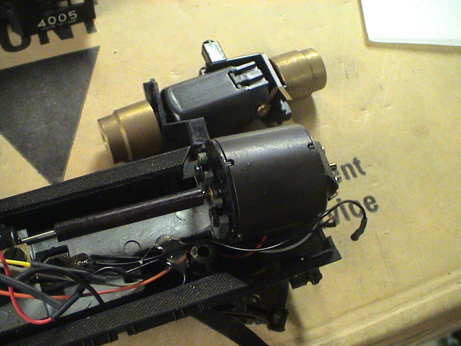
In the box of hulks, I found a lonely Kato motor. The Kato motor ran fine, about an amp of stall current and 100 mA of running current with no commutation spikes. The shaft is almost exactly the same diameter as the Riverossi motor shaft. The motor is small enough to fit when the Riverossi motor mounts cast into the frame weight are ground off. The motor would mount on a bed of some kind of conforming adhesive, such as Liquid Nails.
The Riverossi motor and coupling use flats on the shafts, those would be easy to grind into the Kato shaft. This is Plan A. I could cut the plastic coupling in the middle and then bond the shortened halves back together. Plan B would be to retain one of the flywheels on the Kato motor and build up the plastic coupling shaft with epoxy and file hex flats on it to mate with the Kato flywheel. The other flywheel would have to go as it would stick out of the Big Boy cab way too far (the whole thing would be hanging out the back). I decided to try Plan B first as it was less invasive.
The shaft would have to be shortened eventually, but for a test, I elected to try building up the shaft to fit the flywheel on the end of the shaft I would cut away anyway. This is just to see how it would work. If it doesn't work out, I can revert to Plan A.
Plan C is to use a larger Mashima motor, also with flywheels. In this case, the motor would have to sit a little further back in the cab so that it could line up properly with the shaft. However, it has a universal joint with lots of off angle capability so that might make the motor a little easier to position. The Riverossi shaft could fit into the end of the Athearn type shaft if the Athearn shaft was drilled out a little. The two shafts would then be bonded together.
The Mashima motor makes more torque than the Kato motor but I'd have to cut the coupling shaft too short to use it with the Kato motor if the Mashima motor doesn't work out so I'm going to go with Plan B first and then go to Plan C later if the Kato motor doesn't make enough torque. If that doesn't work out, then I can splice the short ends of the shaft back together with some tubing and revert to Plan A.
The epoxy trick on the end of the Riverossi coupling shaft seems to have worked. Before the epoxy fully set but after it was no longer tacky, I took the epoxy coated shaft and drove it into the end of the Kato flywheel. This molded the still pliable epoxy into the hex shape of the flywheel. I pulled it out and then let it set hard. There were 6 flats on the end. It took a little filing on the flats to reduce the size just a little such that it fit easily and allowed a little slop so that the shaft could wobble a little. I used Devcon Plastic Steel two part epoxy. This stuff is intended for use on metal but it works great on plastic and it is machinable so it tolerates filing gracefully.
This looks good enough to go with. I am going to cut the frame weight to clear off the original motor mounting features and then fit the motor. I'll then cut the shaft to the proper length and redo the epoxy trick on the shortened shaft. I am going to leave the 2nd flywheel in place on the motor for the time being. It'll make a good handle to turn the motor shaft by hand so that I can feel any resistance (due to the motor not being perfectly aligned) and adjust the motor position before it is finally mounted. Also, if I find that the Kato motor does not have enough torque, I can remove the Kato motor and it will still be suitable for mounting in a Kato loco as a replacement motor. The short end of the shaft that I cut off can then be used in the end of the coupling for the Mashima motor or I can cut the existing shaft even shorter.
After fitting the Kato motor in place and bonding it down, the loco ran quite smoothly. However, the Kato motor has hardly any more torque than the one that I pulled out. Allowing a motor to stall is very hard on the motor and the decoder. I broke the Kato motor out (it debonded easily enough) I refitted for the Mashima motor. I cut off the other end of the shaft short enough to fit into the drilled out universal joint piece that fit the Mashima flywheel and bonded it in place with epoxy. I'll have to wait until tomorrow for the epoxy to set so that I can do a final fit of the motor.
I fitted the Mashima motor on styrene standoffs on the cab floor and ground a little more on the weight so it would clear the larger flywheel It seems to fit well enough. I initially mounted the motor with a little gel CA for test because it would hold well enough and still be easy to remove.
The loco actually ran and now has enough torque to slip it's drivers. However, the motor wasn't in exactly the right spot as there was some shaft vibration. I determined that the motor had to be mounted a little higher so I shimmed it up and then attached it with epoxy. I may have to trim part of the cab roof a little to make room for the higher placement of the motor. It barely fit before with the motor slightly lower. No more testing will be possible until tomorrow when the epoxy has set.
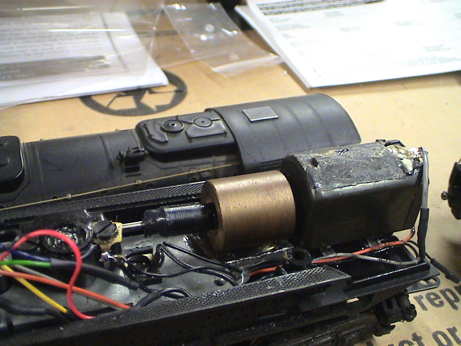
The remotor job worked. There is a little vibration over a small speed range, but it is not serious, much better than it was. I probably won't be able to do better by eyeball. The thing runs, slips its drivers, and with a little trimming on the rear wall of the cab, the shell fits back on too. I used a large cutoff wheel to slice off the rear flywheel. I would have left it and painted it black, but it interfered with the tender.
I've been working on this bad boy, on and off, for 6 months. It goes back to LAMRS for test, hopefully for the last time. It still needs a better decoder though.
I tested 4005 at the club tonight and it didn't do so well. I had many derailment problems in both the engine and tender. This was a surprise as at least the loco didn't derail the last time I tested it. It also stalled with a load on Garrison Pass and the motor was hot. I'll have to investigate this some more.
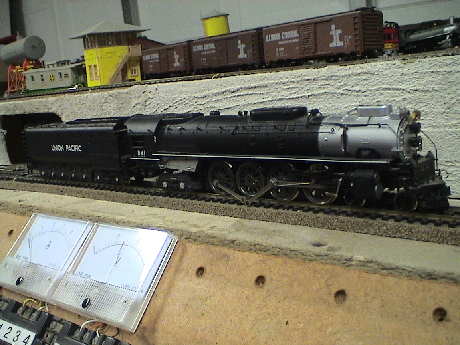
As can be seen in the photo of the Riverossi 4-8-4, it is missing a connecting rod screw. The motor tries to run but the mechanism is jammed by the rod on the other side. I need to find a screw just to get the thing mechanically back together to see what other problems it has.
I took the rear connecting rods off and moved one of the crankpin screws to the 3rd driver. The 3rd axle is the geared one, the rear one now freewheels. Now the loco runs pretty well. I think that all this one needs is a crankpin screw and washer. I may be able to get one of those from Nickel Plate 765 which has a stripped or split main drive gear.
I checked 841 on the bench for motor current specifically looking for commutation issues, none found. However, I did find a systematic bind in the engineer's side valve gear. This had apparently been there for awhile as a pocket intended to hold the valve rod in position was worn out and allowed valve gear to hang up and bind. A little CA on the reversing rod, which is not designed to move anyway, now holds the valve gear deeply enough into the slot so that it doesn't bind anymore.
This loco picks up power on 6 of the 8 drivers with the contacts omitted on the two with traction tires. Two pilot wheels also contact one rail while the two wheels on the other side of the trailing truck also contribute. However, the lead driver set appears to be installed backwards, the contact plunger is on the side with the traction tire. This will be easy to fix.
Riverossi also uses springs on some pilot and trailing trucks to provide downward pressure on the truck. The trailing truck was set up that way and the spring was still there but not connected. The tab that it is supposed to fit over was bent over at an odd angle and holding the spring in place, but in an orientation where the spring could not reach the other tab. I bent the out of place tab and reconnected the spring.
The tender is identical to the one on the Big Boy except that nobody has tried to mount a rear coupler.
The loco has the same hidden dummy coupler as the Big Boy, it'll take the same modifications to install an operating coupler. There is no rear coupler either. A coupler mount will have to fabricated, not a difficult job.
I took 841 back to the club tonight and Lloyd took a crankpin from 765 and reassembled 841. I brought it home to test and it initially ran, then the drive train froze up. I got it to run again, but running in reverse it tends to freeze and running forward it make a dry bearing noise. This one will take more work. The connecting rods are all free, they are not part of the problem. The problem is somewhere from the geared driver back to the motor.
I had a chance to take 841 apart this afternoon and I found two problems. First, the crankpins had been installed in the wrong places, the one with the shorter shoulder was on the driver with two rods and the one with the longer shoulder was on the last driver with one rod. I swapped them and then the mechanism partly freed up. The other problem was the at the stuff that used to be grease on the worm had hardened to a solid glob. I picked as much out as I could and then diluted the rest with some light oil. Then the thing ran properly and very quietly.
There is room in the front of the boiler for an HO sized decoder. The headlight doesn't work but it will have to be replaced anyway because it is firmly attached to the frame.
Since it was running well, I installed at test decoder, a DH121, in the smokebox. It runs under DCC. The test decoder can be easily pulled out of the smokebox from the front and swapped with another 9 pin JST version. I installed a club supplied 14 volt incandescent lamp in place of the non-functional bulb that was there.
A Kadee #5 mounted on the tender with little difficulty. I removed the odd Riverossi mount entirely and glued a piece of 0.040" x 0.250" styrene to the mounting bosses and drilled and tapped a #2-56 mounting hole. This placed the coupler at exactly the right hight.
I test ran 841 around with a track cleaning train. The traction wasn't outstanding, it needs more weight. The tender is also light and needs weight. However, other than some slipping and some wobbling of the tender, it ran fine. I picked up some stick on weights and I'll add them to the loco and tender when I get a chance.
The 1/2 oz weights that I got at the club were too big to fit inside the loco so I used 4 1/4 oz weights from my own stock. This is about all that would easily fit, we'll see if it is enough. The tender is a little odd. The shell is a completely enclosed molding. The end caps can be pried off. I put 3 1/2 oz club supplied weights inside the tender.
I pulled the test DH121 out from behind the smokebox door and put a DH163 in. It ran right away so I buttoned it up to return to the club.
UP 841 had not been certified in the last three months so I brought it home to turn down the flanges.
For the last week or so I've been working on 841. The main task was to turn down the flanges to about 30 mils. While doing the tender, I noticed that the centipede tender frame was badly worn and the center wheelset would just fall out. I've filled in the axle holes in the truck with epoxy using a trimmed toothpick to keep the axle bearing hole open. I removed the toothpick before the epoxy fully set leaving a bearing behind of about the right size. The wheelset fit back in with noticeable drag. The drag reduced materially after only a few turns by hand. It still has more drag than the other bearings, but it will probably wear in quickly. It may never spin as freely as the others, but it is better than the wheelset falling out.
I've turned down the loco drivers. Next I'll turn to the pilot and trailing trucks on the loco.
I turned down the trailing truck with little difficulty, but the pilot was squirming around too much even with my wife holding it in place. I got the flanges to less than 40 mils from their starting point at 55 mils. We'll see how they hold up at LARMS.
I tested UP 841 at LAMRS this evening and it ran pretty well. It still bumps a little on some turnouts so it needs some of the flanges taken down further. The tender seemed to do ok, but it did pick one point. This one is close to done. After some more flange work, I think that it will be ready to certify.
I ground down the taller flanges some more, now all are between 20 and 30 mils. The last time I ground down the flanges, I didn't clean up the flash on the inside of the flange well enough. I think that this is what the loco was actually "bumping" on. The rough back edge can catch a rail and lift that wheel. That stuff has been filed off, the next test should be the last one.
Both UP 4005 and UP 841 had swing out dummy front couplers. I thought that I had installed a Kadee on UP 841, but I noticed that UP 4005 had one. I looked at UP 841 again, and it didn't have an operating front coupler. It was no big deal to remove the swing out dummy and install a working coupler.
I used UP 841 to pull the load over Garrison Pass that UP 4005 could not handle. It did fine. I left this one for certification.
I has been a year and there were complaints in certification. Some of the tender wheels were narrow and the coupler tended to pivot. I staked the tender coupler pocket with a bit of gel CA and then manually adjusted the gauge of the tender wheels. A couple of the engine drivers are very slightly narrow due to the thick flanges left over from the grinding operation. The back to back spacing is just a couple of mils off. I could probably grind a better profile on the back of the flanges, but I elected to leave it. It is just too close.
UP 841 has been sitting for awhile and I finally got back to it. The driver gauge was just too narrow still so I worked over the wheelsets to increase the gauge. I then broke the corner on the inside edge of each driver flange so smooth them out. The pilot truck was removed by somebody at the club and I reinstalled it, but the spring is gone. Now the truck is too light and tends to derail. I glued a cut up 1/4 oz weight to the top of the truck to help hold it on the track.
I'm going to test it again at the club the next chance I get. I can't test it much on my layout because the loco cannot handle the 18" curves. There are no such curves on the LAMRS layout.
I tested UP 841 at the club a couple of days ago and it did amazingly well but it still needs some work. The power pickup is not up to my standards. I'll not be able to do too much more on the loco so I'll wire some of the tender wheelsets up for power pickup. The loco had a tendency to derail on a few turnouts and drag at some station platforms. Both of these behaviors indicate that the back to back spacing of the drivers is still a little too narrow. More file work coming up.
Steve and Matt donated three locos to the club, one got immediately put in the sell pile (train set loco not worth messing with) another, an HOn3 Goose got put away for the narrow gauge guys to look at and the last one I got.
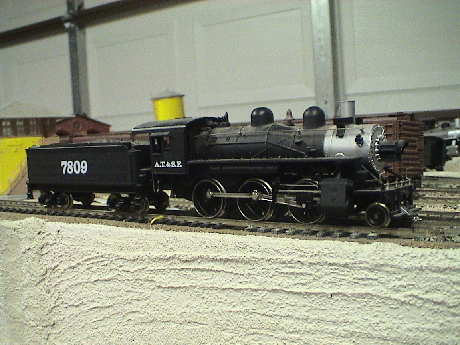
Steve and Matt donated this Mehano Mogul (2-6-0) to the club. Initially it ran poorly with very intermittent power pickup but the wheels were all very dirty and even a little corroded. I cleaned the drivers and tender wheels and then it ran smoothly drawing about 100 mA running light and 200 mA slipping. Matt commented that it was a weak puller so I latched onto a 4 car consist and dragged it up a 5% tightly curved grade. It slipped a little at the top which is pretty normal for a 6 coupled loco on this layout. My Bachmann 0-6-0 does almost exactly the same.
I popped off the boiler to look inside and there isn't any room for more weight and hardly any room for a decoder. A Z scale decoder would fit between the rear weight and the back of the motor.... maybe. The drive train was straight up Mehano. There is a little can motor that drives the center driver via a worm. The other drivers are coupled via the siderods.
The loco picks power on all 6 drivers, they work, and on 4 tender wheels so that the power pickup stability should be adequate. After the wheels were cleaned, I saw little headlight flickering.
There is a Kadee coupler on the rear and room to mount one on the pilot.
Eventually the loco was sold.
At the club work night on 22 Jun 10, we got a group together to disposition the "last" batch of locos, most were selected to keep, only one that I had worked on was designated to sell. There were several items that I had not worked on that were designated to sell. These three however, I elected to take home to evaluate as I had not seem then before.
I also took home a previously certified loco that had mechanical issues.
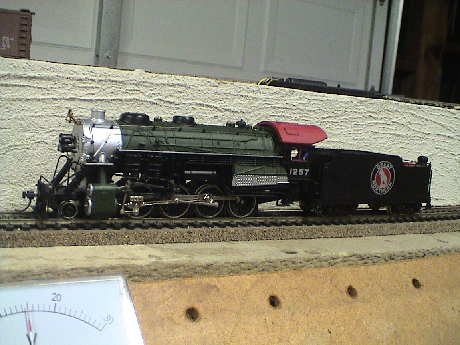
The club didn't show a lot of interest in this loco and voted to sell it. However, it looked interesting to me so I elected to run it through my triage process to see what it was.
It seemed to run pretty well on in a short test, but as I ran it around my layout, I found that it tended to derail on most turnouts. The wheels were in gauge and all rested in the track properly but the thing just walked over many frogs.
Since the club didn't show interest and it has problems, it is probably a sell item. Except for the tendency to derail where other locos do fine, it is a good loco. It might run better on somebody else's layout.
I messed with this one some more and I managed to improve it's performance. First, the pony truck was having problems. I removed the truck and converted the loco into an 0-8-0. Most of the derailment problems vanished. Then I had a vertical gradient leaving a turnout, that was it's worst spot. This hadn't bothered other locos, but I fixed the gradient to spread it out over a longer section of track and the tracking improved, still without the pony truck. The pony truck itself had two problems. It was not mounted properly so that there was no spring tension holding the truck down. Then the fingers that held the axle were bent and the axle could slop quite a bit. After adjustments to the truck to mount the axle more firmly and to mount the truck properly to the loco so that the spring worked, THEN the thing started to behave.
The club didn't know this when they voted to sell the loco, but they didn't know anything about it either so I assume that it will still be a sell.
Eventually, the loco was sold.
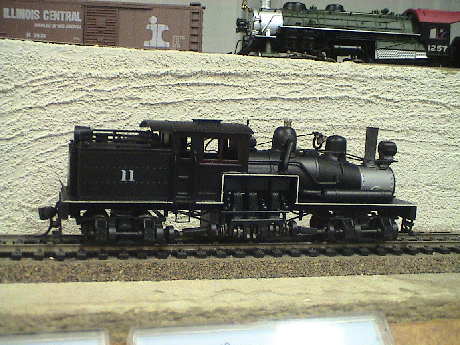
This standard gauge two truck brass Shay appears to be in the 36 ton range. Initially, it ran poorly, it locked right up. After freeing up the gearing on one of the trucks, I got it to run. It clearly needed lubrication so I lubed everything I could reach and then it started to run properly.
This thing is geared very low so that it runs slowly, as it should. The gear train is more complicated than I've ever seen on an HO loco. The motor is in the tender. It drives a worm when engages a gear on a vertical shaft. At the other end of the shaft is another worm which engages train of spur gears that eventually drives the engine shaft. Power is transmitted to the trucks via the square shafts and to gears on each axle. Electrical pickup up is on all 8 wheels.
This one runs well enough to consider converting to DCC. There is probably room in the tender to install a decoder.
I took a peek inside the Shay to see if I could fit in an HO decoder, no joy. The shell comes off the frame easily enough, one screw centered under the boiler and two under the tender, but the NWSL can motor in the tender consumes all of the good space. A Z scale decoder would fit behind the motor or up in the cab. The wiring will be easy enough, everything is properly isolated already so it would be an easy matter to reconnect the motor and lights to a decoder that runs from the wires that go to the motor now.
Since GL&W 56 died I removed the DZ123 and put it into Shay #11. All went well, it runs.
When I first looked at this Shay, the gearing was locked up, some wiggling freed it. Later it locked up once more. After I installed the decoder and took it back to LAMRS, Marty was using it on the logging line and it locked up several times for him.
I brought it home and it was in serious need of a wheel cleaning. I ran it for a short while and it locked up again. After several more lockups, I found that each axle gear can lock, plus there is a lockup in the engine or gearing behind it. I figured that EVERY axle gear could not be bad so it must be a problem with the design of the gears. I also figured that this Shay might be true to it's prototype and need lots of lubrication. I gloped on quite a bit of LGB gear grease on each axle gear and the axle lockups nearly vanished. The engine would still lock up so I greased the spur gears behind the engine too. Then the engine lockups decreased quite a bit but it still locked up once after that. It is really hard to tell which gear mesh is having issues because the whole engine assembly locks up. I was not able to exonerate any of the spur gears. The problem does appear to be "below" the worms because I didn't grease those again and greasing the other gears made a significant improvement.
This one will require a lot more testing to determine what it going on. In the meantime, it runs a lot better than it did.
Marty had noticed that the Shay locked up again and left it for me too look at again. I picked it up today and ran it around and around, forward and backwards, high speed (in Shay terms) and low with hard reverses at many speeds. I could not get it to misbehave. I'm sure that it locked up for him, but it won't do it for me.
I did notice that the Shay sort of wobbled at one rail joint where other locos sometimes jerk a little too. I finally "fixed" the joint. Both rails dipped a little at the joiner and I shimmed them both up. Now the Shay goes over without complaint. The Shay would also stall every time on one turnout with a truck on the insulated frog and the other on a point rail. The electrical contact of the point rail was flakey so I soldered a jumper around the pivot and that got fixed too. However, the drive line binding will just take more testing to sort out.
Over the last week, I have been messing with the Shay some more. It developed a tendency to short out when running reverse. After some serious investigation, I found 8 locations of potential shorts, two were actual, and the other 6 were in the same places on different wheelsets. The engine picks up power from the 4 wheels on the engineer's side and then up through the frame. The wheels on the fireman's side are insulated, but at an odd location. The insulation is a ring just inside the wheel rim. The wire contacts on the front truck were slipping off the rim and moving onto the hub causing an immediate short. Running forward tended to drag the contact outward onto the rim, running in reverse dragged it inward causing a short.
Also, each insulated wheel rim was VERY close to the truck frames. At one point, I saw a spark from the 2nd wheel and the frame. I inserted a 10 mil thick styrene shim on the inside of the frames at each wheel. This removed all slop in the wheelsets. When first running it after installing the shims, the loco was drawing a lot of current and pulsing once per wheel turn due to drag on the shims. After a few seconds, they wore down enough to allow the engine current to drop below 200 mA. I could see a white deposit on each wheel. This was plastic ground off the shim. The shim had another impact. The lead wheelset on the rear truck had a tendency to slip on it's gear once in a while. After the shim was installed, the gear engagement was more steady and the slipping stopped.
The contact on the front and rear trucks was different. The rear one appeared to have been replaced, probably due to this same problem discovered by somebody before. I tried to readjust the front contact wiper, a piece of 15 mil or so phosphor bronze wire, but I eventually broke the wire leading to the front wheelset. Well, the contacts were no damn good anyway, but I was bummed. I bent the wire going to the rear wheelset and clipped it short so I could use that piece to solder on another piece of phosphor bronze wire, but I used smaller wire, 8 mil. I bent this piece to act as a wiper on the wheel tread itself. It is wiping on the tread while pointed down at the track, but it is too exposed and fragile. I'll have to arrange it another way so that it is more protected. However, it works and doesn't short out.
The last gearing lockup is still there. This will require some more work but it doesn't happen very often. The lockup is in the spur gear train somewhere, it'll take more investigation to determine exactly where.
All the while the couplers have been a problem. They are very floppy and can result in disconnects. These will have to be remounted as well.
The Shay has been in Marty's care for a few weeks and it still needs power pickup work. I need to find a better way to fabricate the power pickups for the front truck so it's back in my bin for more work.
My last attempt at modifying the front truck pickup failed because it was all too close to the bottom of the loco and the fine 8 mil phosphor bronze was was too easy to damage during wheel cleaning. This was the problem this time, one of the contact wires was bent away from the wheel and it broke immediately when I touched it.
The next attempt was to use a 15 mil phosphor bronze wire running across the wheel backs but that didn't work for the same reason that the original contacts failed. The insulated standoff that the wire attached to was not secure enough to prevent the wire from tipping in teeter-totter fashion so that one of them would wander off the wheel rim and onto the hub.
Another version is working better. I used the same 15 mile wire, but bent it so that it rubs on the tread, but this time pointed upward into the truck where it is out of harm's way. This seems to be working. The contact wire is not sensitive to the rocking of the insulated standoff. We'll see how long this one lasts.
The couplers were metal Kadee, but mounted in an inappropriate sized box, it is too narrow and too thick. The box is part of the brass loco and I didn't want to cut it off. The narrow part precludes using a Kadee contact spring or a whisker coupler so it will be a body mount with limited swing and no centering spring. The vertical slop was reduced by inserting a 0.030" x 0.135" styrene shim above the coupler to hold it against the bottom of the pocket and more consistently level. It gauges out right and seems to work ok.
Shay #11 had been behaving itself but then it started to derail. The problem is that a very small brass screw had fallen out of the front truck. This screw holds the sideframe in place on the geared side. This allowed the truck frame to shift upward and now the wheels won't sit in contact with the track all the time. The whole engine rocks over the non-geared wheels on the other side. This allows the flanges, usually on the rear truck, to walk right over the track and derail. Somewhere on the Sierra Pacific Lumber Railway is a very small brass screw. It's an odd size and very short. We need to find the screw or find a replacement or this loco will not run again.
The missing screw is clearly smaller than a #2. It occurred to me that I have a lot of AristoCraft screws taken from large scale track. There are two types that are a metric size close to #1. I found that the screw that goes up through the tie strips into the bottom of the rail was about the right size, but too long. I ground off about half of the screw and it fit and held tightly. Now the front truck frame was at the same height as the rear one and the loco doesn't rock on it's wheels anymore. It also didn't derail on my track as it did yesterday.
The other truck screw and the ones that the trucks pivot on cannot be tightened or the loco won't track either. I staked each of those with a small dab of gel CA. This stuff will hold something in place but does not flow and will not penetrate into the threads. The CA glob will prevent these screws from falling out.
Shay #11 was running mostly ok at the club at the Christmas run, but I brought it home anyway with the other three SPLC locos that were having troubles. I found that it ran but the 3rd axle didn't pickup power. The contact was touching the wheel. I adjusted the contact and cleaned the wheels and it ran pretty well.
The Shay had been providing good service on the SPLC line, but it was starting to act flakey again. The wheels had obviously been cleaned of organic contamination, but the brass wheels had oxidized and were not making reliable contact to the rail. It took some running with the aid of a Kadee brush to provide power and a track cleaning block on the turning wheel tread to clean them up. While cleaning the front truck, I noticed that the axle gear was slipping unless I squeezed on the truck frame. There is a cross piece across the front of the truck that had broken loose, allowing the sideframe to slop around a little. I bonded it back with a glob of CA and that problem was patched. Then I found that it intermittently shorted while running. I could see a little spark from the inside of the front truck. One of my phosphor bronze contact wires was just a tad too long and the tip was barely touching the truck frame. I managed to bend the end away from the frame with a pair of tweezers and the shorting stopped.
One final test and now it seems to run properly.
The SPLC #11 Shay (decoder address 8811) came back for power pickup problems. The phosphor bronze wire I had soldered to the front truck power pickup had broken off completely and was gone. I fashioned another one from 8 mil phosphor bronze wire (shorter this time) and soldered it back on the contact block. After some adjustments to cause it to contact both front wheels, I put the Shay on the track and it ran fine. I expect that this one will eventually break off as well, but the contact is easily replaceable.

There were actually two "Geese" in the batch. One was a standard gauge goose painted for Great Northern. Since there weren't any standard gauge geese that looked like this one, much less on the Great Northern, that one got designated as a sell quite quickly.
However, this HOn3 undecorated Goose was another story. The LAMRS has an extensive amount of narrow gauge trackwork although I have never seen anything running on it. This Goose would fit right in. It appears to be in the configuration of Geese #2, #3 or #5 before they were converted to passenger traffic.
I got a piece of HOn3 track from the club to test it on and clip leaded the piece to my track. Initially, the thing was a dead short. However, it wasn't shorted if only one truck was on the track so I suspected that the rear truck had been rotated 180 degrees. I found that it was and when the truck was turned around, the Goose ran fine. It picks up power on all 8 wheels under the trailer so it should be reliable enough.
There is a standard 8 pin socket in the trailer but a Digitrax connector did not fit due to an interference with a choke mounted right next to it. I moved the choke. It runs fine from a DH121 with the short harness that was in a DH163PS package left over from a previous batch of installs. The DH163 will go into a wired loco with a 7" harness. Then the front headlight did not work. Actually, it was coming on but the bulbs were not visible. Still working on that.
The headlight was a poor design. The light pipe was not transmitting any light from the illuminating bulb. I drilled it out with a 0.040" drill and then I got a little light out, but not enough to actually see. I replaced the bulb with a 3 mm white LED with some appropriate resistor selections to prevent the remaining bulbs and LED from burning out and now it works. The DH121 test decoder works well enough in this application to leave it that way. I believe that this one is ready to certify for operation on the narrow gauge line.
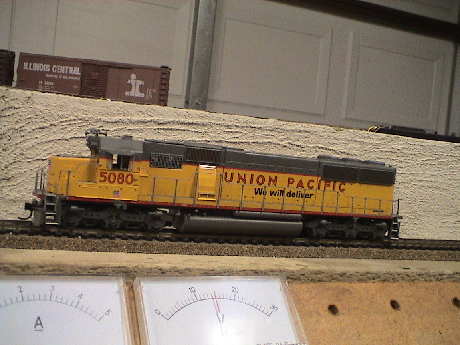
UP 5080 is a club loco that had already been certified. It seemed to run ok so I lubricated it. The loco has a DH123 in it and appears to be an Athearn.
Up 5080 came back with a bad order tag of "no power." It ran fine on my test layout. It needs a layout test.
It came back again, this time with a tag of "doesn't run." It ran fine on my layout. I lubricated it again and I will take it back.
Last night was a work night. Dave had the top drawer of a file cabinet unlocked and I spotted some more stuff in there. There was an undecorated NW2 and this Class B Bachmann Standard Gauge Climax in there along with some other stuff. You cannot turn over a rock in that place without finding another engine or two. I left the NW2 behind as we usually sell undecorated locos, but the Climax was another matter. It is painted but not lettered. It looked new.
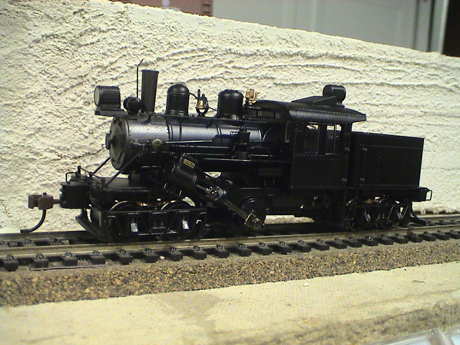
When I brought it home for triage, it immediately failed. The motor ran but the loco didn't. Something was slipping inside. The drive train is through the Climax gearbox, the universal joints and the square shafts to the trucks, much like a real Climax. I took the bottom of the gear box off and it was obvious that the universal joint assemblies were slipping on the output shaft of the gearbox at both ends. The universals have plastic pockets that fit over knurled ends on the shaft. Both pockets were split and were slipping on the shaft. Since this loco is not in production, we would likely not get it fixed by sending it back to Bachmann as they wouldn't have one. Instead, I elected to attempt a repair by cleaning any grease or oil off the offending parts and applying a small amount of epoxy to the slipping joint. The epoxy, once it sets, will grab on the knurling and the ripped up plastic inside the pockets and hopefully hold. We'll see tomorrow after the epoxy has had a chance to set.
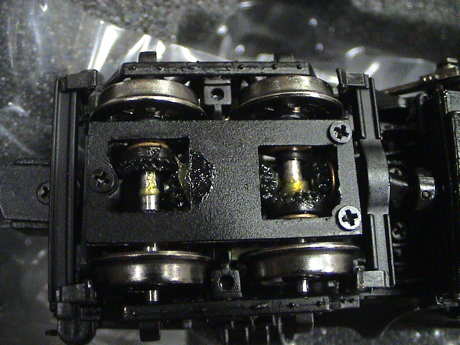
The epoxy joints on the drive shaft worked, but the loco still did not. There is still gear slippage inside both trucks. The drive shaft comes in at one end of the truck and a bevel gear drives another bevel gear on the axle. The axle bevel gear drives yet another bevel gear that drives a short shaft to bring power to the other axle through another pair of bevel gears. At least two, and maybe more, of these bevel gears slip on their shafts. This is not good.
This loco is toast the way it is. Either we scrap it right away or invest $20 to get it fixed under the Bachmann lifetime warranty. However, since the Climax is out of production, we could get ANYTHING back. They won't have a Climax to replace it, nor likely the parts to fix this one, so that they will send a substitute loco from whatever warehouse stock that they have. We won't have much say in what they send back.
This policy worked in my favor once. I sent in an old Bachmann Doodlebug that I bought for $5 at a swap meet (split axle gear) and they sent me back a new, undecorated and DCC equipped SD45. It may or may not work as well the next time.
A reasonable person would have given up at this point, but I am not always reasonable. A little fiddling with the trucks revealed that the output bevel gear on the intermediate shaft in the rear truck was slipping. It was not hard to remove the bottom cover of the truck and extract the whole shaft. I glued the gear back on with epoxy. We'll see if that works. However, multiple failures of things splitting and slipping on the shafts is not a good sign. Bachmann was probably having one of its "bad plastic" days like I've seen before on large scale locos where the plastic gears simply give up and break.
On the front truck, the OTHER side of the universal joint was slipping on the shaft entering the truck. It got the epoxy treatment too. It'll be tomorrow before the epoxy has set and I can try it again. There may be more split gears, but it was not easy to tell with the trucks partly disassembled.
There is an 8 pin NMRA medium socket for a DCC decoder in the tender, but there is not enough room for an HO decoder. Even an N scale decoder may be too long so that if this thing survives, it would need a Z scale decoder like a DZ143PS. I have had too much trouble with the less expensive DZ125, I tend to avoid those.
The two repaired joints from yesterday appeared to be holding, but when I reassembled the loco, the OTHER gear on the rear truck secondary shaft was slipping. It's back to the glue shop for another patch. Even if these gears stay in place, they are split so that there is a wider gap between one pair of teeth on each gear so that they MAY not mesh properly anyway. I won't be able to tell that until I can get them all to not slip.
The epoxy had a chance to set so I reassembled the loco and put it on the track fully expecting the gearing to either bind or slip some more. I was shocked to see it actually run, and pretty smoothly too. The thing is geared really slowly, as it should be, and it draws only about 100 mA even when slipping.
I rummaged through my DCC scraps box and found an unloved Bachmann decoder. It actually fits in the tender and it runs. This loco won't need a better decoder as it doesn't need to be speed matched.
That didn't take long. I was running a test on the loco and noticed that the rear axle was dragging. One of the gears on the rear secondary shaft was slipping again. I glued it again, we'll see what happens this time.
I tried it again this morning with the reglued shaft and it bound up tight. I removed the shaft and ran it as a 6 wheel drive loco and it seems to do fine.
Then I found the part on the Bachmann web site. The page indicates that these parts are new as of this month. The gears themselves are $2 each, but the whole shaft assembly is $6. If this loco checks out in 6 wheel drive mode, maybe the club could order some parts to fix it.
I got approval from the club to order parts for it, it cost $18.02 including tax and shipping. The parts eventually arrived and I installed them, but the thing still didn't run. The trucks were bound up tight and the front universal joint was slipping again. It came apart again and I determined that the new shafts were binding inside the truck. I played and played with them by hand and got the rear one to loosen up so that the truck could be driven by hand from the drive shaft, but there was still quite a bit of binding inside that started to go away as I continued to work the truck by hand. I took the front one apart and did the same thing. Since the drive shaft was slipping, I instead back drove the truck via the wheels. It slowly started to come around too. Then I reattached the shaft, this time with CA and let it set up.
When the CA had had enough time to set, I placed it back on the track and it started to run with all drivers turning but there was clearly a lot of unstable binding going on inside. As the loco ran, it slowly began to smooth out. I gave it some break in running at low speeds in both directions until it began to act like the trucks were wearing free. This one will take some considerable low speed break in running to completely smooth out and to see if the remaining glue joints on the shafts will hold up.
The loco ran fine at the club. Since it doesn't need speed matching and can't even attain nearly the top speeds of other club locos, this one is ready to certify, crummy Bachmann decoder and all.
Over the last week of testing, the loco had become very flakey for power pickup. Testing individual wheels, I found that only the lead axle on the rear truck was providing any kind of power pickup. Some of the other wheels did not work at all or just barely. I messed with the wiper contacts, but there was no improvement.
I noticed that after Marty had lettered the loco for number 9, that the cab windows were somewhat frosted. I confirmed today that Marty had started the weathering process with some DullCote. It occurred to me that he might have got some overspray on the wheel treads and the backsides of the flanges (where the wipers contact the wheels).
I worked the wheels over with a lacquer soaked Q-tip. It was hard to even get it to run. My Kadee brush didn't contact the wheels well so I got some help from my wife to hold some clip leads against the "good" set of wheels so that I could run the Q-Tip over the other wheels. Slowly, I started to see some improvement. It took quite a bit of time, but eventually, I could use the Kadee brush on the "good" wheelset and then later on every wheelset. THEN the loco ran on my track without even a headlight flicker. This one goes back to the club for more testing.
The two truck Climax failed at the club at the Christmas run. I brought it home and I found that the rear truck doesn't pick up power and the central gearbox slips. This will one will need some shop work.
I got approval from the club to send it back to Bachmann for repair. This has cost $26.30 including shipping and it's been shipped.
Bachmann elected to replace it with a 3 truck unlettered Climax. It has a Bachmann decoder and plastic Bachmann couplers. It will require Kadee whisker couplers which I don't have so I'll replace them at the club.
It runs pretty well, but slowly. The address has been set to the loco it is replacing, 8809.
At the run night tonight, Dave donated a loco to the club. It is a Bachmann Spectrum GP30 similar in construction to Amtrak 246.
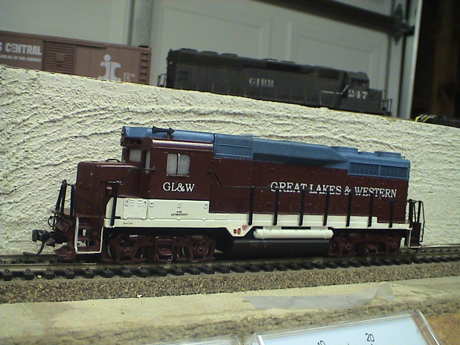
I brought the GL&W GP30 home for test. Initially, it was very stiff and drew lots of current, about 600 mA. However, after a minute or so of running, it stabilized at 300 mA running light and about 500 mA slipping. It seemed to have adequate lubrication. There doesn't seem to be anything mechanically wrong with the loco except that all four number boards are missing. There is no road number on the loco.
The loco seems to run well enough to convert to DCC. There is room between the internal weights/frame and the top of the shell for a conventional decoder. I'll have to split the weights apart to isolated the motor, but it won't be difficult. The lighting board may or may not be recoverable. If there is room for it, I'll leave it in, otherwise, it goes overboard.
I had some time this morning so I installed a club DH121 test decoder into the GP30. The installation went without much difficulty. The only unexpected part was that I had to grind the frame a little around the upper motor tab to provide positive clearance between it and the weight which is also connected to one rail. I did use the existing lighting board by removing the contact tabs and diodes. It provides a good physical mount point for the headlights and a good termination point for the decoder headlight wires. The rear coupler needed a little shimming to get the height to be stable and I needed to glue the engineer back in place.
If the loco tests well at the club, the decoder could be easily upgraded later, a 2 minute, no tools job for this loco.
I installed a DH163 in the GL&W GP30 and it ran fine. It is ready for certification.
LA brought in a Heisler that he had given up on. He asked me to see if it worked and if not, scrap it.
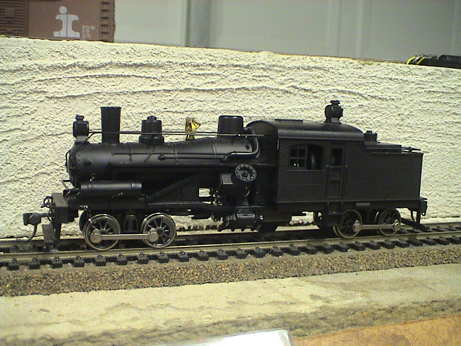
This is a very nice looking loco, but unfortunately, it didn't run at all. It had many problems. The gear train is all brass spur gears and it was just locked up when I got it. After I solved a bunch of other problems, it still locks up occasionally. I believe that the lockup may be in the reciprocating parts of the engine.
However, there were other problems to solve. There was very high drag inside the loco. That appeared to be numerous dry plain bearings. I lubricated all of them and the gear train and then the motor started to run.
The motor itself is one of the ones with a pancake commutator. It sparks pretty heavily and the motor draws considerable spikes of current although the average current is quite low. To clean the commutator, I'll have to bend some tabs so that I can get the rear frame of the motor off.
Once I got the motor running by itself (dry bearings), I reattached the motor and ran the loco on the track. It makes a lot of gear whine due to many straight cut brass spur gears. This will probably never improve. There is also a clunking sound that I first thought might be a split axle gear. However, now I think that the noise is in the "engine" where there is a lot of valve gear and piston rod movement.
The motor is in the cab with the shaft pointing forward. A spur gear train leads to the firebox at the rear of the "engine" and turns the propeller shaft going to the rear truck and the engine crankshaft eventually heading to the front truck. There are square slip shafts coupling the engine to the trucks. Inside the trucks, the far axles are driven via a worm and worm gear. The other axle in the truck is driven via the side rods.
Power pickup is steady, but it is via two wheels on one rail at the front truck and two wheels on the other rail at the rear truck. It did ok on my insulated turnouts, but the pickup configured this way will never be really good.
Except for the occasional lockup, it runs pretty well while making quite a bit of noise. I'm not sure that this loco will ever meet the club standards for reliability but I am willing to give it a shot after I manage to clean the commutator gaps of conductive crud and locate and fix the source of the lockup.
After several days of fussing over this loco, I managed to get it to run well enough that I thought that I could do a test DCC installation. I first put in one of the club test decoders but the DH121 wasn't doing so well. Before, when it was unconverted, it didn't seem to have much trouble with my insulated frogs. Since it has a short wheelbase for power pickup, only one wheel would work over the frog. The other one would JUST get back on live track when the 2nd wheel rolled onto the frog. The DH121 exhibited instability there, it would sputter a little but not actually stall. Since the older decoders haven't had a good history of dealing with flakey power, I put in my wounded DH123. It has a burnt out headlight function but I didn't need that here, there are no lights installed. The DH123 did much better on the insulated frogs, pretty much the same as before the loco was converted.
I did determine that the lockup was not in the trucks, motor or "engine." The only part left is the spur gear train. It did lock up once for me this evening and I carefully removed the bottom cover of the gear train far enough to get a small screwdriver in there. I could feel that the gearing was locked. After a little wiggling, it broke free again and didn't lock up again. The motor itself is not in the best condition but after I refaced the brushes, it sparked much less. I also installed a 2.7 ohm resistor in series with the motor so that a very short transient current will be less likely to eat the decoder.
When running on the track, it draws about 100 mA RMS of DCC current. When it was locked, it would draw much more depending on the throttle setting (this with the DH121 installed, it hasn't locked with the DH123 yet) up to a half amp or so. When it stalls due to loss of power, the current is zero. The "lock" is indicated to be mechanical causing a motor stall, not an electrical problem with the motor. Even though the motor is not in the best condition, it does run.
The loco was partly disassembled when I got it. I put it back together and boxed it up to take back to the club for testing there. There were a couple of headlight bulbs in a bag in the box, but they will need installation, there are no contacts to reach the socket type bulbs.
This loco goes back to the club for test.
Marty has been testing the Heisler for a while and the power pickup is just too touchy, but the rest of it has been running ok. It's back in my bin to devise a way to use the four currently insulated wheels for power pickup. Without 8 wheel pickup, it won't make the cut.
The Heisler picks up power on two wheels on each truck. The other wheels are insulated so that it is electrically straightforward to add new contacts to the other wheels. It's the mechanical implementation that is the issue.
My first attempt is to attach a thin styrene insulator to the truck bottom plate with CA. I will then attach a 15 mil phosphor bronze wire to that with gel CA that will brush against the wheel backside high enough to clear the wing rails of turnouts. We'll see how it works out as it will take a few days to implement the fix. CA isn't sufficient to hold the insulators on the truck frame so I need to use epoxy instead which will take some extended cures. I am going to finish one truck before I start on the other.
When I had done the front truck, the contact wires didn't have any continuity to the wheels. I assumed that this was due to the existing oxidation on the wire so when I did the rear truck, I abraded the wire before installing it. The rear truck worked fine. I wired both of them figuring that some break-in would wear off the oxide on the front truck. After some running, the contact to the rear wheel on the front truck started to work and the engine ran pretty well. The front wheel was still not very responsive so I ran it some more and it's condition has been upgraded to "flakey" from "dead." I assume that more run in will eventually cause the contact to start working reliably so I cleaned up the wiring and reassembled the loco for more test at LAMRS.
Marty has been testing the Heisler for awhile and he gave it the thumbs up. However, it still has plastic low set couplers. I have only high set couplers available so I'll have to dig through the club stock to find them, ask Dave to get some or buy them myself.
Marty indicated that the Heisler was a go so it was time to change the couplers as they are plastic. It has an odd set on it. They are long shank low ones, Kadee my call them "high set" as the drawbar is set high on the rear of the coupler head. The custom box on these is the small one that uses a wire spring that wraps around the mounting screw. The boxes are shorter and narrower at the back to allow mounting in constrained spaces, but a regular #5 box will fit. This is a Kadee #49 kit which neither I or the club has.
I changed out the couplers to a club supplied #49. The front box was not mounted right so I elected to remount a #5 box which took some serious shimming to get the right height. The rear one fit in the original box and came out right.
The club supplied some 14 V 30 mA GOW bulbs so I installed them and they work. However, I had to change out the decoder as my DH123 that was in there has a blown out front headlight. I used my spare DH163 which had just become available in the last couple of days due to a swap in one of my locos for a sound decoder. The headlights worked fine so I tried button it up but no joy. The DH163 is just a little bigger than the DH123 and it would not fit. Either we get a good DH123 for a tight fit or use a DZ143 which will certainly fit without difficulty.
After sleeping on it, I figured another, actually more obvious way to get the decoder in and still manage to get the shell on. The thing is back together and ready to head back to the club for final disposition.
Last Tuesday when I took the loco back to the club, The rear truck contacts that I added got caught on the foam in the loco box and the contact wire fell off. I brought it back home and reattached the wire with gel CA. This morning, I tested it again, all 8 wheels pick up power and the loco runs as well as it has in the past. This thing goes back to the club for more testing. If the testing goes well, I'll just leave the my DH163 in there. I'll get a replacement later.
This one ran badly at the Christmas run so I brought it home. The wheels and contacts were dirty. I cleaned them with alcohol and it ran just as noisily as it ever did, but it ran.
SPLC #3 (decoder address 8803) came back to me last week for flakey running. When I tested it, it wasn't too bad but there was some intermittent power pickup. The wheels are getting a little pitted so I lightly polished them with a Bright Boy and the power pickup improved to the point that I didn't see any headlight flicker. It seems to run fine, at least for awhile. The loco is as noisy as ever though.
Dave brought in two club loco that he found at his house. He didn't have any recollection as to why they were there, but somebody had gone to some trouble to weather them.
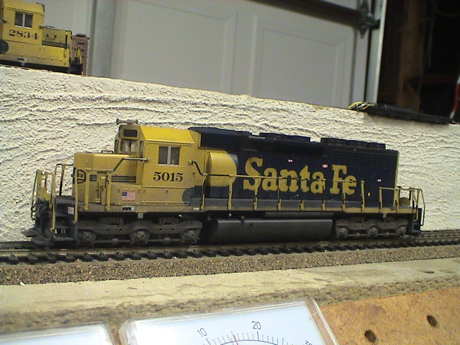
This Kato SD40 ran well right off the bat. The current is good at 200 mA light and 500 mA slipping. It is smooth and quiet. It needs couplers and a decoder and it would be good to go. It would take a Kato type drop in decoder.
After checking with Steve who had been looking for this loco, I elected to install a DH121 test decoder in it for test. It ran fine.
The loco still does not have any couplers as I am out of Kadee #5 boxes. We can install them at the club.
I did find one Kadee #5 lid on my workbench. I actually have lots of the boxes, but only the one lid. The box and lid (with the ears trimmed off) fit into the Kato coupler slot and the coupler comes out at the right height so an install will be easy. I tapped the mounting holes to #2-56 and left it there.
I picked up enough Kadee coupler boxes at the ops meet today to install couplers on this loco, so I put on a set.
I tested ATSF 5015 at LAMRS tonight and result was mixed. It had very intermittent running while the headlights were not flickering all that much. This is partly due to the DH121 test decoder which responds poorly to intermittent track power. But it should have been doing better for power pickup. I cleaned the wheels and I have never seen such dense black streaks on the cleaning cloth. Back on the track it did better, but still not well enough. I brought it home and it behaved the same on my layout, much worse than just after I had cleaned the wheels the first time at home. I cleaned them again and there were more dense black streaks. Then it ran better for one pass around my 4x8 twice around and it got flakey again. I cleaned the wheels and there were yet more dense black streaks. These wheels are just collecting crud at an amazing rate. The loco probably needs new wheels as these show heavy pitting.
I decided since the wheels were crap anyway, I'd make an attempt to clean up some of the pitting by polishing the treads. I ran the loco upside down with a Kadee brush and hit each spinning wheel with a Bright Boy until the haze went away. In the process, I discovered that the center axle on the rear truck has a cracked gear and one wheel essentially produces no torque and probably won't hold gauge either.
I got authorization to buy the gears needed for this loco then we will see how well the wheels hold up.
I tested ATSF 5015 at the club last night and it did well.... for half a lap. Then the headlights started to flicker. I was running consisted with ATSF 2934. That one go so bad that 5015 had to push it. This morning I cleaned the wheels and they were really dirty. The wheels are still collecting crud at a high rate, although not as badly as before I polished them. These locos need new wheels.
I ordered a Kato part which I thought was the right gear, but it was one of the idlers instead. The actual axle gear apparently comes only with the wheelset assembly, one axle for $15. This is a bummer. I'm still looking for the right gear.
Last night the club dispositioned ATSF 5015 to a "hold" status awaiting parts. I am going to start digging for hulks that can surrender parts, particularly the gears.
I discovered that I had misinterpreted Kato's prices for the axle sets, the are 6 for $15, not $15 each. This is in range so parts were ordered.
The parts came in a couple of days ago and they were the right parts this time. I took them to the club tonight and changed them there because that is where the loco was. A club member tested the locos and they ran fine. I have it back pending a new decoder.
ATSF 5015 was upgraded to a DH163, no issues.
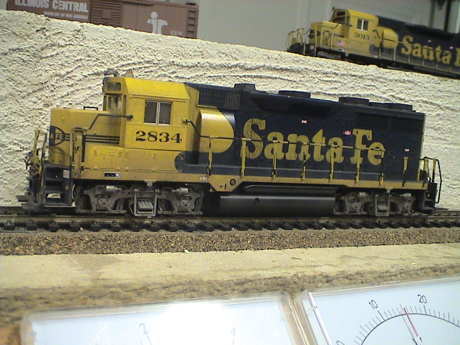
This Kato GP38 didn't run so well. It sputter and stalled. It needed a heavy wheel cleaning and lubrication and then it smoothed right out. It draws about 200 mA light and 400 mA slipping. It also needs couplers and a Kato type drop in decoder.
After checking with Steve who had been looking for this loco, I elected to install a DH121 test decoder in it for test.
The loco still had power pickup problems. I had cleaned the wheels with alcohol, but that didn't get off the oxidation and pitting. I flipped it over on the bench while running it from a Kadee brush. I found only one wheelset that was reliable. After cleaning all of them with a Bright Boy, I found that the wired going from the fireman's side power bus to the truck was not properly crimped into it's contact. I cut the wire, stripped and resoldered the end and then the loco ran well.
The loco still does not have any couplers as I am out of Kadee #5 boxes. We can install them at the club.
I picked up enough Kadee coupler boxes at the ops meet today to install couplers on this loco, so I put on a set.
I ran ATSF 2834 at LAMRS today it ran poorly. The story was just the same as ATSF 5015. The wheels were very dirty and got dirty very fast. The wheels are probably need replacing.
I decided since the wheels were crap anyway, I'd make an attempt to clean up some of the pitting by polishing the treads. I ran the loco upside down with a Kadee brush and hit each spinning wheel with a Bright Boy until the haze went away. In the process, I discovered that the both axles on the front truck have cracked gears and one wheel on each axle slips some, but not nearly as badly as the one wheel on ATSF 5015.
I got authorization to buy the gears needed for this loco then we will see how well the wheels hold up.
I tested ATSF 2834 at the club last night and it did well.... for half a lap. Then the headlights started to flicker badly. I was running consisted with ATSF 5015. 2834 got so bad that 5015 had to push it. This morning I cleaned the wheels and they were really dirty. The wheels are still collecting crud at a high rate, although not as badly as before I polished them. These locos need new wheels.
I ordered a Kato part which I thought was the right gear, but it was one of the idlers instead. The actual axle gear apparently comes only with the wheelset assembly, one axle for $15. This is a bummer. I'm still looking for the right gear.
Last night the club dispositioned ATSF 5015 to a "hold" status awaiting parts. I am going to start digging for hulks that can surrender parts, particularly the gears.
I discovered that I had misinterpreted Kato's prices for the axle sets, the are 6 for $15, not $15 each. This is in range so parts were ordered.
The parts came in a couple of days ago and they were the right parts this time. I took them to the club tonight and changed them there because that is where the loco was. A club member tested the locos and they ran fine. I have it back pending a new decoder.
ATSF 3834 was upgraded to a DH163, no issues.
At the run night tonight, the cabinet where I found a couple of other locos was open again and I poked around a little. I found three brass steam locos in there, all club property. Also, a Shay donated by a club member also came to me with problems.
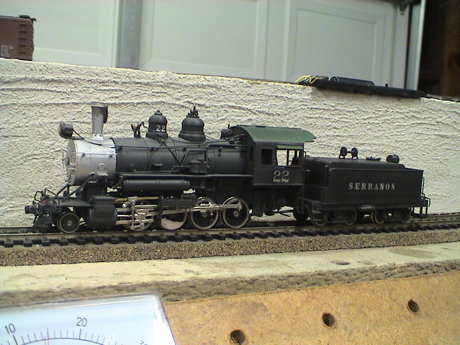
This Samhongsa brass Consolidation does not run. It is dead shorted. The loco appears to be arranged to pick up power on the tender wheels on one side and the loco on the other side but the loco by itself is dead shorted. This will take some more investigation. Otherwise, it is in pretty good condition.
It is very odd for a brass loco that will typically pick up power only on one side of the loco to be able to short out the track by itself. I took off the shell and confirmed the simple wiring to a small can motor. I hooked it up with clip leads and it ran although the current was a little high, about 400 mA. Something has to be wrong with the pickups.
After probing the drivers for continuity to the frame, I found that the geared axle appeared to be installed backwards. I disassembled the bottom end and flipped the axle around and the loco ran on the track. However all is not well. The motor uses a short rubber tube to connect to the gearbox and the rubber coupling was slipping on the gearbox shaft. The rubber is old and has lost flexibility. I could probably find another suitable flexible tube somewhere, but to further check out the loco, I simply dabbed some contact cement into the tube and pushed it back on the shaft. After an hour or so to let it dry, I'll try it again. This is a temporary patch, a new piece of tubing is needed for the long term.
The patch held long enough to reveal other problems. There is a rather severe hesitation in the drive train. The axles are actually sprung, but they don't all sit on the rail at the same time so it derails easily. The thing shorts out the track going over most turnouts. Then the patch failed.
I call a loser on this one.
The club elected to sell this one so it goes into the sell box.
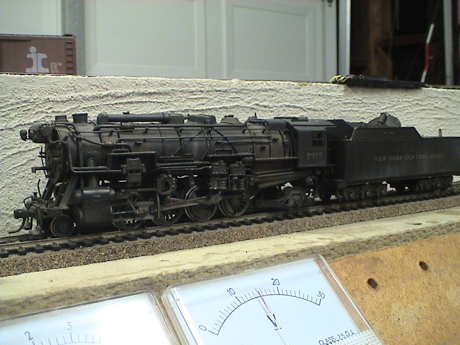
This LMB Models brass NYC Class H10B Mikado (2-8-2) runs but it has some minor mechanical problems and it draws lots of current. The valve gear eccentric actually hits the compressors causing it to bump once per driver turn. The drawbar (which picks up power from the tender) is very loose and doesn't stay on the pin on the tender. The motor draws more current than I am used to seeing in any loco, 800 mA running light and 1.4 amps slipping. This indicates a weak motor. The rear coupler is ok, the front one is a dummy. Overall, this loco is probably not a keeper.
The club elected to sell this one so it goes into the sell box.
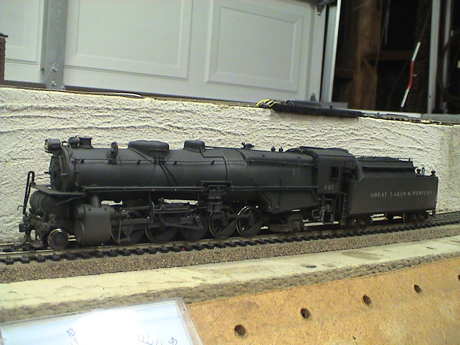
GL&W 345 is a Westside Model Co. brass import (Samhongsa again) of a Pennsy Class N1s Santa Fe type 2-10-2. This is a drag freight engine. When I first put it on the track it sort of tried to run on DC and then didn't run again. I peeled it open and found a Wangrow DH155 inside. I wasn't expecting that. Once I determined the address (03) and tried it on DCC, it ran, but very hesitantly. The loco clearly doesn't have good power pickup, but the Wangrow decoder just amplifies the problem. It picks up power on 4 tender wheels on the fireman's side and two loco drivers on the fireman's side. It picks up power from all 5 drivers on the engineer's side. If they were all working, this should be enough. It probably would be a good plan to try a better decoder in this loco after the power pickups are cleaned. The motor draws only 300 mA (DCC) running light and 500 mA (DCC) slipping. It has a can motor.
This loco is worth further work. The current is low, the mechanism, while it is running, is quiet, the body work is good, it already has a the club roadname, and there are enough wheels that can make power pickup to allow the loco to run properly if they were all working (not yet known) and it had a decent decoder, which does not. I am going to work the power pickup first. If I can get that going, then it can be at least tested on the LAMRS layout. If that doesn't work well enough, I'll strip out the junk decoder and test on DC on my layout. I could also reinstall a somewhat better test decoder, a DH121, as I do have one available. Then it would be easy to "upgrade" to my DH123 test decoder to give it a good test. Since the Heisler, which has my DH123 now, appears to be working well enough to upgrade, that decoder should become available soon.
One downside is that the loco has no lights and it would be somewhat difficult to add them due to the construction of the existing headlight housing. However, if the loco runs well enough, that can be worked out.
I cleaned all the power pickup wheels with a Brite Boy (they were pretty dirty) and the engine runs MUCH better, good enough to test. This goes back to LAMRS for testing on their layout. I have had some problems with derailments of the trailing engine truck on Atlas turnouts, we'll see how well they do on much better ones.
The club elected to keep GL&W 345. It will need some illumination in the headlights, a better decoder and it could use power pickups on two of the drivers that don't have them.
The tender truck problem was easy to fix, the thing was seriously undergauge. I cleaned the paint off the backs of the two rear drivers on the fireman's side. The contact wire assembly is made, just waiting until the CA has fully set to attach it.
The headlight will be somewhat of an issue. The loco never had a functioning headlight so I'll have to do some modifications to the housing to fit something in there. I don't have any more GOW bulbs, I need to check club stock for more. The headlight itself housing is empty. I could drill up from the bottom of the bracket and then back into the smokebox just below the bracket to allow wire access. However, the front of the boiler has been packed with lead shot and there is no passage back from there. I'll have to find a thin spot and drill through there too.
There was a Kadee front coupler, but it was mounted in such a way as to make it useless. I modified a Kadee #5 box to fit there and now the coupler is the right height and centers properly.
While I was running the loco on it's back to clean off the paint with lacquer thinner, I realized just how quiet the drive is. This particular brass loco is built differently that any other piece of brass that I have handled. Then again, all the stuff I have touched has been pre-selected as unloved by somebody before.
I attached the contact assembly with CA and after that had grabbed, I tested it, no contact. Inspecting the wheels closely revealed that the insulator is a ring right out by the tire. My contact wires were touching inside the insulator, the wrong place. It took some adjustment to get the wires in the right spot and then they made contact. It may take the installation of an additional styrene spacer to keep them there. I reinforced CA joint with epoxy so that will have to set until tomorrow.
Once the epoxy was set, I wired the new contact back to the one that was probably added on by somebody else. Now four of five drivers on the fireman's side pick up power. The loco was built to pick up power on the tender only on the fireman's side, now it runs even without the tender.
I decided to go overkill on this one. The tender's electrical contact to the loco is via the drawbar, a single point failure, which is probably why somebody added contacts to the lead drivers. I am going to wire around the drawbar with interconnect wires and SIP pins. Further, on the insulated side, I added wipers on the trucks and will wire them across too. The engine will then pick up power with at least 8 wheels on EACH side. This will also allow a sound decoder to be added to the tender later as there is already cutouts on the bottom for a speaker. I've assembled and attached the added tender contacts. After the CA initial tack bond has set, I'll reinforce it with epoxy too.
I tested the old Wangrow DH155 on my non-boosted DCS100 programming track and it actually responded to reads and writes. I reset the address to 345.
The tender contacts are finished so the next stop for this loco is to return it to LAMRS for more testing.
I tested GL&W 345 at the club last night and it did much better for the power pickup. This was the only real change from last time. Under heavy loads, I found it slippery though. It is a heavy loco, but it has a rigid wheelbase and not all the drivers sit hard on the track all the time so that it slips. The slippage provides a safety valve for the motor so that it not likely that it will burn up. The loco needs a good decoder, headlights (I have the parts now) and maybe a sound system. This will be for the club to decide.
The decoder for GL&W 345 is due to arrive tomorrow so I started the installation preparation. Since the loco already has an obsolete decoder, the wiring will be simple EXCEPT for the headlight. The front of the boiler is full of a cast lead weight. Somebody has already filled much of the rest of the boiler with shot. I found that by chipping away at a little of the shot in the smokebox, I could fish a piece of music wire from the smokebox back to the firebox area. I was expecting trouble getting wires through the same path, but both fished in on the first pass. The GOW bulbs that I have are too large to properly fit in the headlight housing so I have prepared a 3 mm white LED for that spot. It is be really tight but it fits. I drilled an access hole into the bottom of the headlight housing and then back into the front of the smokebox such that the wires are be unobtrusive. I've cut the leads on the LED to nubs and soldered some fine solid wire to them. I then coated the whole backside with Loctite Gel CA to encapsulate it. Just in case a lead shorts to the housing, I wired a 1.2KΩ resistor in series with each lead such that if one shorts to the housing, the headlight may stop working but it won't blow up the decoder headlight function. This runs the headlight at just under 10 mA. It is very bright but not overpowering.
Since room for the much larger Wangrow DH155 decoder had been gouged into the weight just in front of the motor and gearing, a Digitrax DH163 should fit fine.
The DH163 arrived and was wired into the loco. That part was fine except that the decoder is a little wider than the Wangrow decoder it replaced and I had to grind a little more from the weight to get it to fit. The new headlight worked fine.
I have been fiddling with this loco on and off for over a year. A while ago it got layout tested and the trailing engine truck tended to derail on the Calamity Curve trestle in 3 places within a foot. I played around with the truck and finally got enough weight on it to keep it on the track by winding a layer of solder around the axle and then trimming some stick on weights to fit in the truck frame ahead and behind the axle.
Then about a week ago, it went back for test and simply did not run. I peeled it open and found that the orange wire to the motor was broken. I spliced a little more wire on and reattached it. Then the engine ran but it would slip it's drivers without a load. Something was wrong. As I played with it over uneven track, I pressed it down a little and something went pop and then it started to work, but the front truck then derailed at the first hint of a curve. It turns out that the truck frame was binding on the round head screw that holds on the front coupler and literally holding the front of the loco up. I first changed the screw to a cap screw but that wasn't any better so I ground away some of the pony truck frame to clear the screw head. Then it ran. It goes back to LAMRS for more testing.
This brass stuff may look good, but I am beginning to think that the stuff just isn't worth the trouble.
I did some grinding on the pony truck frame and the loco frame to allow the truck and wheels to clear the coupler box and frame. Now the loco doesn't hang on the pony truck. I also ground some of the weight that I added to the rear truck to keep it from hanging up on the frame. It's back to the club for more testing.
GL&W 345 got some serious test time this evening. I got to the club early and had clear tracks so I dragged around 8 freight cars, 3 draggers and a caboose. In most cases, it ran fine. There are about half a dozen spots where it stops with drivers spinning. These are all spots where the track is twisted a little and isn't quite level. Apparently, the long rigid wheelbase of this loco is interacting with wavy track and it lifts some drivers and spins. I don't think that I can fix the loco, so I'll start a project to fix the track. There is one spot just east of Itasca, just entering the tunnel, that the loco stalls every time. I need to figure out what is going on there, likely some dead track. I think that I need to provide a little more clearance for the trailing truck but that will be easy to do by grinding on the frame a little more.
After looking at the loco and it's performance more closely, the problem with it stalling with spinning wheels is systematic. It takes a curve, wavy track (not very wavy, less than half a bubble) and this particular loco to make it happen. If it was JUST the wavy track then when some drivers lifted, others would carry more weight and the net result would not be so drastic. However, if there was a load shift off the drivers, then it would do what it is doing. Since all the spots I found were in curves, then the likely cause is due to the pony or trailing truck hanging up and starting to carry some load when they deflect in a curve AND a rail dips allowing one of the trucks to touch the frame and hang up. By placing the loco on flat and level track and gently rocking it down at the front and back, it is clear that the pony truck has much more clearance that the trailing truck. I had also modified the rear truck by wrapping a layer of solder around the axle. This is where it hits the frame. The frame is narrow in width and thick in height at this point so I ground some off the bottom to make clearance. More testing is required but this loco is getting close.
I ran GL&W 345 at the open run after the OPS training session this morning. Most of the spots that it had problems in before were between Ford yard and Garrison summit. It didn't have a hint of a problem anywhere along there so I think that the spinning driver problem may be fixed. The one other spot was in Deepwater 2 about half way around. I didn't get there because 345 started to make a pretty horrible sounding screech sound going forward, no sound in reverse. I elected not to run it to Deepwater and instead took it off the layout for evaluation at home. I tested it on my layout and it screeched some. I guessed that some of the brass dust that got on the loco while I was grinding the frame may have been part of the problem so I washed the bottom in rubbing alcohol to rinse off the remaining dust where I could not brush it off and then lubricated the driver axles. The noise went away. It's back to LAMRS for more testing. If it passes this time, I can certify it and put it in general service.
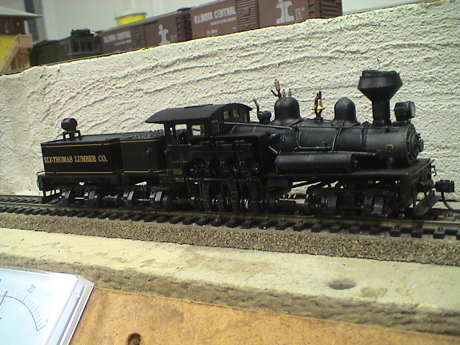
A club member donated this Bachmann 3 truck Shay and another club member has tried to get it running, it had obvious mechanical problems that he fixed but the motor appears to be having difficulty. The loco has an 8 pin DCC socket in the rear tender. The headlights and firebox light and the loco draws some current but the motor ran for me only once and has not been heard from since. I need to get into the loco to see what is going on with the motor.
The motor in the Shay is not drawing any current. It is up in the boiler and I have not yet figured out the last thing I need to do to pull the shell off. It rocks a little, but something near the front truck is still holding it on. I set it aside to ponder it some more.
I finally found the mystery screw. It was hidden under the little PWB that holds the frame contacts for the front truck. Once I got inside, it was clear that the motor was having difficulty. I managed to get it to run by working on the commutator, but even unloaded, the motor speed was unsteady and the commutator occasionally spit fire and smoke. The motor is toast.
We have two practical options. Since the thing also has gearing problems (one of Marty's trucks is on it and he wants it back) AND a motor problems, we either scrap it it send it back to Bachmann with a check for $20 and let them fix or replace it.
After some email traffic with other club members, the club concluded that we're going to send it back to Bachmann. I have another unloved Bachmann decoder that will fit this loco (or it's replacement).
The club elected to spend the $20 (plus shipping) and send the 3 truck Shay back to Bachmann for repair/replacement. I will do this next week.
Bachmann called a few days ago and said that, as we expected, they didn't have a 3 truck Shay to replace it with. I accepted an unlettered 3 truck Climax with white striping and red windows. I don't know when it will show up.
The replacement Climax was returned about a year ago. Somebody lettered it for SPLC 73. It has a Bachmann decoder in it. I got it back because it freaked out at the club at the Christmas run. The decoder had lost it's 4 digit address, it was 2723 instead of 8873. I reset the address and it ran fine.
Lloyd uncovered yet another loco in a cabinet. This one is a docksider.
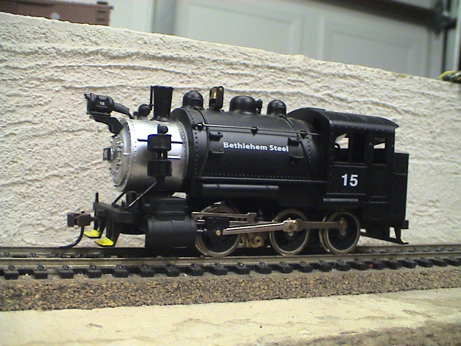
This 0-6-0 Docksider appears to be new. It runs well on DC and it has a 9 pin JST connector in the cab. The current draw is 150 mA light and 300 mA slipping. The headlights are claimed to be LED but somebody has changed them to GOW bulbs. The loco picks up power on 3 wheels on the engineer's side but two wheels on the fireman's side. This would require fixing. The center drivers are blind. The couplers are plastic. To me, this one looks like a keeper.
The docksider had plastic couplers and further the front one would not rotate. An inoperable front coupler on a switcher is not acceptable. Both coupler mounts were connected electrically to the frame which is also connected to one rail. This could cause problems later when connected to some other loco or car that had a metal coupler connected to an electrically hot frame. The rear mount was almost wide enough to take a Kadee #5 box so I shaved the box a little to get it to fit. The front one was half as wide as necessary so it took some time with a Dremel tool and a small milling bit to grind out the room needed to get a Kadee #5 box there too. Eventually, it fit as well.
There is one insulated wheel, a rear driver, that needs to be electrically connected to the other two on that side. A phosphor bronze wire was added to wipe the back side of that wheel.
The shell comes off with one screw. It will be an easy job to install a DCC decoder. I don't have one with working headlights available, but it doesn't need a test decoder. We can go straight away to a final decoder. The install will take about 5 minutes.
The adhesive holding on the new wheel contact has had time to set so I wired and tested the new wiper. It was working. The engine got a layout test and had no problems at all with power pick up. The mechanism did lock up once after it went a few feet, but I was able to free it and in about 15 minutes of further testing in both directions, it didn't lock up again.
A test decoder became available so I stuck it in #15. The motor was wired backwards, but everything else worked. I reversed the motor leads and it is ready to test at LAMRS.
I tested Bethlehem Steel 15 at the club last nigh and it did well. Due to it's short wheelbase, it did REALLY well at finding dead frogs and point rails. On regular powered track it did just fine. This one needs a good decoder and it will be good to go.
Bethlehem Steel #15 got a DH163 stuffed into the cab. This was an easy installation, a single screw. I did use some gel CA to attach the crosshead guide to it's rear support and to attach the steam chest to the frame. This assembly was sufficiently worn that it would fall apart when the shell was removed and it was touchy to get back together again. Now the steam chest and crosshead stay in place with the frame.
This cabinet seems to gush forth locomotives. There is one brass loco still in there.
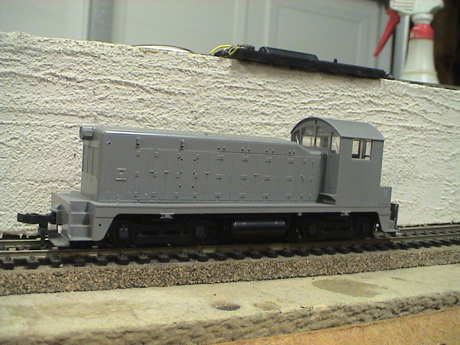
This Kato undecorated NW2 initially did not run, but after some coaxing, it started to move and loosen up. It has clearly not run at all for a very long time. It was a little noisy so I lubed the truck gearing. I couldn't get the shell off so I have not lubricated inside yet. Besides the fact that it isn't painted, there is no detail on it (the detail parts are in the box) and it has NMRA couplers, it appears to be in good condition.

I thought that this loco felt a little light in the box. It had shrinkwrap, but it was in the wrong box and there was a bag inside that was obviously torn open so that the shrink wrap wasn't factory original. When I removed the shrinkwrap, I realized that it was a dummy.
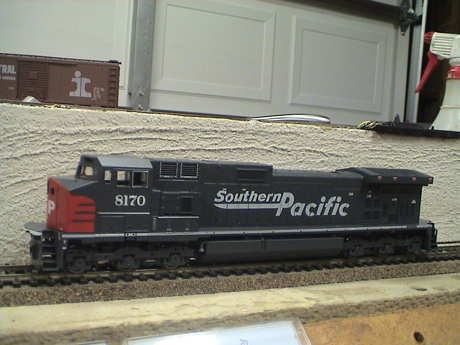
SP 8170 is a box stock "blue" box Athearn C44-9W. It was quite noisy and sounded like dry gears. I lubed it top and bottom and it quieted down quite a bit, but it still needs to break in. It has not couplers or details installed (details are in the box). I ran it with the shell off so I could watch for commutation issued. I saw a very little bit of sparking that went away quickly as the brushes wore in a little. Other than the fact that the loco is pretty old, it looks to be a pretty normal loco.
The C44-9W was originally produced by GE in 1993. SP bought some and numbered them in the range of 8100 to 8200. The model probably came on the market sometime in or after 1993. This would make it's release date at the dawn of NMRA DCC in HO. The loco is not designed with DCC in mind, it would be a completely wired installation which is no big deal for this design. If the club elects to convert this loco, I might make photo study of the installation process so that the younger members might be less reluctant to actually use on of these if they come across one that they like.
I had a test decoder available so I went ahead and converted this one, taking photos of every step of the process.
To test the loco at the club it needed some couplers. The pockets are cast into the frame. I found the cover screws, a pair of hook and horn couplers and a pair of plastic knuckle couplers in one bag. The covers will still on the sprues in another bag. Some Kadee couplers fit on just fine.
Ben installed all the detail parts on this loco and I got it back last night. I tested it today and it hardly ran. Both trucks were binding up. After removing the trucks it was obvious that the idler gears were binding in the truck housing, probably on gummed up old lubricant. Some new oil applied between the inside of the truck frame and the gear fixed that. All of the idlers needed that treatment. After reinstallation, the rear wheelset also bumped causing the truck to rock. It's axle gear was cracked although I couldn't see the actual crack. I replaced it with a new one and that problem went away. I don't know what happened in the meantime, but the stuff that Ben did couldn't have had any impact on the loco's running properties.
I changed out the partially blown up DH121 decoder (no headlight functions) with the last DH163 in stock, programmed the 4 digit address to 8170 and gave it a test run. It did fine. It goes back to the club for testing and possible certification.
I tested SP 8170 at the club last night with a heavy train. It pulled really well, but the wheels got dirty really fast. I cleaned them three times in one pass around and it was still flakey at the end. This one is going to need some wheel work.
Last night, I found a package of 12 NWSL 42" wheels for Athearn locos. I think that one of the club members had given them to me. I tested SP 8170 at the club again before the open house this morning. About 1/3 the way around, it was still toast. So I brought it home and changed all the wheels and yet one more cracked gear. We'll see how it runs during a test next Tuesday.
The club received a donation of a bunch of Kato C44-9Ws and the club decided to junk this blue box loco even though it was running fine. As I was removing the decoder for use elsewhere, I realized that I could use the wheels to fix ATSF 2789. So the decoder, lamps and 4 of the 6 axles came out of SP 8170 and it will go into the parts box to later surrender even more parts to the cause.
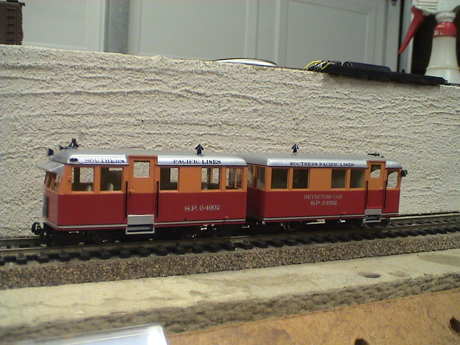
This Ajin brass track inspection car set is fairly noisy but well detailed. It probably needs some break in for it to calm down a little. The tow car picks up power on 4 wheels reliably. The trailer also has power pickups, but the are not connected to the tow. The box says that it has lights, but I saw none in either car.
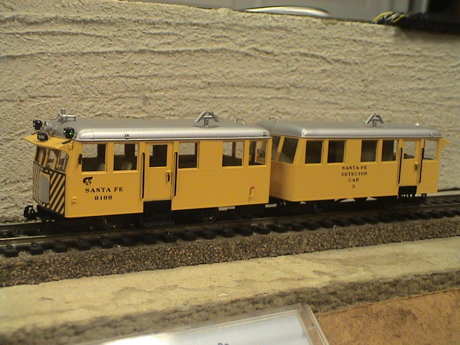
This Ajin brass track inspection car set is fairly noisy but well detailed. It probably needs some break in for it to calm down a little. The tow car picks up power on 4 wheels reliably. The trailer also has power pickups, but the are not connected to the tow. The box says that it has lights, but I saw none in either car.
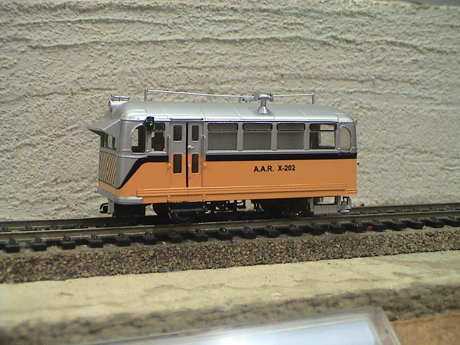
This Ajin Detector car was probably part of a set, but the tow car is missing. Except for the paint, it is the same as the trailers described above.
The cabinet yielded two more brass locos, both 4-6-0's.
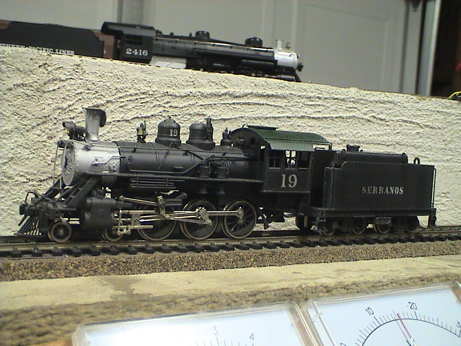
Serranos #19 is a brass 4-6-0 but I can't quite read the manufacturer stamped on the bottom. It has a Pittman motor and, like most Pittman's, draws a fair amount of current, 500 mA running light and 800 mA slipping. There is a dummy coupler on the front, a Kadee on the rear.
It ran very poorly until I cleaned the wheels of some sort of clear film, I suspect DullCote or something similar. Then it ran well enough but the drivers are wide enough to reach across the frogs of my Atlas turnouts and short as they go by. Tracking could use some work, it derailed a couple of times, admittedly on spots that have been problematic for other locos.
If it is recovered, it will require some more power pickup points which would not be hard to implement.
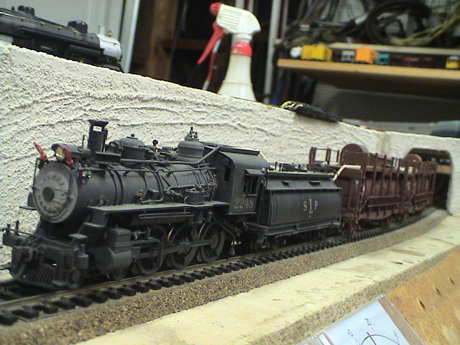
This is not just an engine, but a whole train. The Samhongsa brass engine, tender and cars are interconnected with a "fire hose" that runs the length of the train. The the whole train has a Kadee couplers all around and the body work is quite good. Unfortunately, it does not run. It tries to run but doesn't quite make it. The motor hums on the "dc" from my MRC power pack and draws about 150 mA. This is not enough to indicate a mechanical stall. It is also not enough to produce sufficient torque to get the motor to turn. I would suspect bad brushes. It does not have a decoder. To evaluate this more, I'll have to get inside the loco but I don't want to do this now because I'd have to remove the fire hose which is bonded to the loco with some kind of adhesive.
I spent part of the afternoon at Lloyd's place going over the LAMRS senior member checklist. After that was done, Lloyd handed me three shells and two basket case locos. These have been partially converted to DCC and there are lots of parts, probably enough to get both locos to run. The third shell was for a GP38 and he couldn't locate the rest of it, maybe later.
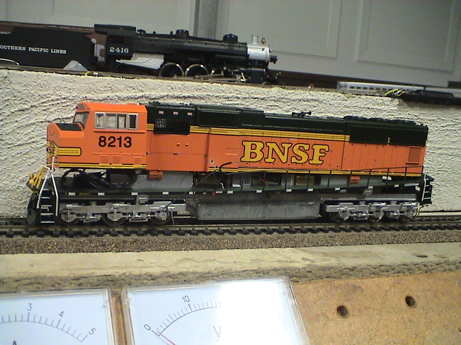
This Athearn Genesis SD75MAC is similar to another one LAMRS has with the same road number. It does have a DH165AO drop in decoder with a SFX004 sound bug attached.
The DH165AO had been physically installed but apparently it was never wired. I did not have any push on caps so I soldered the track pickup and motor wires to the decoder, reset it and it ran.
The sound decoder did not work. After reading the manual (found on line) it became apparent that the 8 pin plug on the decoder was not the same as an NMRA medium 8 pin plug. However, the two screw holes on the corners are track connections. I clip leaded to those, reset the decoder and then it started to work.
I set the motor decoder to a 2 digit address of 3 and a 4 digit address of 8213. I set the sound decoder to a 2 digit address of 4 and a 4 digit address of 8213. Then I could program the decoders separately using OPS mode. I set CV60 to 1 to enable the diesel (GP38) sound set in the decoder and increased the volume with CV58 to max (15).
The speaker is a 28 mm (1.1") pretty much standard HO speaker. It needs an enclosure so I fabricated one from styrene. The enclosure worked acoustically, but it is too big to fit. I sort of forgot that the shell is a lot narrower than the frame. It'll take a speaker no wider than 18 mm to fit up inside the shell. There are 15 mm round speakers which would easily fit under a fan, or 16 x 35 mm speakers which would fit under the rear two fans but may require that some unnecessary frame material be removed.
I used the Digitrax SoundLoader software (running on a Macintosh with the aid of the Parallels 5 virtual environment to run Windows 7) to change the sound set to an SD70MAC version. All this works except for the speaker is still to big to fit. I need to look around at the club to see if they have any smaller ones.
A 16 x 35 mm speaker arrived a few days ago and I installed it. I built a small styrene enclosure to surround the speaker and installed it under the rear two fans. This one was small enough so that I won't have to grind anything off the frame.
All of the lights are 1.5 volt 15 mA GOW bulbs, all work. The DH156A0 has a special circuit for the headlights. It is a current source so that LEDs or 15 mA GOW bulbs can be driven directly. There is a jumper on the board that can be cut to increase the current to 30 mA, but the bulbs will be wired in series so 15 mA is good. Wiring the bulbs in parallel and using 30 mA is easier and more straight forward, but if one of the bulbs burns out, the current source will try to ram 30 mA into the remaining bulb and blow it out immediately. The ditch lights will require current limiting resistors unless I can determine that two pads, marked as F1+ and F2+ are also current sources.
I could not find out what F1+ and F2+ were so I went ahead and added 820Ω resistors in series with each ditch light and powered them from the blue wire pad. I programmed them per the Digitrax Decoder Programming manual and they work. They are on with the headlight, flash with F2 and hold over flashing for about 2 seconds.
I wired the ditch lights first as they were attached to the frame. Once those were working, I wired the headlights and the new speaker. That all worked so I put the shell on and everything still worked. Then I had to reattach a bunch of detail parts. I found a cab interior left over that I didn't realize was supposed to be inside. I'll install it only if I have to get inside again.
I don't have any more couplers to put on this thing so I'll have to get some from the club on Tuesday.
I went ahead and put the cab detail back into the cab. The loco will go back to the club tomorrow night.
The loco got certified and set up to run in reverse with the other BNSF 8213. I pulled it from the cabinet last night and it didn't run so I brought it home. I found that the front truck was all bound up. I could mess with the locked up wheels and free it, but as soon as it ran forward for about 3 motor revolutions, the thing would lock up again. There didn't seem to be anything wrong with the bottom side of the truck so I cracked open the loco and played with the motor by hand. It locked up every time. I removed the front worm cover and inspected the top of the gearbox and found nothing visually wrong. I put the cover back on and then it ran fine. I have no clue what was hanging it up, but the problem will likely eventually return.
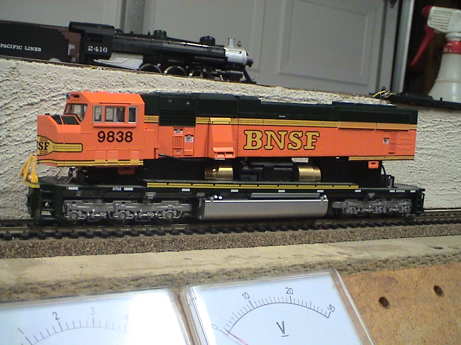
This Kato modern diesel, maybe an SD60, is also a basket case. It has an SFX064D sound decoder and a 9 pin JST socket for a motor decoder.
I put a 9 pin JST jumper plug on the Kato and it ran on DC at about 200 mA running light and 400 mA slipping. The sound decoder was connected only to it's speaker leads during this test, but it started to smoke and there are burn marks on the plastic sleeving. The speaker is buried in the fuel tank. It is not shorted to anything. The sound decoder is toast. I don't have clue where it got power, my best guess is that the storage capacitor was resting on the frame or contacted the rail somewhere. I tested the decoder by itself and it is indeed dead.
I unplugged the dead sound decoder completely and connected my old DH123 with the burned out front headlight function. The loco ran drawing 200 mA DCC running light and 400 mA slipping. The rear LED headlight worked, the front one didn't as the decoder is known to have a burned out front headlight function.
The burned out sound decoder had been returned to Digitrax for repair and I got it back a couple of months ago but didn't have time to put it in. When I did find time, I fought Windows and SoundLoader for a few weeks before beating them into submission so that I could load up a new SD70 sound project. After that, it was fairly smooth sailing. I installed a new club supplied DH163 and programmed both decoders. The motor decoder is at 2 digit address 3 and 4 digit address 9838. The sound decoder is at 2 digit address 4 and the same 4 digit address.
This one is missing much of the pilot details, the side handrails and some body detail but it now runs and makes sound.
I put of set of club supplied Kadee #5 couplers on Kadee boxes on the loco. I had to tap the mounting hole for #2-56 but the box fit fine after the ears were trimmed off.
This is the loco that was returned from Bachmann to replace the defunct three truck Shay.
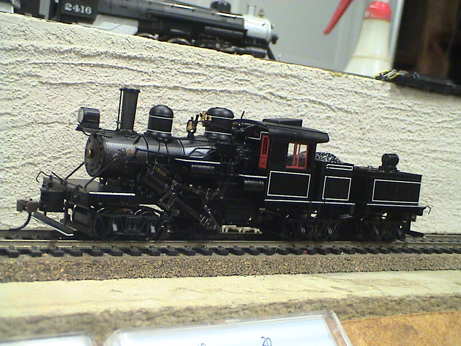
Bachmann didn't have a 3 truck Shay to replace the one that was broken and they apparently didn't want to spend the time and trouble to fix it so they replaced it with a similar loco, an unlettered 3 truck Climax. The Shay didn't have DCC, this one came with a DCC decoder installed. It runs fine, very slow but it also only draws 100 mA from the track.
The couplers had to go though as they were Bachmann EZ Mate plastic couplers. I had only a couple of standard Kadee couplers left. I first tried a whisker coupler but it was too thick and would bind in the box. I filed it down to fit then I found out that the geometry of the box was such that the whiskers did almost nothing and it didn't center. Besides, it was too high. I had a couple of Kadee #42 overset shank couplers (low knuckle) so I installed one. It was the right height, but the thickness of the centering spring made the assembly too thick and it didn't fit right, it bound up. The Bachmann coupler shank is 50 mils thick, so is the Kadee. The spring is 5 mils thick. The obvious thing to do was file down the Kadee shank. I took them down 4 mils before my fingers got tired. They worked ok if the mounting screw was backed off a turn or so. They need to be filed a little more, perhaps 2 mils. However, they work the way that they are and I buttoned them up.
This one goes back to the club for lettering and certification.
During the January 2011 OPS session, both of these locos were bad ordered.
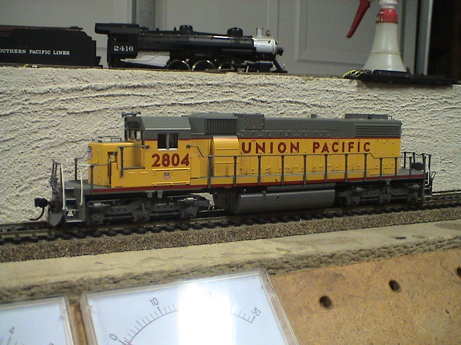
This Kato SD40 ran for only a foot before I yanked it and wrote it up. The thing made some pretty awful grinding sounds, very un-Kato-like.
I brought it home and it was still bad. After removing the shell, it became obvious what the problem was. The cab had pushed the two forward power pickup wires down into the front U-joint. This had been like this for awhile as the U-joint had ground off the insulation on both wires almost all the way around. I slipped some shrink tube over the damaged insulation and tacked the wires to the front weight so that they would not be pushed into the U-joint again. Then it ran like any Kato, smooth as silk.
When I went to put the couplers back on, I realized that they had been severely kludged. Only the Kadee cover was there, no box, so that the couplers were very poorly constrained vertically. I could not figure why somebody would do this so I grabbed a couple of boxes and reinstalled them properly. They fit right in.

NS 8907 is also a Kato, a D9-40C. It ran fine except it was the lead unit of 3 an it didn't have a working headlight. I ran it this way and it ran fine, but it needed a headlight so I brought it home to see what was wrong.
After the shell was off, the problem was again obvious. The person who installed the TCS T1 decoder did not install any lights.
I had some club supplied 14 volt 30 mA bulbs so I glued their wires to the inside of the shell and positioned them in front of the Kato light guides. I then tacked them to the light guides. I pulled the blue, white and yellow wires from the decoder bundle and wired them.
This one came back for some damage to handrails and grabs. I patched them the best that I could.
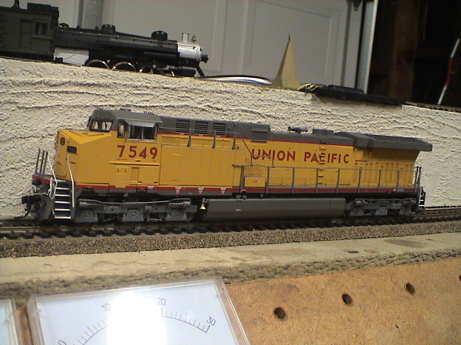
A while ago, this one was in a consist and sort of stalled out. I pulled it and determined that the axle gears were mostly split and the wheels were badly worn making power pickup flakey. I bad ordered it and it sat for awhile.
After a quick evaluation, that is all that is wrong with it, but it needs new Kato wheels before it will run again.
UP 7549 came back with bad wheels. Further, it did not run. The sound worked, the motor didn't.
I took it apart and found an apparently factory installed sound decoder of a kind that I do not recognize but it looks sort of like an Atlas decoder. The decoder says PrecisionCraft on the PWB. The sound responded fine. There was an 8 pin socket on the board so I plugged in a jumper plug and the motor ran on DC, removal of the jumper plug returned the loco to it's previous non operating state.
The decoder does not respond to a programming track, I just get NoAck. I suspect that the decoder may have failed. I have sent an email to Atlas to see if they know anything about this loco.
The club established a project to prepare and paint some heavy locos specifically targeted at MOW service. These would be dedicated to pulling the track cleaning trains that typically have lots of drag. We dug through the junk box to find some heavy C-C locos for this job and found a few older locos, but the club decided to use some new ones that were destined to for sale on eBay instead.
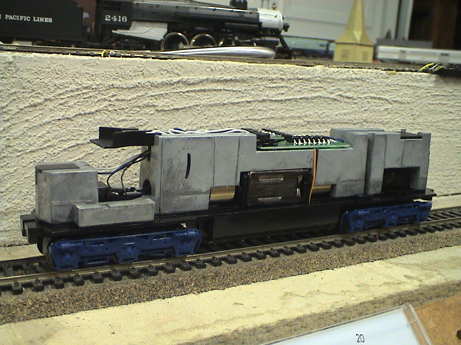
Six Proto2000 SD45's in a variety of road names were found for this job. Except for the color of the truck sideframes, they are all the same. The shells have been shipped off to the paint shop for their orange and gray paint and GL&W lettering.
I tested each of the mechanisms for performance. All were essentially identical except for one that did not run. That one had a wire broken off the top motor terminal. When fixed, it ran like the others. They draw about 200 mA running light and 500 mA at full slip. They negotiate the 18" radius turns on my little layout with no difficulty. All run with light gear noise. All have plastic couplers.
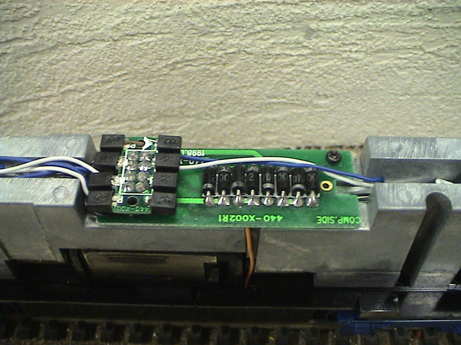 The wiring in the locos is pretty simple. There is a DCC socket plugged into a PWB. The PWB simply has a diode set to provide the proper voltage for the 1.5 volt bulbs, two in front and one to the rear. These will either need current limiting resistors or replacement with 14 volt GOW bulbs. The PWB will go away, a decoder will sit in it's place and plug into the socket.
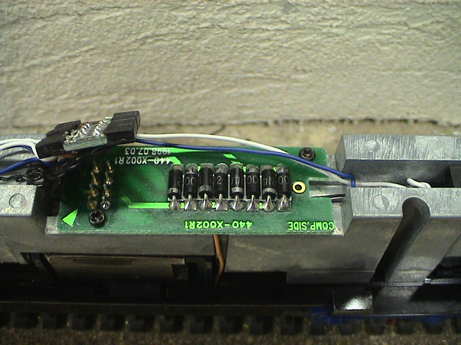 Digitrax makes a decoder specifically designed to fit into these locos, the DH163LO however most wired decoders with a short harness would probably fit. TCS also makes a decoder to fit, the LL, but I couldn't find a price that got close to the Digitrax one at $21.
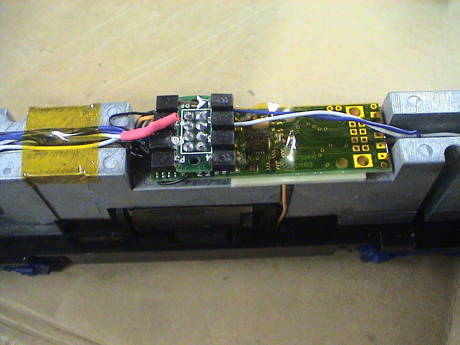
A few weeks ago, the club order of DH163LO decoders arrived but I didn't have time to work on them due to vacation travel. However, when I got back, I started to install them. This is the first one.
The DH163LO decoder is supposed to be plug and play into Proto2000 locos but it didn't work out quite that way. First, the locos ran backwards. I fixed that by setting CV29=3. This turns off analog conversion and turns on the NDOT (normal directional of travel) bit so that they run backwards, which is this case was forwards.
The front headlights didn't work either. The decoder has a built in 15 mA current source to run LEDs or low voltage bulbs. The rear light was fine, the two front lights didn't light. This is because the two front bulbs are wired in parallel and 7.5 mA each was not enough to cause them to light up even a little bit. I simply rewired them in series. The current source on the decoder has plenty of compliance voltage to work with so that it can easily handle the 3 volts that the two bulbs need wired in series. The same 15 mA flows through both of them.
The rest of the batch needed the same changes. There was one bad decoder in the batch (already sent back to Digitrax for replacement) so the 6th loco has not yet been modified, but it is clear that it will take exactly the same 5 minute modification as the others.
Digitrax returned a new decoder to replace the defective one and I installed it in the last loco. It went in fine.
I got to the club early last night. When Lloyd came in he was carrying a couple of boxes. One had 19 locos in it, the other a half dozen or so Amtrak double level cars. This stuff had been donated as non-functional but most of the stuff ran. There were some chassis without shells, some locos without wheels and many without couplers. All were DC but some had been remotored.
I ran a triage of all 19 locos to see what was useful and what was maybe junk. I found mostly running locos.
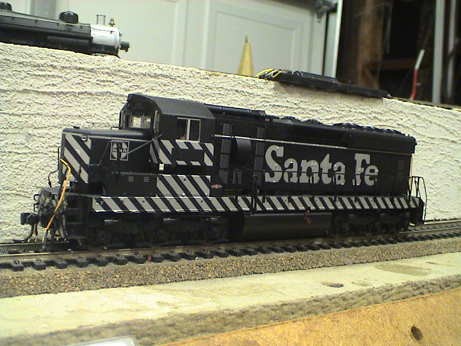
This Atlas SD24 is painted for ATSF in the zebra stripe scheme but it doesn't have a road number. One should be easy enough to add. It needs some minor detail work, but it runs well.
A Digitrax DH165AO drop in decoder was installed in this loco without difficulty. IT still needs a road number. ATSF had SD24s in the range of 900 to 979 so we should be able to pick a good number.
I finished some minor shell repair and lubed the loco.
Engine number 901 it is. I decaled it with some silver decals I found at the club.
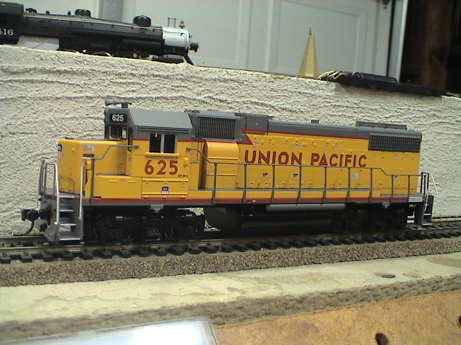
The Athearn GP38 (or similar) is a pretty much stock blue box loco. It runs well and has good couplers and body detail
UP 625 was designated as a "sell" loco.
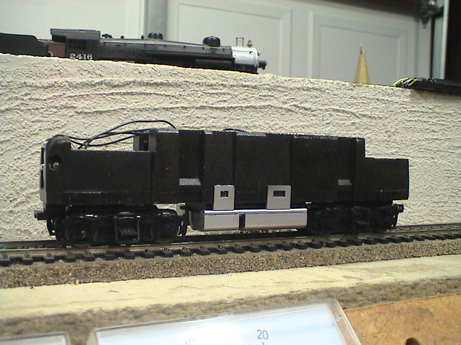
This is an Intermountain chassis, probably for an F unit based on it's shape. At first, it did not run and made a lot of noise. The front driveline was disconnected from the front truck. I reinserted it and the loco ran fine. The driveline doesn't fit very far into the gear tower so that I don't know how long it will stay in place. Since it has not shell, it is probably good only for parts.
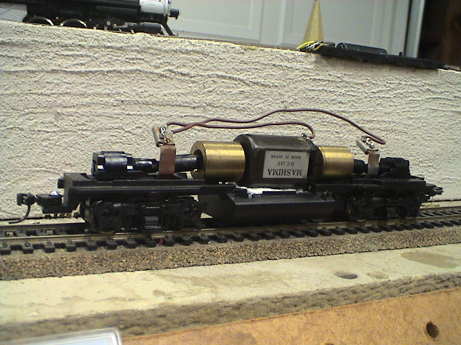
This remotored Athearn chassis runs well but the motor is loose and needs to be reattached. I don't know what kind of loco it is for. It is probably useful for parts.
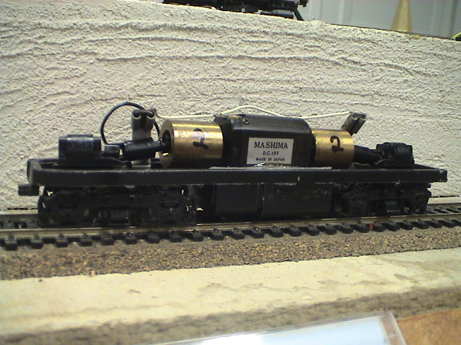
This Athearn chassis is probably for an F unit. It has no wheels so I did note evaluate it further. I will scare up some used wheels and give it a go later.
I didn't have any used wheels to fit this chassis so I just tested the chassis on the bench. The mechanism runs quietly drawing 130 mA free and 2 amps stalled at 12 volts.
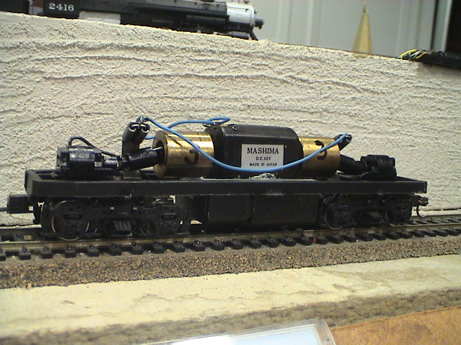
This Athearn chassis has also been remotored and is probably for another F unit. It has at least one cracked axle gear. It is also a candidate for parts.
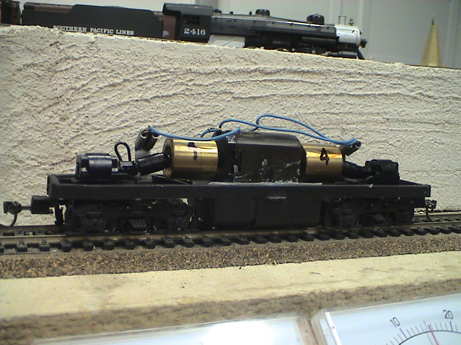
This is a similar Athearn F unit chassis. It was also missing it's wheels so I did not test it. That will come later.
I didn't have any used wheels to fit this chassis so I just tested the chassis on the bench. The mechanism runs quietly drawing 130 mA free and 1.5 amps stalled at 12 volts.
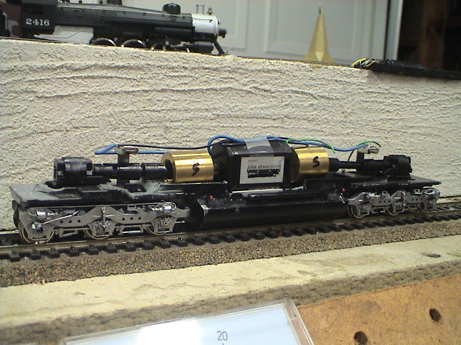
This Athearn chassis is for a C-C unit, maybe an SD40. Initially, it did not run. The chassis wire that connected to the motor was broken. I patched it back together but it is a solid wire so if this loco gets used for anything, the wire will have to be replaced. Then the loco ran with considerable noise. I moved the other wiring so it wasn't dragging on the flywheels and lifted one end of the motor, which had been poorly mounted. The universal joint on that end had some wobble and was hitting the chassis. After those adjustments, it ran well enough. This loco is also a source of parts.
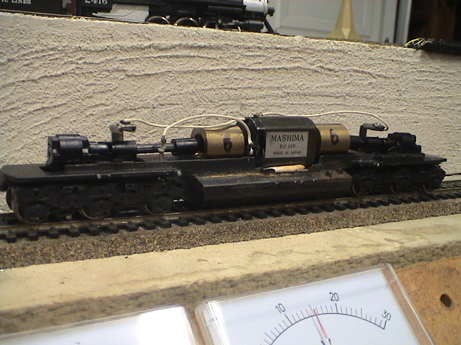
This Athearn chassis is likely for an SD45 or similar loco. It has been remotored and ran well but it does have one cracked axle gear.
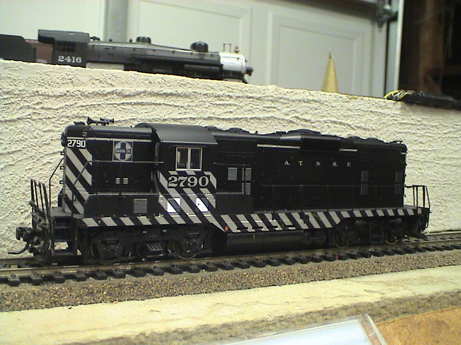
The club has one other Life-Like GP9 with this same road number. This one didn't want to run initially, it was very stiff but it loosened up quickly. It will need some lubrication. The rear pilot and step on one side is broken.
Since this version of ATSF 2790 had some physical damage and we have another one already certified, this one was designated as a "sell" loco.
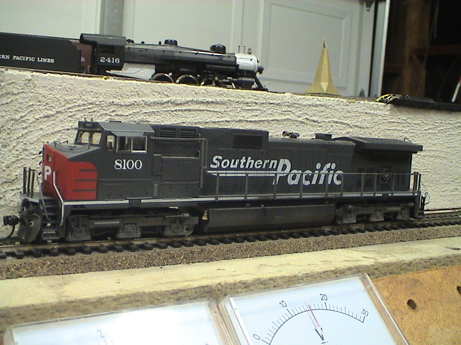
SP 8100 is a Kato C44-9W that runs well. Overall it is in good condition but it does have worn wheels.
SP 8100 got a DH163PS, a lube job and a new coupler knuckle spring.
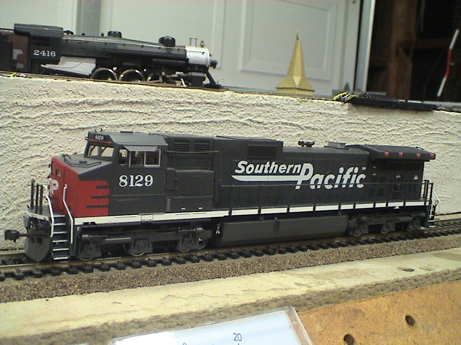
SP 8129 is also a Kato C44-9W. It runs well and is in good condition but the owner cut off the coupler trip pins.
I installed a DH163PS into this loco, lubed it, replaced the couplers, and did minor body work. It is good to go.
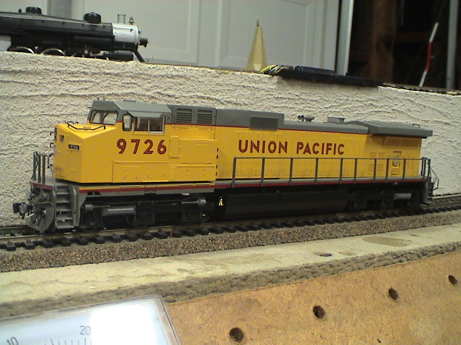
UP 9726 is yet another Kato C44-9W. It runs well, is in good condition and also has cut trip pins.
A DH163PS fit in without difficulty. There was some body damage (shell clips) that needed work. I had to glue the shell to the walkway so that the shell would stay on. The walkways are held on by the coupler pockets.
It still needs new couplers as the trip pins have been cut.
I don't have any more Kadee #5's so I'll have to get some from the club. I lubed the loco and repaired some handrails.
I got some couplers and installed them on UP 9726 so now it is good to go.
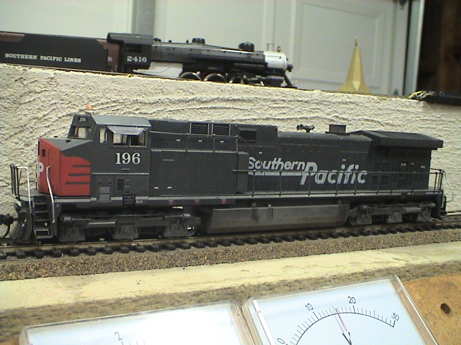
SP 196 is yet another Kato C44-9W. The loco runs well, the body and couplers are in good condition. The wheels also look ok.
SP 196 got a DH163PS decoder. The couplers needed remounting, both screws were damaged. I had to retap the mounting holes. Somebody had also ripped the plastic light guides out of the loco. While the LEDs on the PWB near the center of the loco light properly, the light does a poor job of getting out of the loco.
SP 196 is waiting layout test and certification.
SP 196 got tested on the layout a few days ago and it was doing very well as the 2nd unit of a very heavy track cleaning train. Then the rear coupler just pulled out as it was leaving the cutoff. The coupler mounting screw had fallen out somewhere in the cutoff. The first few threads of the mounting hole were stripped. All the screws I had were all too long or too short so I had to trim a long one down so it didn't bottom out and still found some threads to bite into. It goes back for certification.
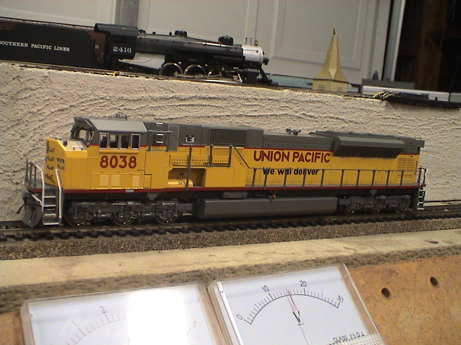
I had never seen one of these before. I had to look it up on the internet. It is an SD90, probably a UP experiment that didn't turn out so well. It runs well and the body is in good condition. The front coupler is missing and the rear one is plastic. The wheels look new.
UP 8038 got a DH163PS decoder and new couplers.
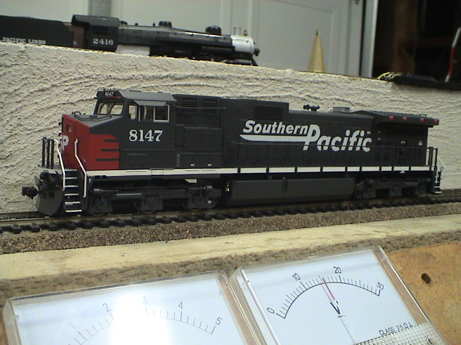
This guy really liked C44-9W's. This is another Kato that runs but with some noise. The coupler pins have been cut but the body and wheels are in good condition.
I installed a DH163PS into this loco, lubed it, replaced the couplers, and did minor body work. It is good to go.
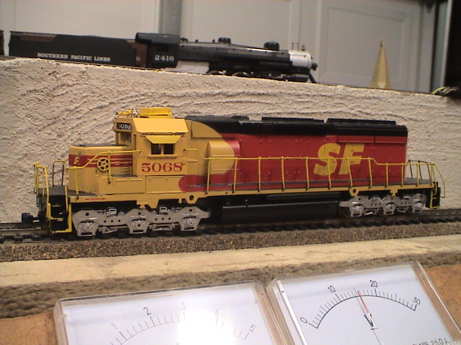
I think that this is an Athearn SD40. It is missing it front wheelsets, but the motor runs. I'll find some used wheels to give it a better evaluation.
I found some used 42" wheels and installed three sets in the front truck with a cover that I found in a bag in the box that the loco came in. Two of the wheelsets had cracked gears, but that was ok for testing. Then the loco ran fine at 200 mA light and 500 mA slipping with normal noise for a Athearn blue box loco.
The rear coupler was mounted in an inappropriate box so I changed out the box. The front one was mounted in a broken box and the coupler knuckle return spring was glued to the side as the pin for it was gone. I replaced both the coupler and the box.
SF 5068 has been designated as a "sell" loco.
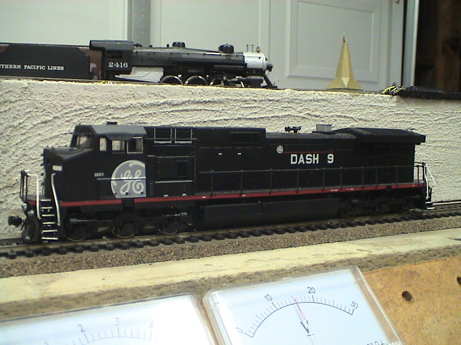
This is yet another C44-9W made by Athearn. It runs well, the body is good, but the couplers are plastic.
GE 8061 has been designated as a "sell" loco.
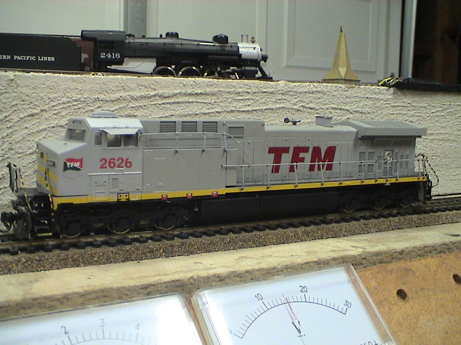
The last loco in the batch is also an Athearn C44-9W. It runs with some noise. The couplers and body are good but it is missing one fuel tank insert.
TFM 2626 has been designated as a "sell" loco.
This one has been at the club since before time began and it is showing it's age.
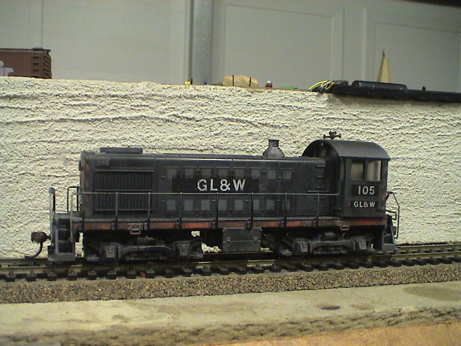
GL&W 105 is a very old Atlas model of an Alco S-2 switcher with worn wheels. The bare brass surface picks up track dirt fairly efficiently. However, this one is so old that it is unlikely that we'll find parts for it. The gearing is not the same as any of the parts I have seen.
It sputtered some when I put it on my test track. After a wheel cleaning and a lube, it ran much better but I expect that the power pickup will degrade quickly.
I hadn't worked on any of these before.
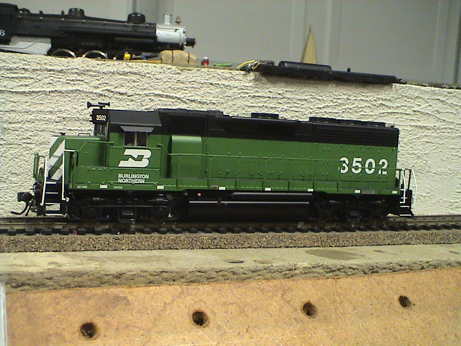
The bad order tag said that it was slow. It was indeed slow. It made a sort of a hissing sound and hardly moved. However, it also didn't draw much current, less than 100 mA with the headlight off. I thought that this was odd, I expected higher than average current due to some binding in the mechanism. This one appeared to have an electrical problem.
Then rather suddenly, it took off and ran. It was running quietly and smoothly at about 200 mA. Now I was really confused. It wasn't in my database so I hadn't handled this loco before.
I put it on the programming track and DecoderPro reported the decoder type as an Atlas 4 function decoder. I popped the shell and there was a neatly installed decoder that looked like a drop in board, but it wasn't a TCS, NCE or Digitrax board. This one has an 8 pin socket with jumper plug on it that might be for a sound decoder. I found nothing wrong inside so I lubed the top end and put it back together.
I got it back for the same problem that it had 18 months ago. This time, however, it did not recover. I tested the motor in DC and it was fine. The decoder would barely drive it though. The motor waveform looks odd. I suspect a bad decoder. The only way to really tell is to replace the decoder.
I finally got a replacement decoder for this loco, a Digitrax DH165AO. The replacement was tedious but uneventful. The loco ran smoothly but slowly after the install, however much better than with the old decoder. I lubed the motor and gear tower bearings and ran it in for a few minutes. The speed came up, the current came down. Now it appears to be running fine.
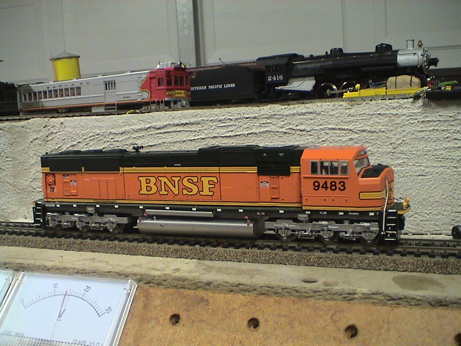
This one lost it's front coupler somewhere on the layout. Since the couplers hold down the walkway part of the shell, the front of the shell came up too. Also the carbody separated from the walkways because the clips were broken and then some of the railings came off. The loco ran fine however.
I attached the shell to the walkways with CA and then installed a new Kadee #5 coupler and box. The front handrails would not stay in place by themselves so I attached them with CA. The engineer's side railing stayed in place without adhesive.
The loco had already been converted by somebody with a TCS T4X decoder which seemed to be doing just fine.
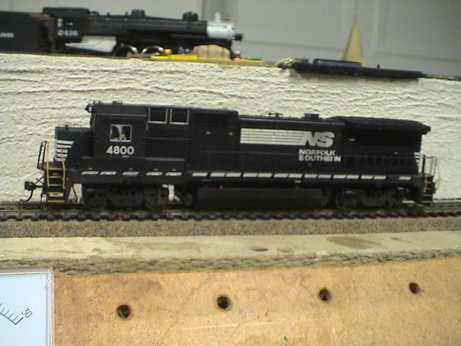
This one had been running at the club and I hadn't touched it before. It got into the bad order box with no tag. However, it was obvious that it had problems. It had terrible power pickup and made a lot of noise from inside the shell. A quick visual inspection revealed that the wheels were flat worn out. They were so bad that the decoder was getting mostly bad packets and it couldn't even decide which headlight to use or when to turn it on.
 Inside, I found an unknown type of decoder. DecoderPro could not identify it either, it said unknown manufacturer. It was likely that some of the wiring was rubbing on a flywheel so I repositioned all the wiring, lubed the top end, and put the shell back on. The internal noise was gone, but it still ran like crap.
I had one set of club owned Kato wheels left. Atlas and Kato use the same wheelsets in most locos. I put them on and the running problems just went away.
NS 4800 came back with no bad order tag. However, it did not run. A quick check of some CV values indicated that CV29 was 6 (2 digit address and analog conversion on) and it had no 4 digit address at all. I reset the address and it ran but it needs to be checked for speed match. It looks like the decoder might have reset itself.
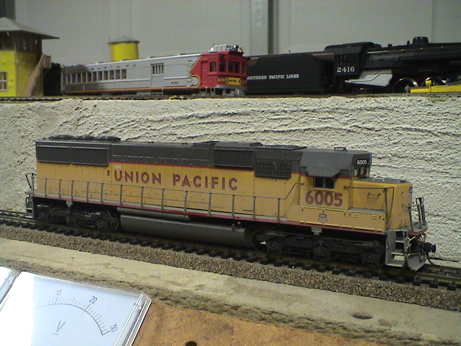
UP 6005 is a LifeLike SD60 that is also one of the club's two speed match locos. The complaint that it did not run.
It ran for me, but not all that well. The power pickup is flakey and the loco seems to be running a little slowly, but that could be due to intermittent power pickup. The trucks use Kato type wheelsets and the wheels are simply worn out. I have replaced lots of these recently once I determined that if the plating is worn off, they are just unreliable.
I need to get club approval to purchase some more wheelsets. Once it gets new wheels, I'll lube both the bottom and top ends and give it back to the club for re-matching to the other speed match loco.
Later in the day, I got approval via email to order some wheels. I expect them in a few days.
I took the shell off and found that the motor would not turn at speed step 1 so I lubricated the 6 high speed bearings on the driveline. After a short run in to distribute the oil, it will now run at speed step 1 but the wheels are still giving it problems. The headlights flicker lightly which would not be a big issue except that the decoder would not receive commands reliably. A command to change speed or turn on or off the headlight would not be received right away. This is a symptom of the chopped up power getting to the decoder. Many of the commands are garbled by many short power interruptions.
The decoder is by TCS, but it appears to be an N scale version. From a programming perspective, all the TCS BEMF decoders are pretty much all the same.
The new wheels came and I installed a set. I found that the lower gearing was totally dry. I greased the bottom ends as I put in the new wheels. The loco runs very reliably now, but it seems to be a bit slow. It sped up a little with a minute or so to redistribute the grease, but it may require an extended break in before it gets speed matched again.
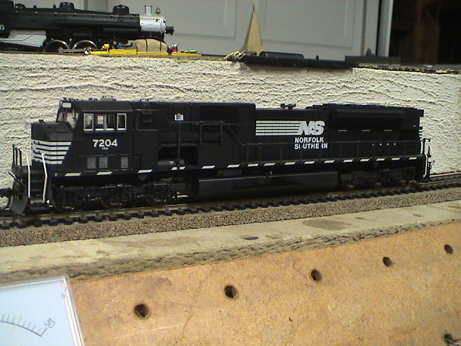
I tried to consist this one at the club modern OP session yesterday and it refused to respond so instead of messing with it then, I found another loco and bad ordered this one.
When I got it home, it refused to do anything on the running track, but it was alive on the programming track. I tried to use DecoderPro to read back the decoder contents but DP complained that it was an unknown decoder. I faked the decoder type and the 4 digit address came back with an illegal value and there was a value of 34 in the advanced consist CV17. I just forced the correct 4 digit address on it and it took. The engine began to run.
NS 7204 got a bad order tag for "no response." It responded to me on my test track and appeared to run fine. It'll go back to the club for test.
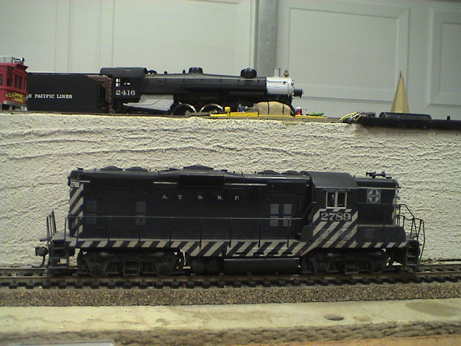
ATSF 2789 is a Life-Like GP9. It has, or had, a decoder in it but it was clearly an old one. The wheels were incredibly dirty and it hardly ran at all. As I was cleaning the wheels, the decoder shorted.
I'll need to remove the smoldering remains of the decoder that was in there and evaluate it on DC. The club has two other locos like this one that run quite well.
I removed the Wangrow decoder from this loco and plugged in an 8 pin jumper plug. It ran, then shorted again. I found that all four of the axle gears are split. Two of the wheelsets were undergauge and this probably resulted in the half axles touching inside the gears and causing the short. When I tried to clean the wheels, I apparently jostled them. After regauging the wheels, the short cleared and the loco ran pretty well considering the crud on the wheels. It draws 200 ma light and 600 mA slipping.
The wheels themselves are pretty much gone, but I have a new NWSL set of replacements. However I have only one new axle gear. I need to buy another bag.
My impression is that this loco is a keeper. I'll do a test replacement of the wheels and gears and if it does run well, we should convert and keep it.
The club elected to keep this one because it matched well with ATSF 2790 but it needed new gears and wheels. Since the club elected to scrap SP 8170 (we have a lot of SP C44's) I pulled the wheels off of it and then I removed the decoder which was a DH163. The one bulb that was in ATSF 2789 was burned out and the C44 had bulbs wired to the decoder so I took them too. All that stuff went into ATSF 2789 and it ran fine. It is ready for certification.
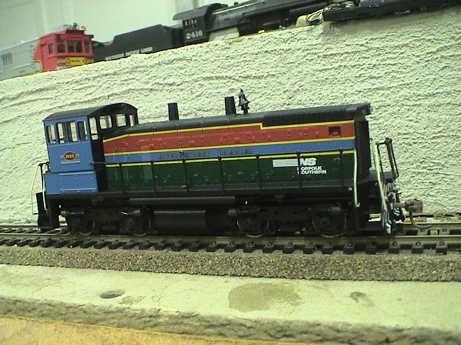
NS 1733 is an Athearn SW1500 painted in an odd, but prototypical, scheme. It runs smooth but makes some noise, it could stand some lubrication. There is no decoder. It draws 300 mA light and 600 mA slipping so the motor is in fair shape.
NS1733 has been designated as a "sell" loco.
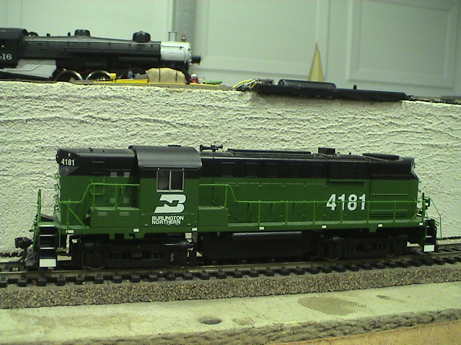
BN 4181 is a Life-Like RS27. It has an old noisy decoder but it ran. There is some high speed bearing noise so it needs a topside lubrication job. There might also be a problem in the rear truck as one axle wanted to hop around a little. Due the old decoder, it runs so poorly that it is hard to tell what else might be wrong.
I peeled this one open and clipped out the Wangrow decoder and converted the loco back to DC. It still had some high speed bearing noise, but a little oil on all 6 high speed bearings made that go away. I also lubed the bottom end.
The loco has a conventional can motor, flywheels and geared trucks. It has a heavy die cast metal frame. There are no headlights installed.
Then it ran better. There is still some power pickup issues due to the worn wheels but it isn't serious. It is also poorly tolerant of out of level track. It found a bad spot on my layout (which I fixed) but other locos did not derail there. The minor power interruptions were driving the old decoder nuts, a newer decoder won't have nearly as much problem. There is also a slight bind once per wheel turn when running forward, no problem in reverse. This is a load change because I can see the current fluctuating at the same rate at low speed and the motor is loaded and unloaded.
The loco clearly has some minor mechanical problem that may or may not go away. However, the loco doesn't quite meet my reliability standards and should probably be sold.
BN 4181 has been designated as a "sell" loco.
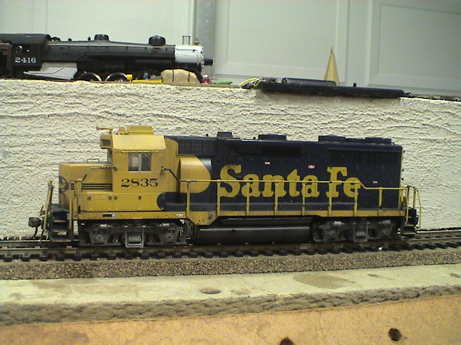
ATSF 2835 is a Kato GP35 that has not been converted to DCC. It is well weathered and is in good condition. It draws 200 mA light and 400 mA slipping. There is a little gear noise going forward, it is quieter in reverse. It will probably clean up with some lubrication.
This is an older Kato that was not configured for DCC. However, the installation of a wired Digitrax DH163 decoder was not difficult. It needed 100Ω in series with the blue wire to prevent the lights from burning too brightly.
I did some minor shell repair and lubed this loco. It is ready to go.
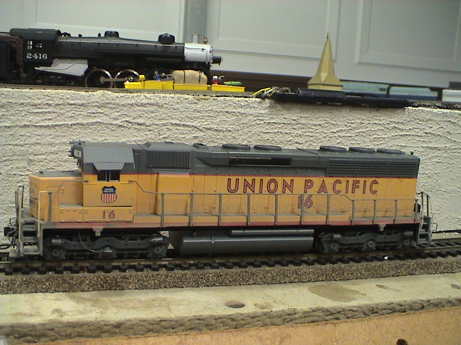
UP 16 is a Bachmann Spectrum SD45. It has been converted to DCC. The decoder reports itself as a DZ143 class decoder. It draws 200 mA light and 400 mA slipping. It runs smoothly and quietly.
The front coupler was half a knuckle too high. I removed it and found that was a high set coupler. I replaced it with a low set coupler and the height is just right. This one probably could use some lubrication, but otherwise, it seems good to go.
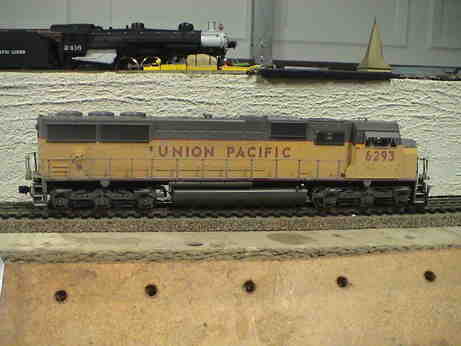
UP 6293 is one of two club speed matching locos, but seemed a little balky starting forward. I took it home for lubrication and a run in and it seemed to run better. It now runs at the same speed on speed step 1 forward and reverse. I used LGB gear grease on the worms and AeroCar oil on the motor shafts and the worm shafts on both trucks.
I did find that somebody had inadvertently glued the front coupler pocket to the pilot, probably when attaching some details. It took some gently prying to break it loose. Also, the frame hangs up on protrusions on the pilots on both ends requiring some flexing of the pilots to get the frame past them. The front coupler was missing a knuckle spring.
UP 6293 was bad ordered for howling bearings. It had dry gear tower bearings on the front truck. I disassembled the top of the truck and lubed the bearings and worm. While I was in there, I did the same to the rear truck and lubricated the motor bearings.
This is one of two LAMRS speed match standard locos, both have had problems recently. It is likely that neither runs at exactly the same speed as it used to. The club will likely have to determine, based on the preponderance of evidence while running against other locos that have been speed matched, if they are still good as speed match standards.
This one came back with a howl. This was the first of the Life-Like locos that I identified as having upper bearing problems and at that time I didn't know that the old lubricant must be completely cleaned out. I took it apart, cleaned the upper gear tower bearings with rubbing alcohol and relubricated it. The howl is gone, hopefully for a long time.
A long time wasn't long enough. Just a year later, it was back for the same problem. I cleaned it out again and relubed it and the bearing noise was gone again. We'll see how long it lasts this time.
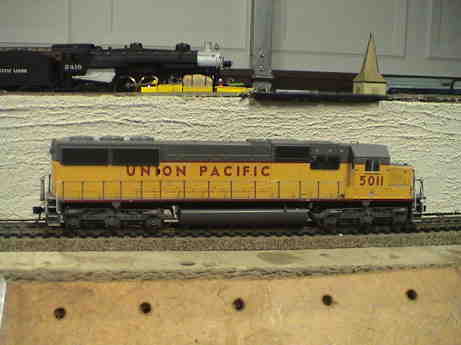
UP 5011 is exactly the same mechanism as UP 6293 and had exactly the same problem, a dry gear tower bearing. I lubed the rear one and the howl went away so I did the front one too. This loco as some sort of a drop in decoder, maybe a TCS.
UP 5011 came back with a bad order tag of "slow." I tested on my layout and it ran fine. It needs a layout test.
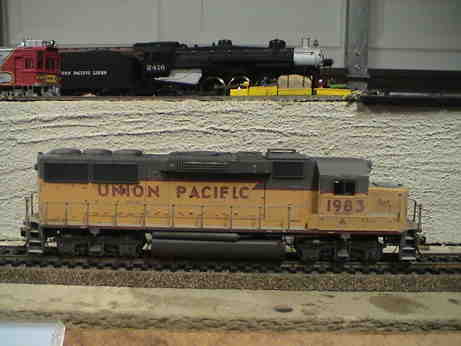
UP 1983 was bad ordered for "lights and direction don't match" but they do. It worn wheels and the pickup is not very good. I don't have any so the club will need to buy some.
At the club, I found a two packages of NWSL nickel silver wheels with enough to do 2 B-B locos, so I changed out the wheels on UP 1983. It does much better on my layout.
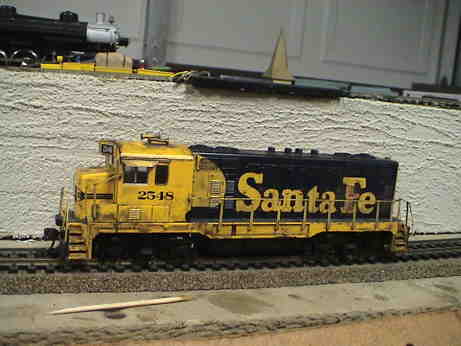
ATSF 2548 was bad ordered for no response. It ran fine for me. Nothing done, returned to the club.
During a cleanup before the LAMRS Spring 2012 Open House, we found 4 wooden boxes of locos and cars that used to be owned by a deceased club member. He generally painted his stuff for the California Southern Lines, the namesake road of a club nearby. The CSL is also known as the "Orange Belt" line. The motto of the CSL is "Serves You Right." This stuff is all very old and none of the locos are worth expending any club resources on although somebody might want them so they will likely go out for sale at the swap meet at the Spring Open House.
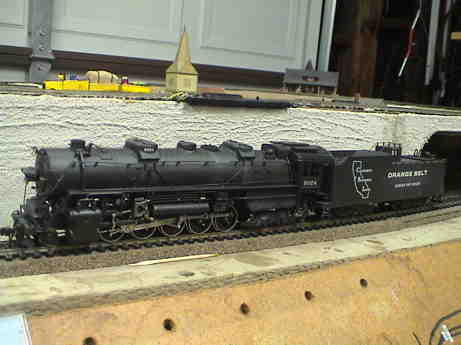
CSL 6024 is a brass 2-10-4 that actually sort of runs. It shorts the track on the first snap switch that it hits and the power pickup is a little flakey. The current is somewhat high at 800 mA slipping, 400 mA light. There is no front coupler and the front pilot assembly is bent.
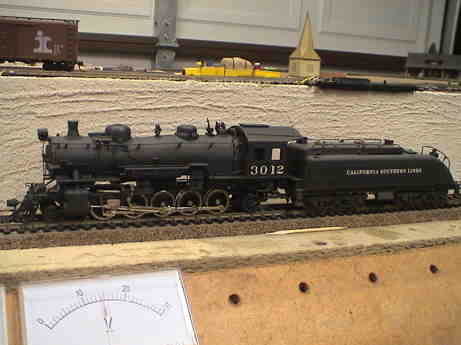
CSL 3012 is another brass loco, a smaller 2-10-2 freight hauler. It also sort of runs but is very intermittent and smelled of burning oil.
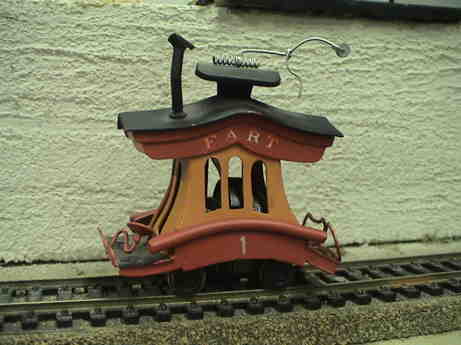
The FART is the Ford Area Rapid Transit. This is a brass model of a Toonerville Trolly. I was really hoping that this one would be good, but since it was disassembled when I found it, I wasn't holding out too much hope. The motor brick has just two wheel drive and two wheel pickup, this is not good in itself. The motor hardly ran when clip leaded but after a little coaxing, I got it to run on the bench for awhile before it developed a hard short.
However, we may keep it. It is likely that we can find some little brick to put under it and return it to service on the FART.
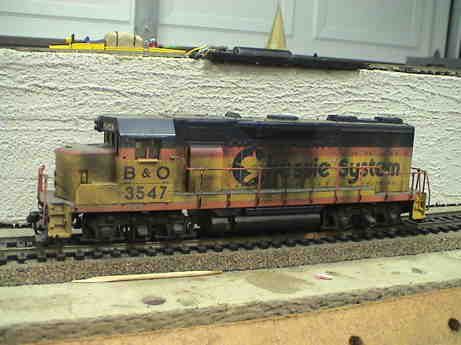
B&O 3547 is a GP35 dummy, as such it is not much good to the club.
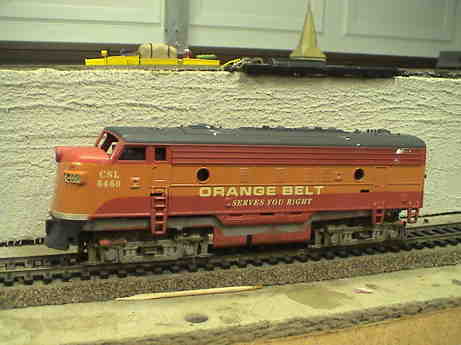
CSL 6460 is a Hobbytown F7. It does not run as the brush holders are broken off the motor and the brushes are missing.

CSL 2560 is an MP15 of unknown manufacturer. It has 4 wheel pick up and run very slowly but at least it doesn't draw a lot of current doing it.
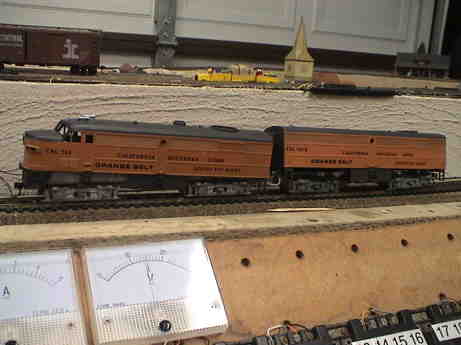
CSL 765 and 765B are a dedicated set of an FA1 and FB1 from Hobbytown. This one also had some kind of sound unit in the B unit. However, the units do not run at all.

The motor is in the A unit. It drives the front truck via a spur gear chain and U-joint. The rear truck is driven via a square shaft under the loco. There is another square shaft that connects to the B unit front truck. Another square shaft and U joints drive the B unit of the rear truck. Power is picked up from one side of the A unit and the other side of the B unit.
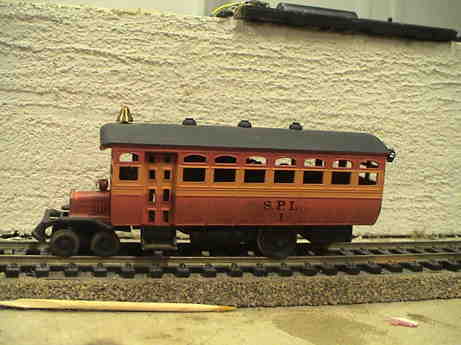
The SPL is the Sierra Pacific Logging railroad, the standard gauge logging line on the LAMRS Great Lakes & Western railroad. SPL 1 is a brass railbus. It actually runs fairly well on clean track. Power is picked up on only two wheels so that it stalls on every insulated frog on my layout. It would run poorly on the LAMRS SPL as well even though there are powered frogs there. The LAMRS might want to consider keeping this one just for the scenery value.
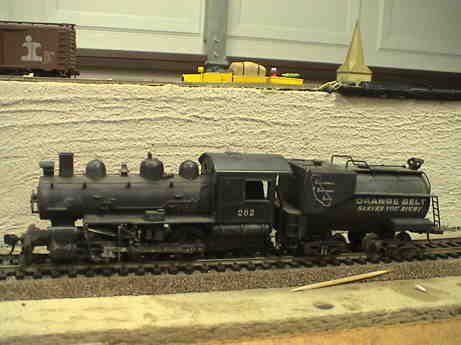
CSL 262 is an 0-6-0 switcher. It is not in good shape. There is a broken valve gear rod and the loco barely runs. I could not get enough power into it to even measure the motor current.
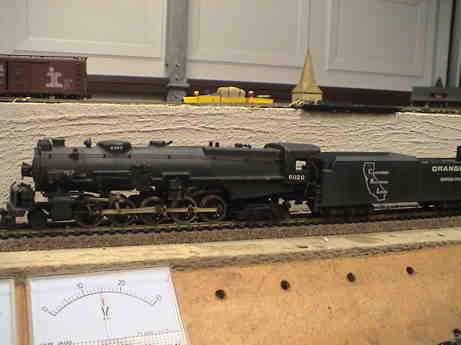
CSL 2060 is another 2-10-4, obviously of a Pennsy prototype. It tries to run but it shorts out.
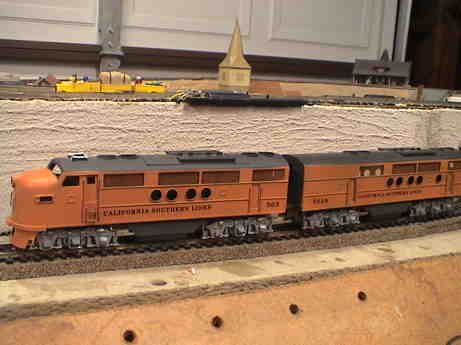
CSL 565 and 565B is an FT A/B set that has the same mechanism as CSL 765/765B. However, this one runs. It draws about 600 mA and makes some noise, but at least it is steady without the tendency to short.

CSL 2250 is an NW2 that runs somewhat. It draws about 800 mA and it has a fair top speed. It has 4 wheel power pickup.
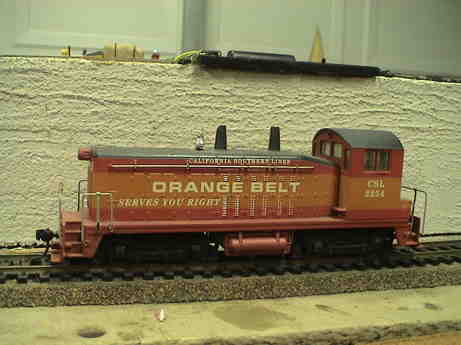
CSL 2254 is another NW2, but this one runs much better, it is the best of the lot. It has 8 wheel pickup and runs light at about 200 mA.
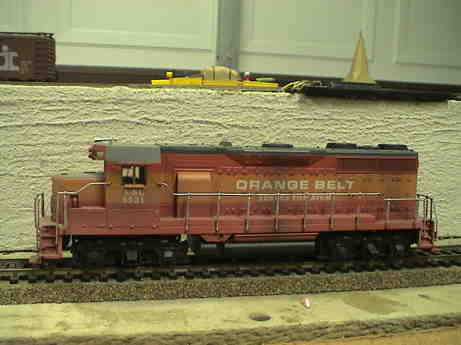
CSL 6521 is another GP35 dummy.
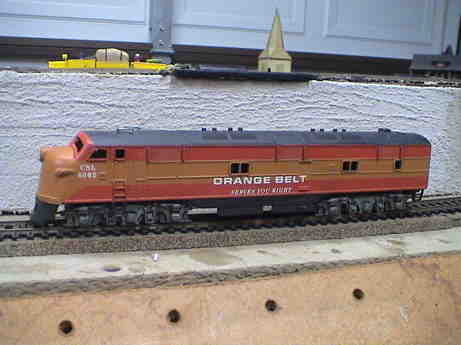
CSL 6002 is a Hobbytown E7. This one has 6 wheel power pickup, but the power delivered to the motor from the trucks is very flakey. When I clip directly to the motor, it runs steadily.
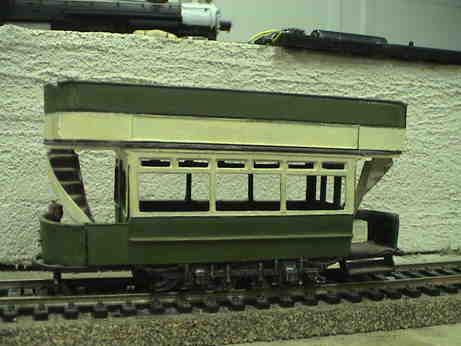
This one showed up in a box of donations. It clearly is older than dirt and hasn't run in nearly that long. However, it runs now. After some adjustments to the power pickups, a serious wheel cleaning and a little oil, it actually runs pretty smoothly drawing about 200 mA. It does have a tendency to short out the track on my Atlas turnouts. It is not obvious what is doing it, but it does it every time. If I can get it running, this might be a candiate for the Ford Area Rapid Transit streetcar line.
After playing with it some more, the short is dependent on the direction of travel. Going forward, it shorts both facing and trailing point on the straight or diverging route. Going in reverse, it doesn't short at all. This means that one of the wipers is probably being dragged out of place as the wheels turn allow it to touch a point rail. The short occurs only in a very limited part of the turnout when the car is over the point rails. However, it is hard to see what is happening under the car when it is on the track.
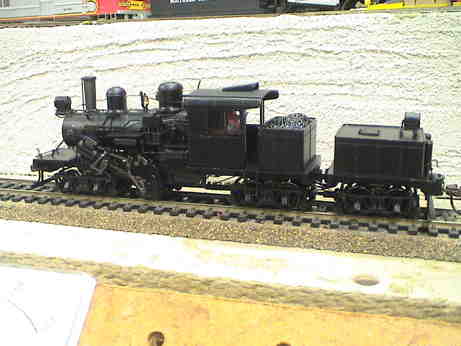
This is a replacement for the old SPL #9, a Class B 50 ton Climax. That one finally bit the dust. I sent it back to Bachmann and, as expected, it was replaced with a 3 truck Climax. This one is unlettered so it will get #9 to replace the 2 truck one in the roster.
It runs well but slowly. I has a Bachmann decoder, maybe the one that the old one was sent it with. Bachmann indicted to me on the telephone that they were going to use the existing decoder. It came back at address 0000 though instead of 8809. The one that was sent back was actually my decoder, but I donated it to the club as I have several of these and they are pretty much unloved on my layout. I reset the address to 8809 and turned off analog conversion.
It has Bachmann plastic couplers. It will need Kadee whisker couplers but I don't have any so I'll change them out at the club.
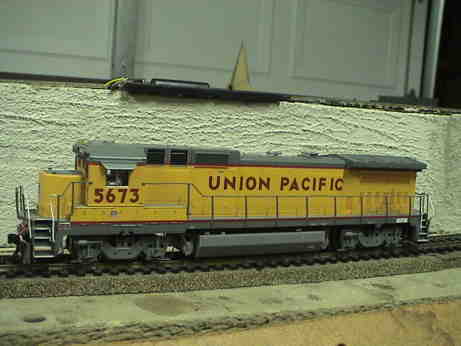
This is the first time I have seen this loco. It is an Atlas B40 variant of some kind. It was bad ordered for a missing cab visor. I just fabricated one out of sheet styrene and painted it UP gray.
I didn't open it up, but the decoder appears to be an Atlas Dual Mode version. It makes some buzzing noise, but otherwise it runs fine.
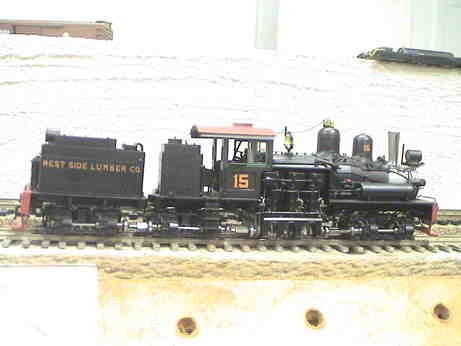
I was given this Precision Scale brass West Side Lumber Co. 3 truck narrow gauge Shay to decoder. I don't know where it came from but I was told that it was a club loco. The loco is in like new condition with no signs of usage or wear.
The club will supply a DZ143PS decoder for it. From the exploded diagram and visual inspection of the model, there won't be a lot of room inside for anything bigger. On the off chance that there is an 8 pin socket inside, the DZ143PS has a short 8 pin harness. If there is no socket, I will cut the plug off and hard wire it. The only reasonable place for the decoder is inside the boiler.
I test ran it on DC on a 1' piece of NG track and besides some gear noise it ran quite smoothly. It picks up power on all wheels and all are driven through the side shafts and engine assembly. The current draw was about 100 mA running light or slipping.
I got the decoder from the club a couple of weeks ago and I have partially disassembled the loco to see how it is wired. The motor is wired directly from the track pickups. Inserting the decoder will be straightforward. The decoder shrinkwrap has been trimmed so that it will fit into the smokebox. The headlight wiring is a little odd though. The bulbs are low voltage, about 1.5 volts at 22 mA. The rear one runs from a small PWB in the rear tender. There are four connections between the rear tender and the loco via a double layer PWB that is also the drawbar. Two of them buzz out to be power pickups. The other two are for the front headlight.
The installation will then be fairly straightforward. The wires to the motor are removed from the motor and connected to the decoder track power inputs. The decoder motor outputs go back to the motor. The PWB in the rear tender gets ripped out. The wires that were used to power the front headlight from the rear will be reused to power the rear headlight from the front. The decoder blue wire will get a 470 ohm 1/4 watt voltage dropping resistor that connects to both headlights. The other headlight wires will be connected in the standard fashion to the decoder white and yellow wires.
The DZ143 decoder is motor only, no sound. There isn't room for any sound decoder in the boiler anyway. Adding sound would have to be done with a sound decoder in the rear, but there is precious little room there either for a typical motor/sound decoder and the wiring would be more complicated yet. A sound only decoder, such as a Digitrax SFX004 could probably fit in the rear tender and all the wiring that is needed for it (power pickup) is there already. The speaker would have to be mounted under a hole cut in the top of the water tank and then concealed with a piece of black cloth that covered all the flat surface on the tender. The pins on an SFX004 would likely need to be trimmed off but they are not needed for a sound only install. The stock Digitrax sound program for steam engines has a distinct 4 beat chuff which is inappropriate for a Shay so that another acceptable sound file would have to be located. If the club wants sound added, the existing silent DCC installation would not have to be touched.
The Shay sat for a couple of weeks but this afternoon, I removed the lighting board from the water tender and wired the rear headlight to the pair that used to power the front headlight. All the wiring is now located in the smoke box and it will be a straightforward decoder install from here.... I hope.
My hope was misplaced. I wired up the headlights and installed the decoder and... it didn't work. The decoder responds to the programming track properly. The headlights respond to F0 and direction properly. However the motor does not run in either DCC or analog converted. I am left to conclude that the decoder is defective and it'll have to be replaced. I have started that process with Digitrax.
The replacement decoder arrived from Digitrax and I wired it in. It worked. However, even though I had done fit checks before with the old decoder, I could not get the shell back on all the way. I have more work to do.
I have made several attempts to get the loco to close with the decoder in place without success. I carefully cut the decoder out so that it wasn't constrained by it's wiring and I still couldn't get the loco to close.
Since there is no other practical place to put the thing without having to run a bunch of wires to the tender, it is looking like this loco will need a smaller decoder. The DZ143 isn't the smallest Z scale decoder around. NCE makes one that I think is smaller but I have never actually seen one of those. I do have a Digitrax DZ125 decoder in my DCC box. I had tried to use this decoder in my Berlyn inspection car, but the decoder didn't perform electrically to my satisfaction. It tended to become catatonic with power interruptions, of which the inspection car suffered quite a lot. However, the Shay has more power pickups and might do better. So I am in the process of wiring that decoder into the loco to see if I can get the thing to close and still run properly.
My DZ125 still had full length leads on it and I would have to cut them really short to make it fit. I didn't want to do that until I had some assurance that it wouldn't have the same problems in the Shay as it did in the inspection car. So I wired it with the full length leads to the Shay in a temporary fashion and ran it on the one foot length of narrow gauge HO test track that I have in my garage. The decoder was hanging by it's leads over the edge of a shelf while the loco ran on the test track at the edge the shelf. I ran it back and forth at low speed maybe 20 times and it didn't become catatonic. The next step is to actually install the thing, including headlight connections, into the Shay and see if I can close the shell. I can't really do a test fit with the long leads, but it looks like it will fit. The DZ125 is about 2/3 the length, width and thickness of the DZ143.
After three attempts, I finally trimmed the wires short enough to allow the decoder to fit, I put it together.... and it was dead. I took it apart and found that the decoder red wire had broken at the joint to the loco. I fixed that, shortening it again, then I shortened the black wire too. Then the thing went together and actually ran. I installed the last two screws under the cab and boxed it for test at LAMRS.
It still needs couplers, which I don't have.
I returned it to the club last Saturday and Mike put NG couplers on it so that it could be used in the NG OPS on Sunday. It apparently ran fine. I also used it for some tests in staging last night. The loco seems to be complete. It's the only NG loco that I know of at the club except for a Goose that I converted some years ago.

I used ATSF 21c, an F7 drawbar coupled A/B set, at the OPS session but it was intermittent. I cleaned the wheels and it appears to be fine.
This is probably an Atlas loco and the B unit is sound equipped.
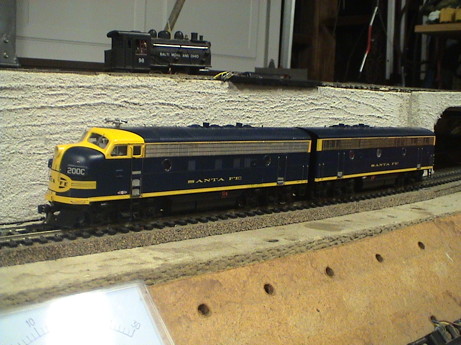
ATSF 200C is similar to 21C but it is painted in the blue and yellow freight scheme. It also appears to be an Atlas drawbar coupled F7 A/B set. I tried to use it in the OPS session when 21C started to act up but 200C was worse.
The wheels were dirty but also pretty badly worn. It didn't run at all on my layout. I cleaned all the wheels, but then it only sputtered. The wheelsets will have to be replaced.
I discovered last night that 21C and 200C were both early Athearn Genesis locos. The wheelsets looked kind of like Kato/Atlas but the axle gear is larger so that Kato wheels do not fit properly. I have put wheels for those locos on my list to buy when I can find them. In the meantime, I polished the wheels of 200C as best I could and it ran better, but it is still not as good as it should be.
It took awhile to locate wheels for these locos. We get them from North West Short Line in solid nickel silver. These will never wear out again, that is at least until they wear too small to be usable. The locos run fine now.
This page has been accessed times since Dec 2, 2010.
© 2009-2013 George Schreyer
Created 9 Dec 09
Last Updated March 28, 2013