When I originally planned the GIRR in 1996 I had intended to
illuminate whatever buildings appeared on the layout. Even though the
whole layout can be very well illuminated with halogen outdoor lighting
for nighttime running, this doesn't get close to simulating night. To do
that, one would expect that the layout's inhabitants would have some
lights burning in their homes and businesses.
It was a long time before I actually accumulated enough buildings to
actually go to the trouble of illuminating them. As I have nearly
enough buildings to populated my town, I need to find their "final"
placement so that I can add infrastructure around and under them. This
will include roadways, underground wiring for the lights and
underground drip irrigation lines for the plants. Some of the buildings
will conceal the drip irrigation junction valves. Others already
conceal electrical junctions. That process has started.
My buildings stay out all year around so that the illumination of
the buildings can be a semi-permanent installation. Buildings that come
indoors for the winter may require some extra features to deal with
wiring that may become exposed when the building is removed.
One of the first decisions that you have to make is to select what
kind of lamp that you are going to use. I prefer LEDs in most
applications with GOW (Grain Of Wheat) bulbs second. LEDs are far more
efficient that incandescent bulbs, and lately, their cost isn't much
higher either. You can light a whole building with LEDs on 10 to 50 mA,
a single GOW bulb draws 50 mA or more by itself. There might be lots of
lights on a layout and the current can really add up. It's best to
conserve if you can.
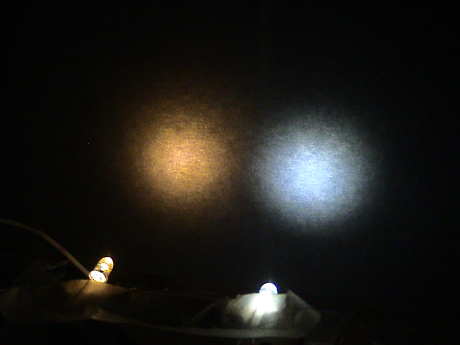 Until
recently, LEDs have been the wrong color for building lighting. The
typical white LED was too
blue. It cast a bright but hard light. This works ok for modern
locomotive high intensity headlights but the color is wrong for
residential lighting. The typical "white" LED has a color temperature of
about 6000°K like the sample on the right. The newer "warm white"
LEDs cost about the same, have nearly the same intensity, but have a
color temperature of about 3000°K, a very close match to
incandescent lighting. Warm white LEDs are available for about $1
each.
Until
recently, LEDs have been the wrong color for building lighting. The
typical white LED was too
blue. It cast a bright but hard light. This works ok for modern
locomotive high intensity headlights but the color is wrong for
residential lighting. The typical "white" LED has a color temperature of
about 6000°K like the sample on the right. The newer "warm white"
LEDs cost about the same, have nearly the same intensity, but have a
color temperature of about 3000°K, a very close match to
incandescent lighting. Warm white LEDs are available for about $1
each.
The GOW bulbs run at reduced intensity have a reddish cast to them. The warm white LEDs, when compared side by side are more yellowish with a very slight hint of green. Both do an acceptable job.
LEDs are also low voltage devices. Then need about 3 volts at 20 mA
to run at full intensity. The LEDs in the photo are running at 5 mA so
that they do get much more intense. They are easy to stack in series so
that the same 20 mA can run several LEDs if sufficient supply voltage
is available. LEDs run on DC so you'll need a DC source to run
them.
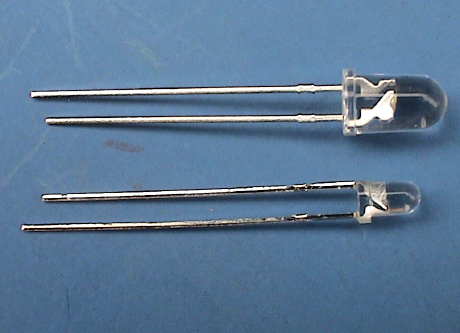 White LEDs typically come in two
sizes, 3 and 5 mm. The smaller packages tend to cast a wider beam and
are better for illumination of larger areas, such as the inside of a
building. The beam is not as intense as that cast by a 5 mm LED as the
total beam energy is spread over a larger area.
White LEDs typically come in two
sizes, 3 and 5 mm. The smaller packages tend to cast a wider beam and
are better for illumination of larger areas, such as the inside of a
building. The beam is not as intense as that cast by a 5 mm LED as the
total beam energy is spread over a larger area.
LEDs are polarity sensitive. The longer lead is positive. If you cut
the leads off and then forget which is which, look at the shape of the
electrodes inside. The smaller one is the positive terminal. The leads
themselves are quite stiff and rugged. You shouldn't solder right next
to the lens, solder down below the bump in the lead and then cover the
connections with heat shrink tubing.
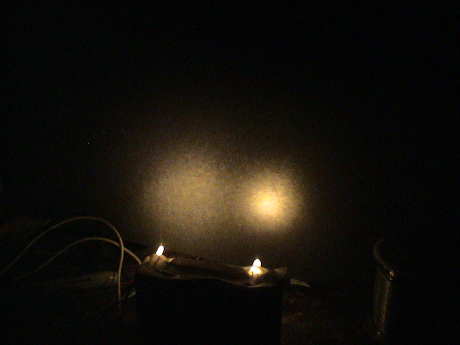 This photo compares a warm white 3 mm LED with a similar 5 mm version running at 5 mA. The 3 mm one has a much broader beam, 60°, and is much less intense than the 25° beam of the 5 mm unit although both make the same total light output. The 3 mm version would be better for area lighting in structures.
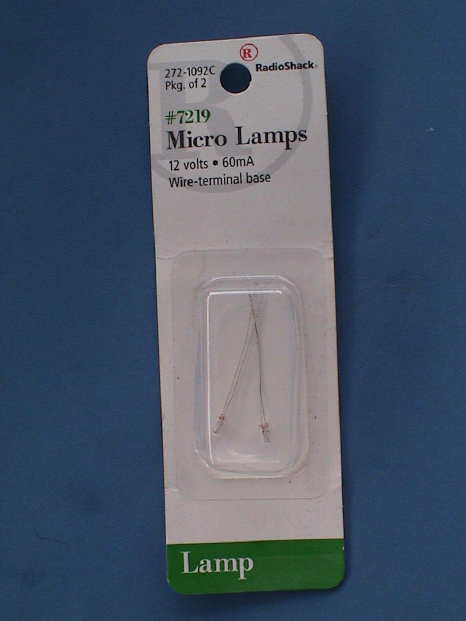 My second favorite for
lighting is the Grain Of Wheat (GOW) bulb. These Radio Shack parts are
inexpensive and particularly useful in applications where I want light
spread all around. LEDs are naturally directional, incandescent bulbs
are non-directional. The bulbs are intended for operation at 12 volts
where they draw 60 mA. I tend to use two in series from a 20 to 22 volt
source so each bulb gets 10 volts or so where it draws 54 mA.
Incandescent bulbs can run happily on either AC or DC power.
My second favorite for
lighting is the Grain Of Wheat (GOW) bulb. These Radio Shack parts are
inexpensive and particularly useful in applications where I want light
spread all around. LEDs are naturally directional, incandescent bulbs
are non-directional. The bulbs are intended for operation at 12 volts
where they draw 60 mA. I tend to use two in series from a 20 to 22 volt
source so each bulb gets 10 volts or so where it draws 54 mA.
Incandescent bulbs can run happily on either AC or DC power.
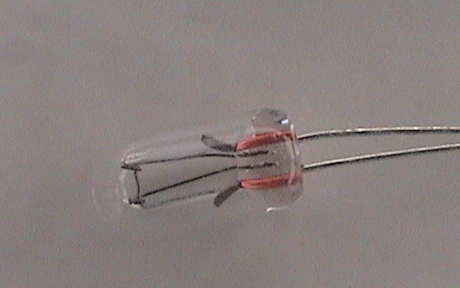 These particular bulbs are
fairly fragile. The leads are very fine wire and have almost no
strength. Trim them very short and solder 26 ga or smaller insulated
wire to the stubs and then insulate with short pieces 1/16" heat shrink
tubing. Another longer piece of 3/32" tubing should be placed over the
both of the smaller pieces of tubing and then shrunk as well to hold
the leads together. Alternately, if the wires are solid core, they can
be twisted right up to the solder joints to hold them together so that
forces are not applied directly to the fine bulb wires. Then the
assembly is rugged enough to handle.
These particular bulbs are
fairly fragile. The leads are very fine wire and have almost no
strength. Trim them very short and solder 26 ga or smaller insulated
wire to the stubs and then insulate with short pieces 1/16" heat shrink
tubing. Another longer piece of 3/32" tubing should be placed over the
both of the smaller pieces of tubing and then shrunk as well to hold
the leads together. Alternately, if the wires are solid core, they can
be twisted right up to the solder joints to hold them together so that
forces are not applied directly to the fine bulb wires. Then the
assembly is rugged enough to handle.
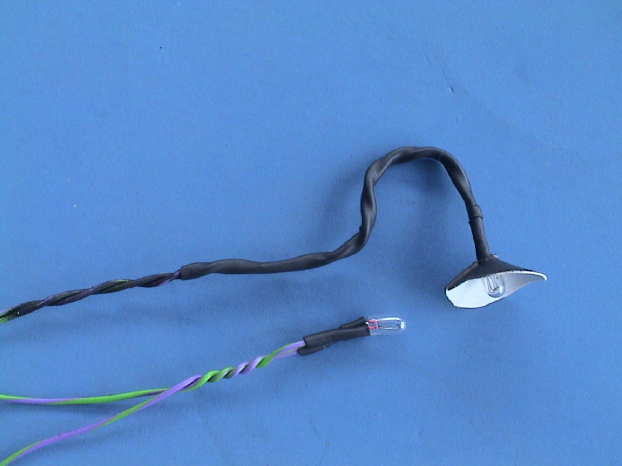 I built an overhead lamp
for my warehouse. The shade is just a piece of 15 mil styrene cut into
a circular pattern with a wedge cut out. Then the piece was formed into
a cone. The twisted wires leading to the LED were encased in 1/16" heat
shrink tubing. Then the wires were bent to shape to simulate the pipe
that the lamp hangs from. The other bulb is wired in series with the
outdoor lamp to illuminate a nearby window. The pair runs from my
lighting power at 20 VDC.
I built an overhead lamp
for my warehouse. The shade is just a piece of 15 mil styrene cut into
a circular pattern with a wedge cut out. Then the piece was formed into
a cone. The twisted wires leading to the LED were encased in 1/16" heat
shrink tubing. Then the wires were bent to shape to simulate the pipe
that the lamp hangs from. The other bulb is wired in series with the
outdoor lamp to illuminate a nearby window. The pair runs from my
lighting power at 20 VDC.
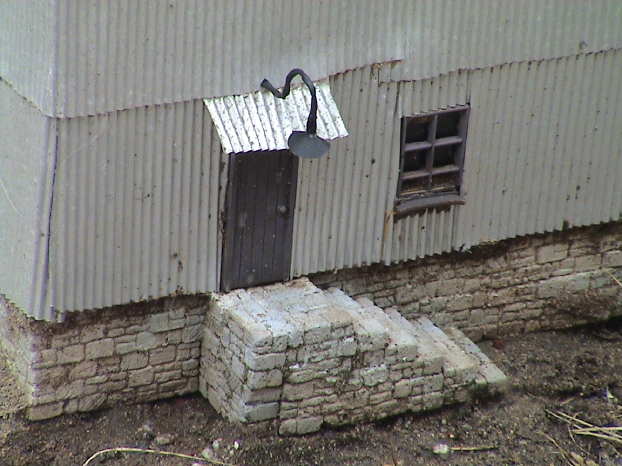 This is the overhead
lamp installed on the warehouse.
This is the overhead
lamp installed on the warehouse.
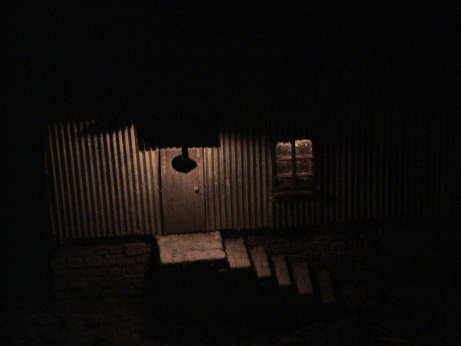 And this is what it looks like at night.
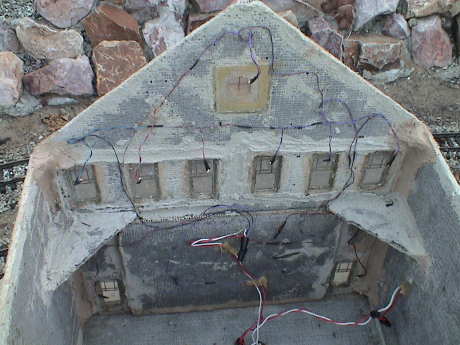 Once the lamps are mounted on pigtails, they can be attached inside and pointed out the windows. The light should shine out a window from above so that the source cannot be seen AND it looks like a ceiling lamp behind the window. These warm white LEDs run at only 1.5 mA each. If the current was any higher, the light would be just too bright at night. However, they cannot be seen at all until dusk. This is the inside of my Mission style station. The whole station building, including the breezeways, runs on just 6 mA from a 20 volt supply. There are a total of 16 LEDs. The total power to illuminate the station is less than 1/4 the power of a SINGLE GOW bulb.
There are two general ways to power lighted buildings, batteries or
a wired power source. There are advantages to both, but for a static
structure, I think that a dedicated power source and conventional
wiring is probably more practical.
Batteries best suited to locations where getting a single pair of
wire to a building is impractical or undesirable for some reason.
Sufficient batteries to power a building can tend to be expensive. Most
rechargeable batteries don't have particularly good charge retention
capability while sitting unused. Gel cell batteries are probably the
most practical type as they can be easily disconnected and moved to an
indoor location to be charged. They also retain their charge while
unused better than other types.
Dedicated wiring allows an AC powered source to be used to
illuminate all the buildings on the layout. All the lights can be run
for as long as needed and all of them can be turned on and off at once
with one switch. Depending on the total load of the building lighting,
the actual source could be an unused power pack set to max output. I
use an Aristo ART-5460
DC power supply, primarily because I had one available. It's 20 volt
output is just right for a series pair of GOW bulbs. 20 volts is also
enough to run a string of 4 or 5 LEDs with a current limiting resistor.
The supply has enough power to run 500 strings or 2500 LEDs, far more
than I'll even need.
If all the lighting on the layout will be incandescent bulbs, then
an AC power source will be fine as well.
The single power supply is also the single control to turn on or off
all the lights.
If a reasonably constant power source is available, as it would be
for either a battery or centralized power supply, then the best way to
control the intensity of the lighting is through the use of voltage
dropping resistors. If a particular light is too bright, it can be
toned down with reduced voltage or current. Incandescent bulbs will
change their color temperature as the intensity is reduced, they will
be come cooler and more red. LEDs will retain the same color
temperature, just with less intensity.
LEDs are current driven devices and want to be run from a current
source. A series resistor with 5 or 6 volts across it makes an
acceptable current source. It's value is calculated by:
R = (Vsource- (N * VLED)) /
ILED
Where:
Vsource = the voltage of your DC power source
N = the number of LEDs in a string
VLED = the voltage drop of a forward biased LED (typically 3
volts per LED)
ILED = the desired LED current, typically 20 mA max, less
for less intensity
For a string of 5 LEDs at 3 volts each and a 20 volt power supply
there will be 15 volts across the LED string and 5 volts across a
series current limiting resistor. To get 20 mA in the LED string, the
resistor needs to be about 250 ohms. The resistor will dissipate only
100 mW. If there are fewer LEDs in the string, the resistor will get
larger and dissipate a little more power.
In a series string, each LED will see the same current and therefore
run at the same intensity. In the instance where one or more of them
needs to be toned down, they can either be run in separate strings with
their own current limiting resistor or a resistor can be placed in
parallel with an LED that needs less intensity. To cut the intensity of
one LED in half a 300 ohm resistor (3 volts / 10 mA) would be wired
across that one LED.
The easiest way to wire up the buildings is to run a single pair of
buried wire from building to building. Wire intended for direct burial
is available at any home improvement store for "Malibu" lighting.
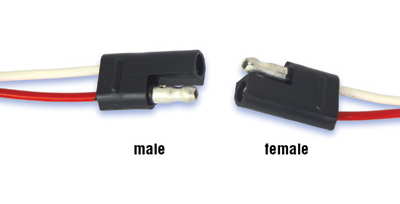 One wire from the
previous building in the chain, another to the next building and the
wires leading to the building can be connected wire nuts. These RV
style polarized connectors are rugged, inexpensive and design to handle
moisture. The connectors are available from most RV stores or some auto parts stores (in the towing section) for about $2
for a mated pair. They typically have 12" leads already attached which
is just about right. This allows a building to be lifted off the layout
and easily disconnected from the bus. When a building is taken in for
over winter storage, some form of protection should be used for the
connections sticking out of the ground. A turned over can with a rock
on top would be sufficient in most cases.
One wire from the
previous building in the chain, another to the next building and the
wires leading to the building can be connected wire nuts. These RV
style polarized connectors are rugged, inexpensive and design to handle
moisture. The connectors are available from most RV stores or some auto parts stores (in the towing section) for about $2
for a mated pair. They typically have 12" leads already attached which
is just about right. This allows a building to be lifted off the layout
and easily disconnected from the bus. When a building is taken in for
over winter storage, some form of protection should be used for the
connections sticking out of the ground. A turned over can with a rock
on top would be sufficient in most cases.
This page has been accessed  times since 2 Sep 08.
© 2008-21010 George Schreyer
Created 2 Sep 08
Last Updated March 22, 2010