 Once I had finished the Mission style station, I needed some way to
get traffic to and from the station, the freight house, and the rest of the
yet-to-be-developed town. Since the era of the GIRR is more or less
placed post WWII, real roadways were fairly common. I could have gone
cheap and used dirt, but I wanted to make some real asphalt
roadways.
Once I had finished the Mission style station, I needed some way to
get traffic to and from the station, the freight house, and the rest of the
yet-to-be-developed town. Since the era of the GIRR is more or less
placed post WWII, real roadways were fairly common. I could have gone
cheap and used dirt, but I wanted to make some real asphalt
roadways.
There are lots of ways to simulate roadways. Since I have been
recently working in WonderBoard, I elected to make
roads from pieces of Wonderboard. The stuff comes in limited sizes so
that some joints are inevitable but I considered them acceptable
considering the weather resistance of WonderBoard. The joints are a
good place to allow changes in grade too.
1/4" Wonderboard is an almost perfect thickness. At grade crossings,
it can sit on the tie strips and get right up next to the rail without
fouling anything as the rail is just a little taller than the
Wonderboard.
However, the natural color of WonderBoard is not acceptable. I first
tried to tint RapidSet a dark gray but all of the tints that I found
were just not the right color. Instead, I used untinted RapidSet as an
overcoat to provide some texture and to hide the pattern of the nylon
cloth in the WonderBoard. Then I simply painted the surface with flat
black spray paint, but I only dusted the surface to darken it.
Non-uniformity of the coating is actually good as the color of real
paving is not uniform either. Further, if the paint fades in the sun,
this is ok. Real asphalt fades in the sun too.
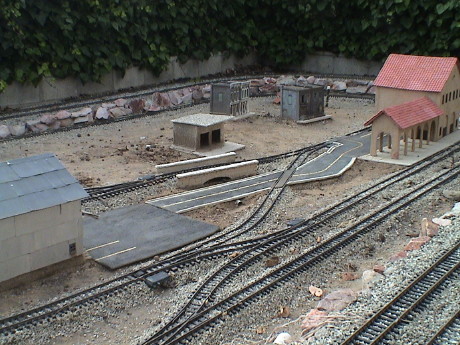
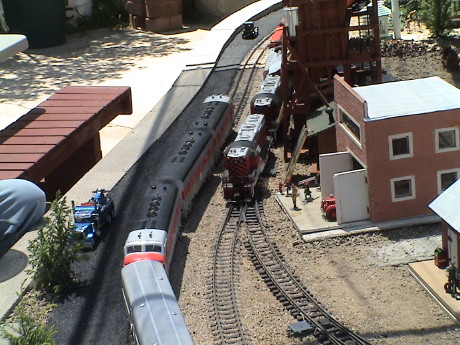
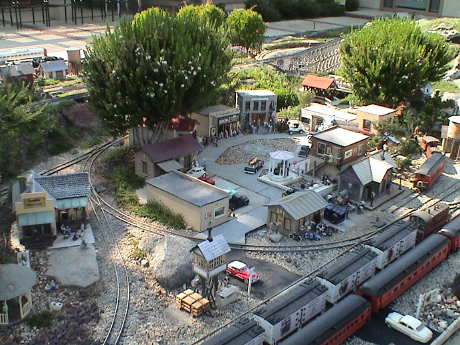
 So far, I've done a small parking lot
behind the station, a road to the freight station and a parking lot at
the freight station. Eventually, the road will cross the tracks, make a
90 degree left turn into the town and run down the middle of the
town.
So far, I've done a small parking lot
behind the station, a road to the freight station and a parking lot at
the freight station. Eventually, the road will cross the tracks, make a
90 degree left turn into the town and run down the middle of the
town.
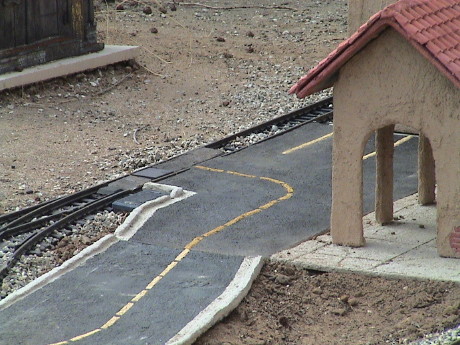
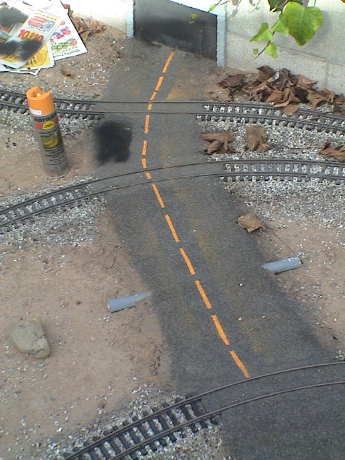
 The striping could be done with paint,
but it would fade. I could not find any spray paint of the right color
either and I don't have access to the epoxy paint that the highway
department uses. Instead, I used tinted cement. I found a tint that was
yellow-orange. It took a 30% concentration of this stuff in RapidSet to
get the color right, but it looks pretty good. All I need to do was
mask the road surface with painter's tape and slop some of the tinted
cement on. If water is not used on the surface, the tinted cement won't
underrun the masking tape. After 5 minutes or so, enough excess water
is leeched out that the painter's tape can be peeled up leaving a nice
yellow strip behind.
The striping could be done with paint,
but it would fade. I could not find any spray paint of the right color
either and I don't have access to the epoxy paint that the highway
department uses. Instead, I used tinted cement. I found a tint that was
yellow-orange. It took a 30% concentration of this stuff in RapidSet to
get the color right, but it looks pretty good. All I need to do was
mask the road surface with painter's tape and slop some of the tinted
cement on. If water is not used on the surface, the tinted cement won't
underrun the masking tape. After 5 minutes or so, enough excess water
is leeched out that the painter's tape can be peeled up leaving a nice
yellow strip behind.
 Then I got overly fancy and installed
some cement curbs. The road is masked again, about a half inch from the
edge, and a bead of untinted Rapid set is formed by hand along the
edge, allowing the Rapid set to run out to the masking. A small tool
was cut from a scrap of door skin to final shape the curb. Once the
hand formed curb has set for a few minutes, the tool can be run along
the curb to skive off any excess material. However, it can't take off
too much excess cement as it also tends to dig in and peel up the whole
curb if too much needs to be taken off.
Then I got overly fancy and installed
some cement curbs. The road is masked again, about a half inch from the
edge, and a bead of untinted Rapid set is formed by hand along the
edge, allowing the Rapid set to run out to the masking. A small tool
was cut from a scrap of door skin to final shape the curb. Once the
hand formed curb has set for a few minutes, the tool can be run along
the curb to skive off any excess material. However, it can't take off
too much excess cement as it also tends to dig in and peel up the whole
curb if too much needs to be taken off.
 On the same day as I
finished the front part of my roadways, I went to an open house. Art
Lizer in Riverside, CA had his layout on display for the SoCal GRS. He
had yet another method for making asphalt roads which produces very
good results. He uses #10 black chicken grit held in place with
Quikrete Concrete Adhesive (available at Home Depot). Chicken grit dyed
green and red are also available as well as undyed which makes and
acceptable ballast if it is glued. It is too rounded to hold together
by itself, but with the addition of the adhesive, it holds together
well.
On the same day as I
finished the front part of my roadways, I went to an open house. Art
Lizer in Riverside, CA had his layout on display for the SoCal GRS. He
had yet another method for making asphalt roads which produces very
good results. He uses #10 black chicken grit held in place with
Quikrete Concrete Adhesive (available at Home Depot). Chicken grit dyed
green and red are also available as well as undyed which makes and
acceptable ballast if it is glued. It is too rounded to hold together
by itself, but with the addition of the adhesive, it holds together
well.
Art buys his chicken grit from an unmarked, unadvertised rock quarry
somewhere in Riverside, but it is also available at A-1 Grit in
Irwindale CA. On one of my trips by there, I'll pick up a bag and try
it out.
This road surface could be striped with the same technique as I used
on the WonderBoard roadway. However, the concrete curbs would be more
difficult.
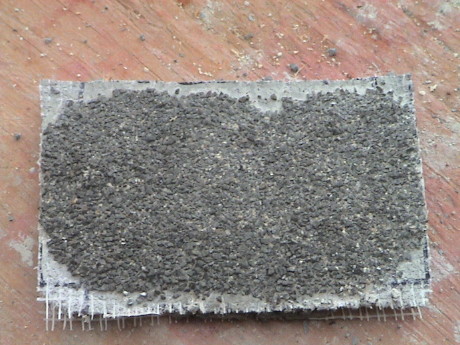 Art used A-1 Grit C51, black
grit. I tried C71, dark gray grit but in this experiment, I've applied
it differently. I dry mixed 2/3 grit and 1/3 RapidSet and dry spread it
on a scrap of WonderBoard. Then I wet it throughly with a pump spray
bottle. This is an acceptable surface for a WonderBoard base and it
doesn't require any paint or adhesive other than the RapidSet
itself.
Art used A-1 Grit C51, black
grit. I tried C71, dark gray grit but in this experiment, I've applied
it differently. I dry mixed 2/3 grit and 1/3 RapidSet and dry spread it
on a scrap of WonderBoard. Then I wet it throughly with a pump spray
bottle. This is an acceptable surface for a WonderBoard base and it
doesn't require any paint or adhesive other than the RapidSet
itself.
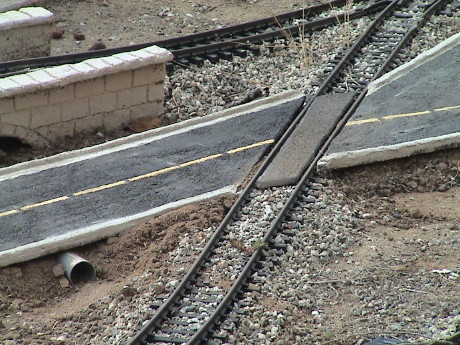
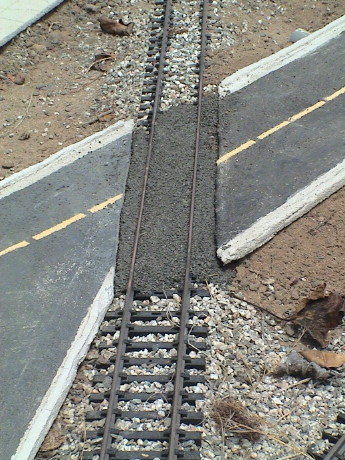 The grade crossings shown in the
previous pictures were made of loose WonderBoard pieces. They didn't
work out so well because they get in the way of track cleaning.
Instead, I've used the dark gray chicken grit between the rails bonded
with TiteBond II and water.
The grade crossings shown in the
previous pictures were made of loose WonderBoard pieces. They didn't
work out so well because they get in the way of track cleaning.
Instead, I've used the dark gray chicken grit between the rails bonded
with TiteBond II and water.
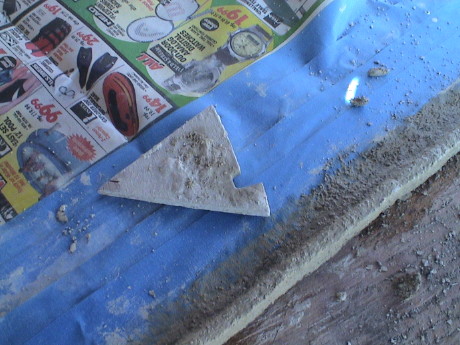
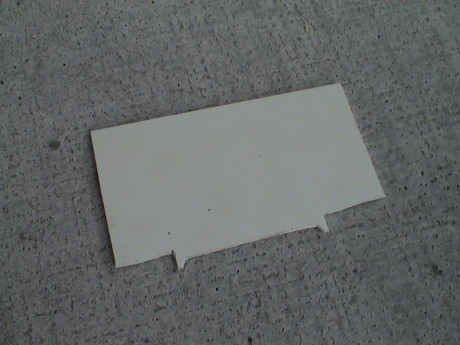 The profile of the grit is formed
with this styrene skive tool that leaves the level of the grit just a
little lower than the railheads and also clears out a flangeway.
The profile of the grit is formed
with this styrene skive tool that leaves the level of the grit just a
little lower than the railheads and also clears out a flangeway.
 Todd Brody uses asphalt roofing shingles and roofing paper for roadways in the town on the Tortoise and Lizard Bash Railroad.
 There is yet another way to build roads, this time with colored rock grit and wood glue.
This page has been accessed  times since 31 May 08.
© 2008 George Schreyer
Created 31 May 08
Last Updated September 23, 2008