I built my plaster
hardshell in 1998. The GIRR Mountain Division sat there in stark
white for 10 full years before I started adding texture and color.
However, once I got started, I found that it was really easy and I
moved right along. The method allows an area of about one or two square
feet to go from bare plaster to finished scenery in less than 10
minutes.
Back in the old days, I had purchased a book, "How to build
Realistic Model Railroad Scenery" written by Dave Frary and
published by Kalmbach. He describes a method which he calls the "water
soluble" method. All the paints, wetting aids and adhesives he uses
are water based. Back in 1998, I started preparing for the use of this
method by collecting paints, adhesives and textures. I used very little
of this stuff until now so that when I actually got started, I had
virtually everything that I needed.
I've invented almost nothing new, but I do use somewhat different
materials and methods. Basically, the method for making a basic level
of dirt is to paint a area in a "dirt" color and then apply a mix of
texturing materials.
The book goes into much more than basic scenery texturing, I'll add
the results of rockwork, trees, water, and backdrops as I do them.
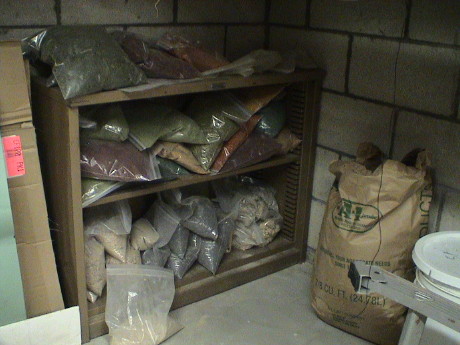 Before you can
apply textures to hardshell, you need some textures. I had prepared
this stuff 10 years before I used it, but I had what I needed. I use
primarily sifted decomposed granite and dyed sawdust. In the smaller
scales, ground dyed foam is a popular texture as well. This can be
purchased, at somewhat significant expense, at model railroad
retailers. However, dirt and sawdust are nearly free, at least from an
out-of-pocket perspective.
Before you can
apply textures to hardshell, you need some textures. I had prepared
this stuff 10 years before I used it, but I had what I needed. I use
primarily sifted decomposed granite and dyed sawdust. In the smaller
scales, ground dyed foam is a popular texture as well. This can be
purchased, at somewhat significant expense, at model railroad
retailers. However, dirt and sawdust are nearly free, at least from an
out-of-pocket perspective.
 The GIRR Mountain
Division is located on a mountain range that is literally made from
granite. I have an abundant supply of the stuff, about 75 tons was
removed from under my cabin when the basement was built and it was
simply dumped on a nearby embankment. I just dig the stuff up and sift
it to grade it into five sizes. The largest stuff is piled on the ground next to the buckets.
The GIRR Mountain
Division is located on a mountain range that is literally made from
granite. I have an abundant supply of the stuff, about 75 tons was
removed from under my cabin when the basement was built and it was
simply dumped on a nearby embankment. I just dig the stuff up and sift
it to grade it into five sizes. The largest stuff is piled on the ground next to the buckets.
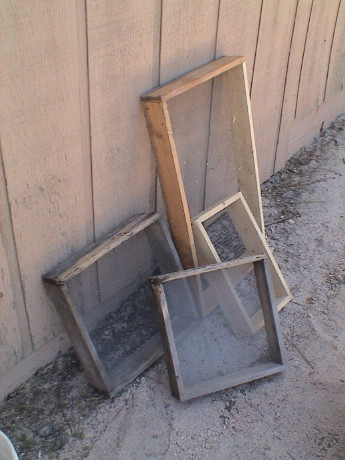 I built four sieves from
1x4 pine and wire mesh. I used 1/2", 1/4", 1/8" hardware cloth and
aluminum window screen to grade the material.
I built four sieves from
1x4 pine and wire mesh. I used 1/2", 1/4", 1/8" hardware cloth and
aluminum window screen to grade the material.
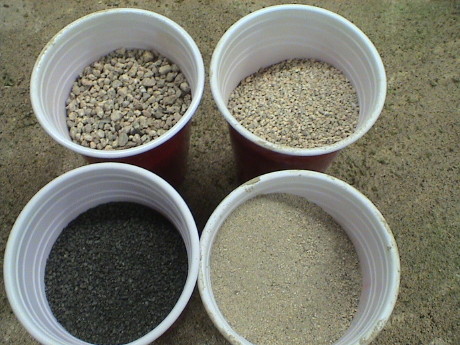 I really only use
the three smallest grades for texturing. The black grit is a commercial
product, C-71 from A-1 Grit, that I use for roadways. I have ballasted
part of the GIRR in gray chicken grit but I don't have enough to
finish. I am going to do the rest in a lighter shade of the same A-1
Grit material. A-1 Grit is located on the seedy side of downtown
Riverside CA at 1901 Massachusetts Ave. The place is virtually
unmarked, look for some tall material conveyors behind an unmarked
gate.
I really only use
the three smallest grades for texturing. The black grit is a commercial
product, C-71 from A-1 Grit, that I use for roadways. I have ballasted
part of the GIRR in gray chicken grit but I don't have enough to
finish. I am going to do the rest in a lighter shade of the same A-1
Grit material. A-1 Grit is located on the seedy side of downtown
Riverside CA at 1901 Massachusetts Ave. The place is virtually
unmarked, look for some tall material conveyors behind an unmarked
gate.
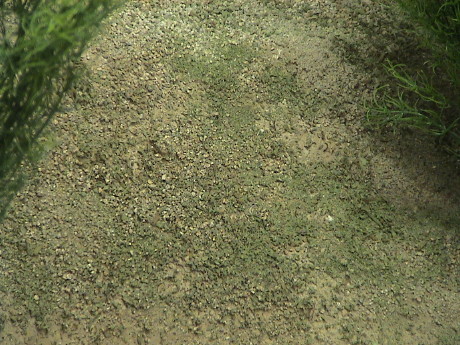
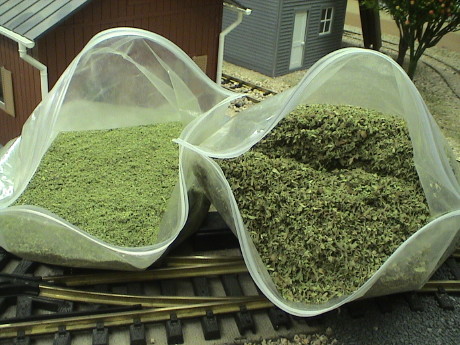 For grasses, I use dyed
sawdust, sieved through the window screen sieve to make two grades. If
you don't have a table saw and make your own sawdust, you can take a
trash bag to a local lumberyard and ask them if you can clean up around
their saws, that is what I did. After screening, the sawdust is dyed in
batches of various shades of green and brown with RIT fabric dye.
For grasses, I use dyed
sawdust, sieved through the window screen sieve to make two grades. If
you don't have a table saw and make your own sawdust, you can take a
trash bag to a local lumberyard and ask them if you can clean up around
their saws, that is what I did. After screening, the sawdust is dyed in
batches of various shades of green and brown with RIT fabric dye.
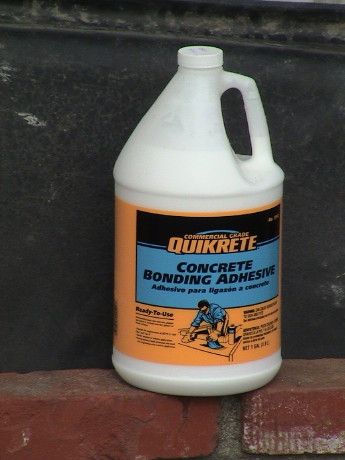 Dave Frary recommends the
use of a material called matte medium as an adhesive. I did use matte
medium when I ballasted the yards many years ago and it worked well,
but it is kind of expensive and hard to find. Try artist supply stores,
Jo-Anns or Michaels. However, I like this stuff just as much. It is
Quikrete Concrete Adhesive, available at Home Depot for $10/gal. I
dilute the stuff 50:50 with water and apply it with a pump spray
bottle.
Dave Frary recommends the
use of a material called matte medium as an adhesive. I did use matte
medium when I ballasted the yards many years ago and it worked well,
but it is kind of expensive and hard to find. Try artist supply stores,
Jo-Anns or Michaels. However, I like this stuff just as much. It is
Quikrete Concrete Adhesive, available at Home Depot for $10/gal. I
dilute the stuff 50:50 with water and apply it with a pump spray
bottle.
I also tried this stuff for bonding ballast outdoors. In that application
it didn't not work so well because it doesn't handle moisture
gracefully. However, indoors this stuff is excellent. It holds well and
dries completely clear.
You'll also need some ordinary latex house paint in your desired
color of dirt. Take a sample of the dirt texture that you are going to
use to a paint store and match it fairly closely. You don't need a
custom match, just get something off the shelf that is close.
I use two different methods for texturing surfaces depending on the
characteristics of the surface. If the surface is flat and smooth, I
just spread the desired dirt texture onto the surface by shaking it
from a plastic cup and then I soak it with the adhesive. If I want some
other textures, I sprinkle them on top and spray again. Done.
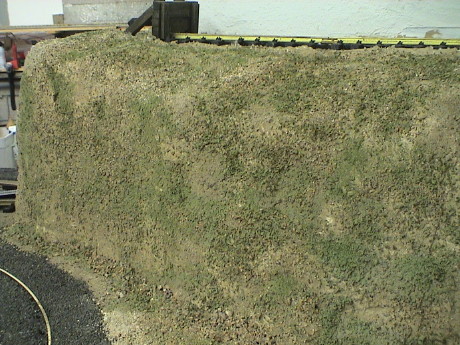 If the surface is sloped,
dry spreading doesn't work. In this case, I use Dave's method. First
the surface is painted with the dirt colored paint and then one of the
dirt textures is sprinkled on the surface, letting the excess fall to
the bottom of the slope if it is steep enough. Then I pick up some of
the fallen stuff and throw it back at the painted surface. Then I spray
the surface with adhesive and sprinkle and throw on a different texture
until I am done applying whatever textures I am going to use. Then I
spray it again and then pick up the mix of stuff at the bottom of the
slope and throw the mix back on the slope until I've got all the
texture that I want.
If the surface is sloped,
dry spreading doesn't work. In this case, I use Dave's method. First
the surface is painted with the dirt colored paint and then one of the
dirt textures is sprinkled on the surface, letting the excess fall to
the bottom of the slope if it is steep enough. Then I pick up some of
the fallen stuff and throw it back at the painted surface. Then I spray
the surface with adhesive and sprinkle and throw on a different texture
until I am done applying whatever textures I am going to use. Then I
spray it again and then pick up the mix of stuff at the bottom of the
slope and throw the mix back on the slope until I've got all the
texture that I want.
 This is a closeup
of that hillside.
This is a closeup
of that hillside.
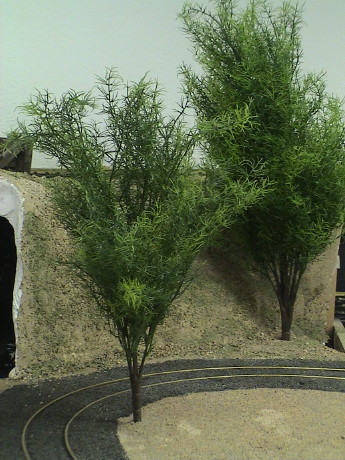 And this is the
same hillside through some plastic trees purchased from Just Plain
Folk. At the bottom of the hillside, I poured on some of the larger
size of DG to simulate rocks that have fallen from the hillside. I
haven't finished the tunnel portal yet.
And this is the
same hillside through some plastic trees purchased from Just Plain
Folk. At the bottom of the hillside, I poured on some of the larger
size of DG to simulate rocks that have fallen from the hillside. I
haven't finished the tunnel portal yet.
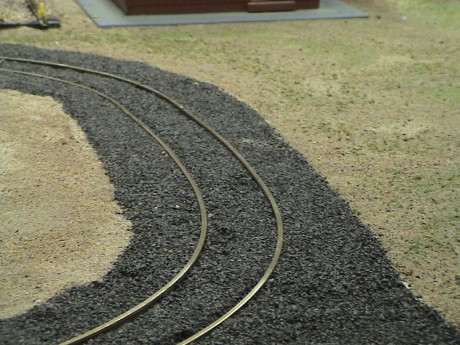 I have a
trolly line that runs through the town. I wanted it to run down the
middle of a road. I had built up the level of the town with Homosote to
1/4" below the level of the railheads. I then poured the dark gray C-71
onto the track and leveled it to the railheads. I used a utility knife
to form a flangeway and then heavily soaked it in the spray adhesive.
There is lots of rock in there and the adhesive has to soak down a lot
so just pour the stuff on. It is VERY important to let the adhesive set
undisturbed for AT LEAST 24 hours. There will be sprayed adhesive all
over the railheads, but just leave it alone. When the road has set up,
the majority of the adhesive on the rails can be scrapped off and the
rest can be polished off with a Brite Boy or LGB track cleaning block.
If you try to clean the adhesive off the rails before the road has set
up, you will surely disturb the road material and it is really hard to
get it flat again when it is wet.
I have a
trolly line that runs through the town. I wanted it to run down the
middle of a road. I had built up the level of the town with Homosote to
1/4" below the level of the railheads. I then poured the dark gray C-71
onto the track and leveled it to the railheads. I used a utility knife
to form a flangeway and then heavily soaked it in the spray adhesive.
There is lots of rock in there and the adhesive has to soak down a lot
so just pour the stuff on. It is VERY important to let the adhesive set
undisturbed for AT LEAST 24 hours. There will be sprayed adhesive all
over the railheads, but just leave it alone. When the road has set up,
the majority of the adhesive on the rails can be scrapped off and the
rest can be polished off with a Brite Boy or LGB track cleaning block.
If you try to clean the adhesive off the rails before the road has set
up, you will surely disturb the road material and it is really hard to
get it flat again when it is wet.
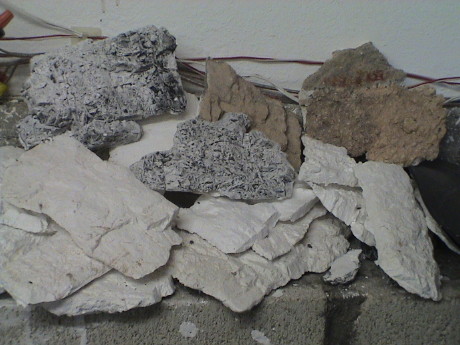 Another significant
part of scenery is rocks. These are typically cast in plaster in rock
molds and then painted and blackwashed to the desired color. I haven't
got the technique of working with plaster rocks completely down yet.
That will come next. Dave Frary describes making excellent looking
rockwork in great detail.
Another significant
part of scenery is rocks. These are typically cast in plaster in rock
molds and then painted and blackwashed to the desired color. I haven't
got the technique of working with plaster rocks completely down yet.
That will come next. Dave Frary describes making excellent looking
rockwork in great detail.
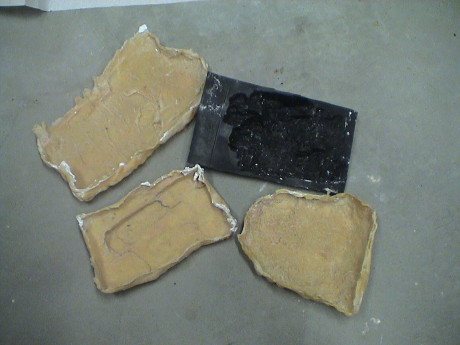 Rocks are cast in molds
made from real rocks. Real rocks seem to work in any scale, a 1:1 scale
rock makes an excellent mold for miniature rocks. The black mold is a
commercial rock mold. The other three of samples of about 20 different
molds that I made from latex following Dave Frary's method. The rock
castings in the previous photos were made from these molds.
Rocks are cast in molds
made from real rocks. Real rocks seem to work in any scale, a 1:1 scale
rock makes an excellent mold for miniature rocks. The black mold is a
commercial rock mold. The other three of samples of about 20 different
molds that I made from latex following Dave Frary's method. The rock
castings in the previous photos were made from these molds.
This page has been accessed  times since 5 Jul 08.
© 2008 George Schreyer
Created 5 Jul 08
Last Updated July 11, 2008